In the first part we explored the foundational keywords associated with formulating a concept, The What and The Why.
In this section we will focus our attention on The How and The Who, namely how is the medium of photography specifically used to create images that support the overall concept, and finally who is the audience for your work and what type of presentation is needed to completely resolve your concept.
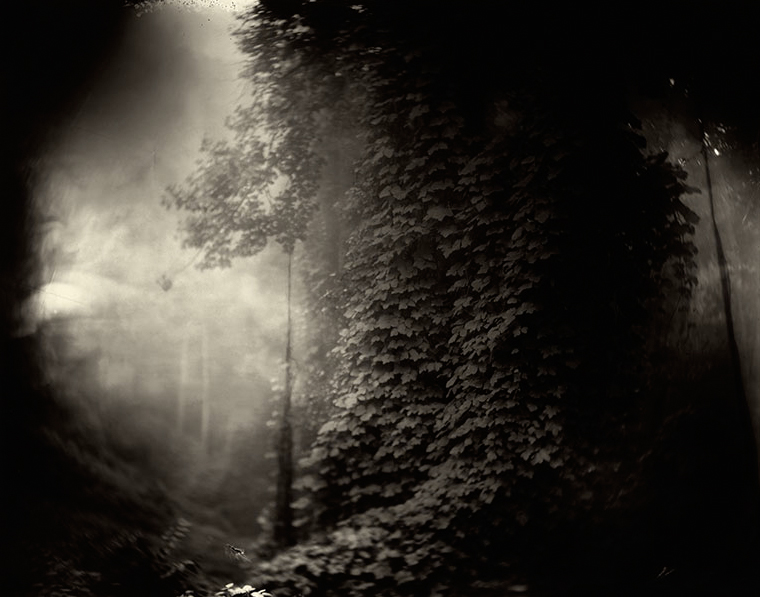
The HOW is a crucial process in the full realization of a concept, choosing the right tools and methodology in order to create photographs that are completely substantiated by a specific process. Rather than using whatever tool you have at hand, as a convenience approach, one must be able to decide what aspect and limitations of the medium are most appropriate to your conceptual involvement. In other words, perhaps a film based camera system may yield the results sought, over a perfect and sleek 35mm DSLR, or an alternative process such as Cyanotypes, Van Dyke Browns, platinum prints, the wet collodion process and so on could enhance the aesthetics and linguistic message embedded in your concept approach. A good example of such a radical approach can be seen in the wet collodion images of Sally Mann, with their eerie and mournful exploration of the past culture of the Deep South. The optical and physical flaws of the process are embraced by Mann to imbue a sense of time deconstruction and nostalgia.
Sally Mann, In The Deep South, 1996, wet collodion process
Keith Carter is another established artist who uses a rare system made for architectural photographers years ago by Hasselblad with the ability to swing, shift and tilt the front lens in order to correct extreme perspectives. However, Carter uses this camera to precisely create narrow fields of focus in the scene for expressive and creative purposes.
Keith Carter, young stallion, 1998 Hasselblad Flexbody system{C}
The expressive and moody nature of Carter’s images was reinvented for my Deep Forest project by creating a medium format digital camera that replicates the Hasselblad system, using several flawed components, an older digital back with the whole system not designed for in the field use. Yet, the aesthetics created by this home-assembled camera were the exact results needed to support the narrative and medium-based conceptual intents, not an easy task but one needed to effectively articulate my concept visually.
Pierre Dutertre, Fright, 2012{C} X2Pro with flawed Phase One P25 back, broken Mamiya RZ lens Cathy Dutertre, Foresight, 2013 Homemade pinhole medium format digital camera
There are an almost infinite amount of decisions to be made when resolving the HOW:
What kind of focus will you be using? Sharp, soft, out of focus, partial planes of focus?
What kind of time? Frozen or slow shutter speeds, long exposures?
What kind of camera? Analog or digital, 35mm or larger formats, toy cameras, home made cameras? Flawed systems? Pinhole?
Black and White photographs? Color? Manipulated colors? Polaroid?
What vantage points?
What kind of light? Hard, bright or subdued? Night photography? Inclement weather?
What kind of compositions? Busy or quiet? Frenetic or silent?
What kind of framing? Active or passive?
As with other decisions made during the concept planning stages, the HOW is often a complex approach requiring research, innovation and some budget. Most likely you will need to experiment with the aesthetics of the images until you arrive at the perfect solution to resolve your visual intentions. In my case, it took almost a full year before I was able to build a system that allowed the desired aesthetics to support my narrative, after experimenting with view cameras, perspective correction lenses and a lens baby that was simply too imprecise.
Last, We also need to resolve the WHO, namely your audience and presentation. Knowing your audience before you begin a project can be a difficult task if the concept is medium based, such as abstractions or classical landscapes, thereby of appeal to the masses, as opposed to social documentaries, environmental issues or a feminist / gender bias, in which case your audience may be more refined. Ultimately, one needs to discern if your audience is clearly refined and in which geographical areas, where are they likely to view your work and who is potentially a buyer or collector of your work.
The location for the presentation of your images will impact your display decisions: Are you seeking a large gallery space? A museum? An intimate location? Are you printing your images very large for a visual impact? Or very small for an intimate connection with your audience? Are you going with a classic framed presentation or an installation? What kind of lighting are you faced with in the exhibit space?
These decisions are also likely to affect your choices of equipment, insofar as printing an image at 6’ by 10’ will likely require a high end medium format camera for the original capture whereas a 10” by 10” print from a cell phone could work equally as well. This leads us to consider the all important budget question. The greatest portion of your financial decisions when developing a concept resides in the final presentation method. An average size 20” by 20” print, matted and classically framed to 30” by 30” can cost around $300 plus, much more if you use the exotic but amazing Optium optically clear acrylic glass at around $600 per frame. If you have a solo show at a gallery with say 30 pieces, your initial investment is around 18K plus shipping, insurance and packaging. Again, this kind of research is important to refine during the concept development, but not as a roadblock necessarily. Cheaper presentation solutions are available and digital only showings are perhaps appropriate, although I am a firm believer that photography is never quite finished until it is printed as a firm and permanent surface for viewing. I would also say that presentation is a key link on how a concept is viewed and received by your audience, yet that step is often ignored altogether by emerging photographers who scramble at the last minute after their work is accepted into a show (crowd funding is slow and unpredictable for such a posit).
Cathy Dutertre. Installation using large images printed on semi transparent fabric, suspended by steel cables in a 3-dimensional space, back and front lighting, multiple heights and free standing. The passage of the viewer between the images will create a gentle wind motion and a soft sway of the prints. Pierre Dutertre, classic framed presentation, captured in the environment.
In conclusion, what separates a confused photographer from an emerging artist resides firmly in the application of a concept onto the work produced. From random images (nothing wrong with great single images, as they may well lead to a subsequent concept) to a body of unified and intellectually resolved images, lies the process of establishing a concept for your work, a direction or operations manual. It does not need to be a roadblock, or an impossible pre-visualization, an unwanted school essay or a tedious task. It however needs to be established BEFORE you begin creating images, as the only path to creating bodies of work that will surely help you grow artistically and intellectually within the medium. Your intellectual and research investments in creating a solid concept(s) will always result in growth and surprising outcomes on many occasions.
Now, let’s see you become image-makers, rather than image takers.
Pierre Dutertre conducts extensive workshops, entitled Journey Through Personal Creativity, on the topic and application of a concept based approach at the Florida Museum of Photographic Arts.
Posted by Pierre Dutertre in concept-based photography
Having recently embarked into a deep metaphysical concept, one that is engaged in a personal and cathartic journey of self-discovery, I needed a camera system that would support such an endeavor. Following some experiments with a regular 35mm DSLR, as well as some exotic medium format digital systems, it quickly became apparent that a perfect camera system would not fulfill the ephemeral nature of the images desired to illustrate such a complex project.
The key components sought for these photographs involved a round image format, as a temporal disconnect akin to the first Kodak box camera of the late 1800’s, and the soft focus dreamlike quality of the pinhole mechanism.
Image # 2: Custom fabricated medium format digital camera
With these precepts established, a custom built camera was undertaken, consisting of a flawed medium format digital array (Phase One P25 with dead pixels and a non functioning back display), a brass pinhole mounted on a 1960’s view camera shutter (that only opens and closes without the regular shutter speeds) affixed to the drilled protective plate supplied with the digital back. This system produces round images due to the close proximity of the wide-open shutter to the array, a soft rendition of the scene from the pinhole and even more interestingly some unpredictable aberrations due to the capture process that involves a dual firing of the shutter, the first to “wake up” the digital back that does not communicate with this mechanical only system, and in rapid succession a second capture for the actual image recording.
The following image clearly shows the results from the twin exposures, the unpredictable aberrations that add a chance element to the photographs, as a subtle reference to alternate planes of reality.
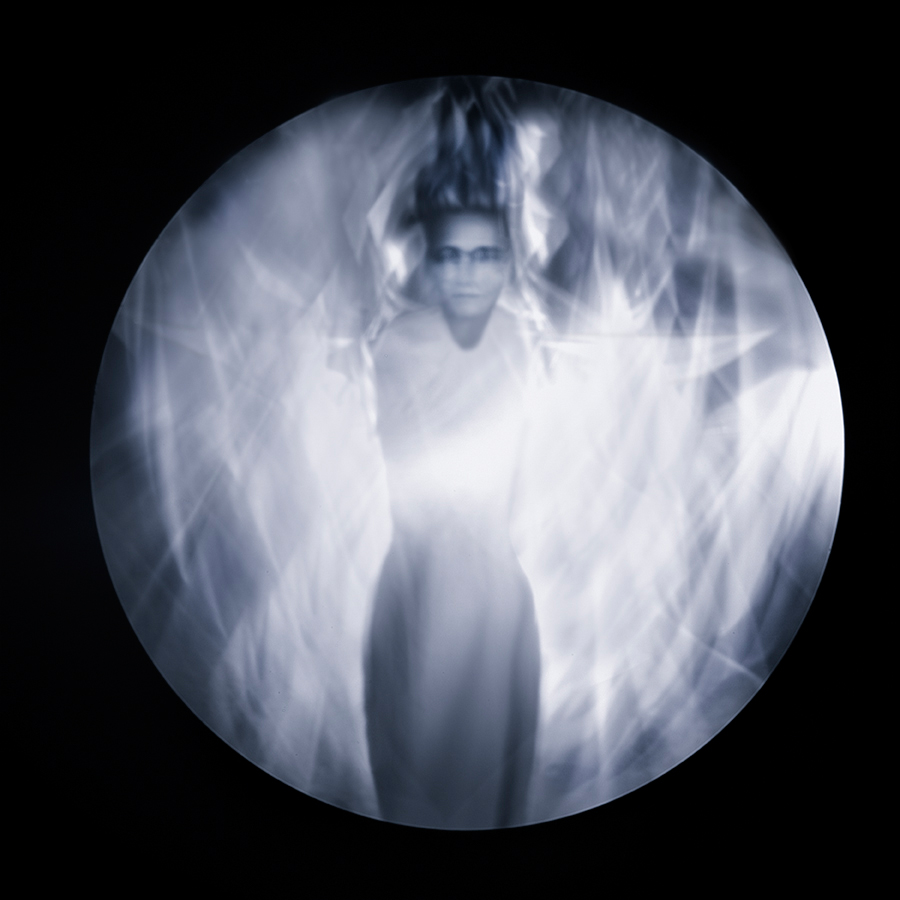
Another aspect of this custom camera resides in its propensity to suffer from extreme flare, a flaw that can then utilized for expressive purposes with the addition of artificial battery powered lighting on location (continuous or flash) projected directly into the pinhole opening.
Cathy Dutertre, Deity, “Behind the Veil” series, 2014
In addition, the absence of a viewfinder and the lack of a functioning back display means that the operator has no way of knowing if the subject, in this case myself as a self-portraiture approach, is actually in the frame and compositionally correct within the environment. This additional chance element allows for a slow and methodical process, one that required much experimentation in order to pre-visualize the camera’s field of view. Finally, the color palettes generated by the pinhole can be surprising depending on the quality and intensity of the light at the time of capture, resulting in images that either work well within the concept’s narrative or not at it is often the case.
Cathy Dutertre. Loss, “Quest” series, 2013
As in all concepts, the tools utilized to generate images that support the project must be derived from the “What” and “Why” aspects, the intellectual approach needed to achieve a cohesive series of photographs that contain the visual elements supportive of the artist’s intent. In this case, this “round” pinhole camera has proven to be most effective with these communicative efforts, yet complex to operate, unpredictable for the most part, a magnet for dust that needs cleaning several times a day, but always wonderfully surprising, as photography should be, and was in the analog realm.
The Use of Natural Low-Light and Neutral Density Filters in Concept-Based Landscape Photography
I want to thank UPA Gallery – and Pierre Dutertre in particular – for inviting me to write this guest blog. I’m grateful for the opportunity to introduce my work to the readers of this unique educational blog and appreciate UPA’s commitment to giving exposure to emerging fine art photographers.
Stormy Weather
Monster hurricanes… saturating heat … biblical rains … what’s not to love about summer in Florida? At least when it comes to photography. When the skies turn dark and stormy and people seek shelter indoors, I grab my camera gear and go to work outside.
In this blog post I’ll review how I use low-light conditions – especially rainy low-light conditions – and ND filters in my concept-based landscape photography, specifically for lighting aesthetics and water-blur effects. We’ll take a detailed look at two images from my Florida series, called “Remnants,” to see examples of how I approach low-light conditions with and without ND filters.
First, it’s important to understand what an ND filter is. Basically, it’s a lens filter made of dark glass (like sunglasses) that reduces the amount of light reaching a camera’s sensor. This allows for much slower shutter speeds in order to create motion-blur effects, among other things. There are different kinds of ND filters – slot-in, screw-on and variable – each with different density ratings that give various f-stop reductions. There are pros and cons to using each type that’s beyond the scope of this blog post, but a quick Google search using the terms “ND Filter” will pull up many useful articles for further reading.
Natural Low-Light Effects
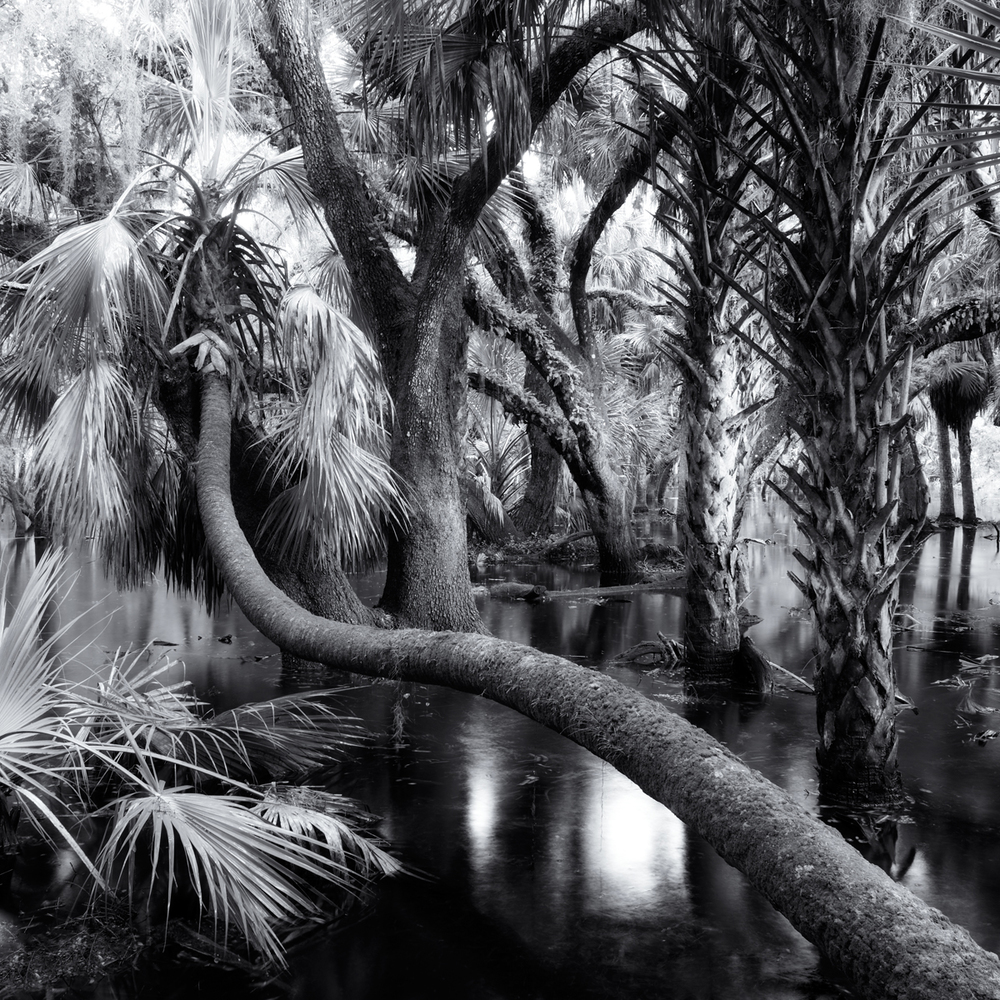
My Florida portfolio is called “Remnants” on www.scottbolendz.com . It documents small moments of modest natural beauty – what I call the “diminished sublime” – in remnant green spaces along Florida’s heavily developed Gulf Coast. The images have a delicate, compressed, dream-like quality due to the contingent, often fleeting, nature of the depicted scene. This project is influenced, in part, by Clyde Butcher’s Florida series and Michael Kenna’s long-exposure work.
I like shooting in rainy low-light conditions because the camera can transform a relatively mundane landscape into something otherworldly. Such low-light is often sufficient by itself for longer exposure times, which can be especially useful if groundwater is present (as is often the case in Florida). One of the challenges of shooting the lush Florida landscape is the visual complexity of the vegetation. Water reflections often add distracting elements to an image (at least to my eye). Longer exposure times, however, can soften or even obliterate water reflections and give a smooth, silky, almost dream-like surface plane that can add depth and simplify a composition. ND filters allow for even longer exposure times when necessary.
“Myakka Park Drive 1, Sarasota” by Scott Bolendz
My photograph “Myakka Park Drive, Sarasota” was shot immediately after a thunderstorm. I set my Nikon D600 on a tripod (a definite must for long-exposure work!) and tried to get a long exposure time without using an ND filter. I was using a Nikkor 24 mm/2.8 prime lens. I set my camera/lens to manual focus (infinity), aperture priority f/16 and ISO 100 which gave me a shutter speed of 5 seconds. This was long enough because raindrops were still falling from the wet foliage onto the groundwater surface, creating small disturbances that would help in achieving a nice water-blur effect. This, in turn, would create a clean background plane to highlight the layers of lush, complex foliage. And – voila!
ND-Filtered Lighting Effects
“Remnant Mangrove, Tampa Bay” By Scott Bolendz
My photograph, “Remnant Mangrove, Tampa Bay”, was shot at mid-day using a 64x ND filter during a brief interlude between coastal storms at Emerson Point in Bradenton, Florida. The clouds and water were both moving slowly, but the light was too bright for longer exposures without the benefit of an ND filter. Even at f/22 and ISO 100 the shutter speed was 1/20 second (too fast for motion-blur).
I only carry 2 high-quality screw-on ND filters: a 64x (6-stop reduction) and a 1000x (10-stop reduction). These 2 filters offer a decent range of f-stop reductions for most lighting situations I encounter.
The workflow for this image is more involved because it’s necessary to compose and meter the scene prior to attaching the ND filter (the viewfinder is too dark when the ND filter is attached):
1. Set the camera on a tripod.
2. Use manual focus (set to infinity) and frame the scene – I used my 24 mm prime lens.
3. I metered the scene using aperture priority f/22 and ISO 100 for the longest exposure possible prior to adding an ND filter.
4. Next, check the shutter speed. It was 1/20 for this particular camera setting.
5. Enter the 1/20 shutter speed value into a long exposure calculator (free apps are available on iTunes!) to see what new shutter speed would be required for a similar exposure if a 64x or 1000x ND filter were attached. The results: 3 seconds (64x) and 51 seconds (1000x). Based on current conditions, I chose the 64x.
6. Next, put the camera setting on full manual and replicate all the previous settings from aperture priority (f/22, ISO 100, etc…) and select a new shutter speed of 3 seconds (to account for the 64x ND filter).
7. Carefully attach the 64 x ND filter to the prime lens.
8. Use a wireless shutter release or the camera’s timer to take the picture.
I often have to increase or decrease the calculated shutter speed based on what the first captured image actually looks like on the camera’s LCD screen. The image may be under or over-exposed (I only shoot RAW files so I can tweak the exposure in post-production). If you decide to re-compose the image, remove the ND filter and start the process all over again.
Here are a few more examples of my Florida series shot in rainy low-light conditions with ND filters. Again, notice how the blurred water surface provides a clean plane that nicely highlights a visually complicated subject.
“Remnant Mangrove, Terra Ceia Bay” By Scott Bolendz “Myakka Park Drive 2, Sarasota” By Scott Bolendz
Some final thoughts
First, since I mainly shoot with a prime lens for my Florida series, the workflow process described in this blog post applies to prime lenses. Use of an ND-filter on a zoom lens is a somewhat different – and more difficult – workflow which I will review in a future UPA Blog post. Second, when shooting long exposures for either water or cloud-blurring effects, it’s important to be aware of even slight movements of your subject. This is less of an issue if the subject is a mountain or city buildings. But with vegetation and wind movement – like coastal mangroves, for example – you may need to be very patient until the subject is absolutely still. And if you’re shooting in rainy low-light conditions, patience is a virtue!
Scott Bolendz is an emerging fine art photographer. His landscape work has won several awards at The Florida Museum of Photographic Arts in Tampa. To see more of his images you can visit his website www.scottbolendz.com or follow him on Facebook at “Scott Bolendz Photography.”
Is it a form of art? A lack of imagination? Or just plain theft?
According to the Cambridge dictionary, the word appropriation is described as: “When you take something for your own use, usually without permission”
““When you take something for your own use, usually without permission”
So with this definition in mind, it is natural to think of this topic as a ‘hot button” for many, but particularly for professional photographers, in the commercial as well as the fine art realms. As an active member of the American Society of Media Photographers for many years, I can attest to the fact that this singular topic is akin to opening the pen of domestic animals to a pack of wolves, with the resulting carnage and even occasional self-cannibalism in the process.
First, we must look at the established parameters for all creative materials. Are they copyrighted? Has the copyright term expired? Are they part of the public domain? These factors would initially establish the potential legal use of these materials, the conditions for the usage and the ultimate outcome of the subsequent work created from the materials. These questions are more of a legal approach to the topic, but nevertheless an important starting point. It is crucial to remember that the courts do not make judgments on the artistic merits of any works of art, but rather look at their specific status within the current copyright laws. Having said that, there is a current flurry of activity proposing changes to the copyright laws (not in favor of the creators), as well as a number of class action lawsuits against Google and Getty Images. So far, the courts have often ruled against the appropriator, much to the chagrin of the art elite who proclaims appropriation to be integral posit to post modernist art, freedom and all kinds of elitist dribble. Sadly, the copyright laws are being eroded and more often than not the courts are now swaying in favor of the appropriation culprits.
Photograph by Mannie Garcia (AP) / Artwork by Shepard Fairey
Secondly, the vast proliferation of images in a globally connected world and social medias in all forms will invariably lead to the proliferation of appropriation, often under the incorrect assumption that if it is on the internet it is free to use and fair game. Google is the biggest culprit, gathering millions of images for the purpose of gathering data on the viewer and/or user of said images. Interestingly, Shepard Fairey found the image of Obama on Google. Should you care to check the terms and conditions for most social media platforms, you may be surprised at the dangers of putting your images on these media! Technology has changed the entire premise of copyright laws, eroding these in the process, yet the world moves forward and so we must evolve as fighting Google, Getty Images or the social media platforms is simply futile. The genie, or monster, is out of the bottle.
““Is the person or artist using these as a precursor and inspiration for their own output?”
Last, and perhaps more importantly in my personal opinion, is the intent of the person who appropriates the materials. Is the person or artist using these as a precursor and inspiration for their own output? Are they replicating or duplicating the materials for personal use or commercial gain from the public or private enterprises? Are they using them to produce a new generation of art, one that takes its roots from the originals but departs in a newer creative form? Are the materials used for academic purposes and following the established rules of that usage? So, at the root of this topic are the ethics within the intent of the person or persons who appropriate the art (in its many forms). Appropriation is not new, gaining momentum with the Cubist collages of Picasso and Braque, the readymade urinal presented by Marcel Duchamp in 1915, the 1950’s works of Jasper Johns and Robert Rauschenberg, Pop art and the emergence of post modernism with notable users of appropriation such as Jeff Koons and Sherry Levine. The polemics of what constitutes art cannot be presented in such a limited blog format, suffice to say that appropriation art is a complex topic that can be debated by the art elite in between ritzy gallery openings, museum gatherings and the columns of well read publications that do not address farming or livestock in any fashion.
Photograph by Art Rogers, 1980 / Sculpture by Jeff Koons, 1998 Photograph by Walker Evans, 1936 / Re-photographed by Sherry Levine, 1981
Ultimately, and in response to the title of this blog, appropriation can be a form of art, a lack of imagination, or just simply theft. As any good lawyer would say: It depends. In this case I would affirm that it depends on the intentions and ethics of the appropriator, or some ubiquitous discussions on what constitutes art and its ownership.
The use of movement and slow shutter speeds for concept-based intents and visual experiential outcomes.
Photo Credit: Edgerton Harold
The uniqueness of the medium of photography resides in its ability to capture the passage of time, either with a long exposure or just freezing a moment in time. High-speed photography allows us to observe the fast actions of the world, the hidden spatial movements of humans, animals, as well as the physical properties of actions and laws of physics.
Photo Credit: Richard Copeland Miller
The reverse of high -speed photography, the capture of movement has also immense potentials for expressive outcomes, the study of the passage of time as a unique characteristic of the medium. Extrusive time, an academic term, refers to slow shutter speeds, long exposures and movements within the subject or scene, as well as with the camera as we will explore shortly. Although many artists have explored extrusive time, either due to the limitations of their historical process, one with low sensitivity such as the Daguerreotype or wet collodion, or even slow optics, others have used these inherent limitations to record the passage of time for an emotional and ephemeral outcome. One of my greatest influences resides with Richard Copeland Miller who photographed the country of Romania in his book entitled “Passage Europe” in a most somber and immensely emotional manner, using both extrusive time and camera shake to imbue the viewer with an extraordinary sense of sadness and nostalgia for a country left behind in the 20th Century. Sadly, he passed away at an early age, yet his work resonates the deepest within my soul.
Photo Credit: Richard Copeland Miller “Ephemeral” by Cathy Dutertre
Cathy Dutertre has made extensive use of extrusive time with several of her current projects, “Behind the Veil” and “Behind the Mask”. Using a tethered stationary camera, she will produce a performance (another academic term that designates a sub-genre of self-portraiture) together with various props in order to arrive at highly expressive images. The exposures are often in the 30 second to several minutes’ ranges, the tethering allows her to adjust her movements in order to arrive at a precise artistic outcome.
Photo by Cathy Dutertre, 2014 Photo by Cathy Dutertre, 2014
Another aspect of illustrating movement resides in the camera’s movement during capture, the act of altering and deconstructing the scene using a variety of techniques including ND filters, variable movements of the camera and rear sync flash.
Photo by Cathy Dutertre, 2014 “Chinoiserie” by Cathy Dutertre
Using movement, either from the subject or the recording device can be extremely emotional as the viewer re-interprets the image from a mental and emotional rather than physical points of view, whereas the use of extrusive time allows the artist to remodel the world at large, exposing the viewers to the astounding ability of the medium to record the passage of time.
The Technique of Variable Planes of Focus for Reflective Artistic Outcomes
Photo by Pierre Dutertre
View cameras, with their ability to independently move the front and back standards to generate sharp images within complex environments where the detail of a product or structure has to be fully rendered, have been around for well over a century. Architectural photographers have used the swings, tilts and shift functions of their view cameras to generate accurate, fully focused and standard renditions of interiors and exteriors, ensuring perfect vertical lines and recording the fine details of a particular space or building. Commercial artists have indeed been fortunate to control precise planes of focus to accurately represent products without distortion and with immense or a very shallow depth of field. This was predominant in food photography, where only a small portion of the image would be in focus, thereby creating a visceral and imaginative reaction with the viewer.
However, this ability to precisely control 3-dimensional planes of focus (also known perhaps incorrectly as selective focus) can also be utilized by the creative artist who desires to highlight a particular point of interest in a scene, directing the viewer to an area of interest as intended for a concept-based reflective intent. This technique relies on the ability to move the lens 3-dimensionnally, with the equivalent of the swings and tilts available in a view camera format. There are several alternatives that replicate the front movements of a view camera, from the easily attainable to the exotic. The beginning point resides in a lens baby set-up available for 35mm DSLR cameras.
Lensbaby, Tilted
The operator can simply twist the lens in multiple directions to generate a fairly precise 3-diemnsional plane of focus.
The results can be very creative in isolating certain parts of the scene in order to create a mood or an ephemeral and mysterious image that denies a full view to the viewer, allowing for directed and controlled points of interest and therefore an artistic communication, resulting in a reinterpretation of the scene by the viewer.
Photo by Cathy Dutertre, 2012 Mounted Canon PC Type Lens, Tilted
Perspective correction (PC) or tilt-shift lenses for 35mm and medium format cameras have been primarily used by architectural photographers in order to control perspectives and distortion, but these exotic prime lenses can also be used to imbue a distinctive style and content to an image.
The Canon TS-E 24mm f/3.5L II allows for shifts and tilts, but can also be rotated to create a similar result of the lens baby, yet preserving a superior optical rendition.
“White Knight” by Cathy Dutertre
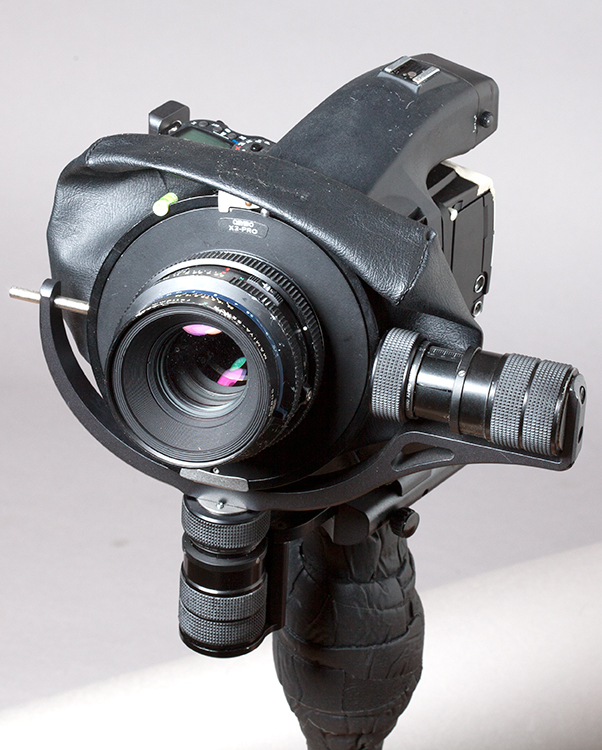
At the high end of the spectrum, one can use the X2 PRO system created for medium format and 35mm digital cameras, replicating the precise movements found in a view camera that otherwise may not be the best suited tool.
X2Pro, Fully Extended
Although created for studio use the X2 PRO is still manageable on location as in my personal use, despite the bulk and weight of the complete assembly. Mounted with a refurbished Mamiya body, a flawed Phase One P25 digital array, an ancient Mamiya RZ lens and a monopod, this rig has been a mainstay of many of my personal projects, allowing me to precisely control the 3-dimensional planes of selective focus to convey a mood and expressive / reflective artistic outcome. From a banal scene, I am able to extract the essence of a particular subject in order to imbue the image with a communicative message, the real subject matter that transcends the recording abilities of the medium.
“Dawn” by Pierre Dutertre “Weeping” by Pierre Dutertre
In effect, the technique of variable planes of focus imitates to some extent our human vision, monocular eyes that have a central point of sharpness, blurred peripheries and adjustable parallel focusing. The ability to push beyond these organic parameters with 3-dimensional planes of focus allows for a creative outcome, making images that are precisely controlled to add a quasi surrealist feel and mood, deconstructing unnecessary elements that do not support the concept, and creating engagement with the viewer as they examine a reconstructed reality as a personal communicative effort on the part of the artist.


 Sally Mann, In The Deep South, 1996, wet collodion process
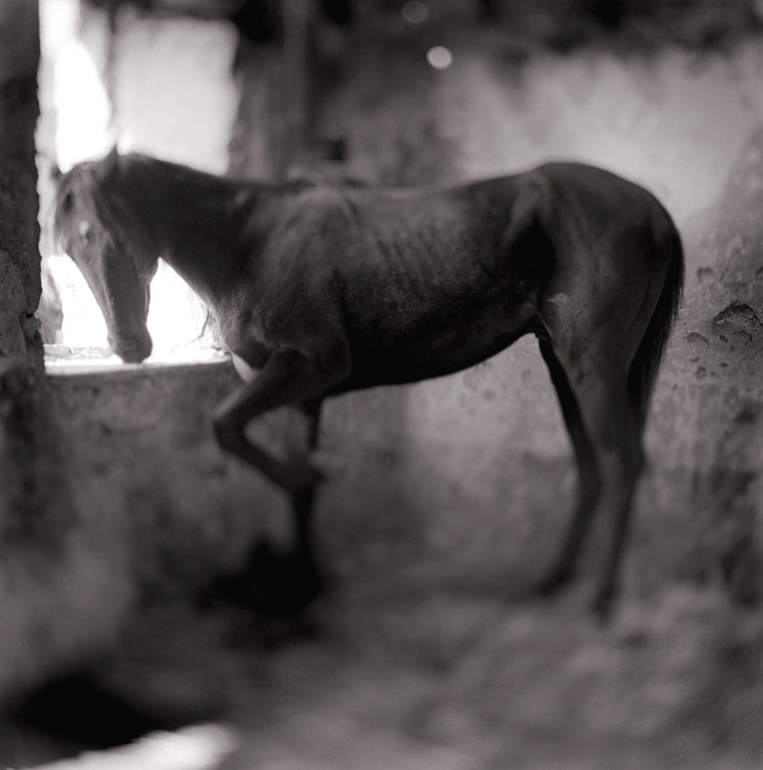 Keith Carter, young stallion, 1998
  Hasselblad Flexbody system{C}
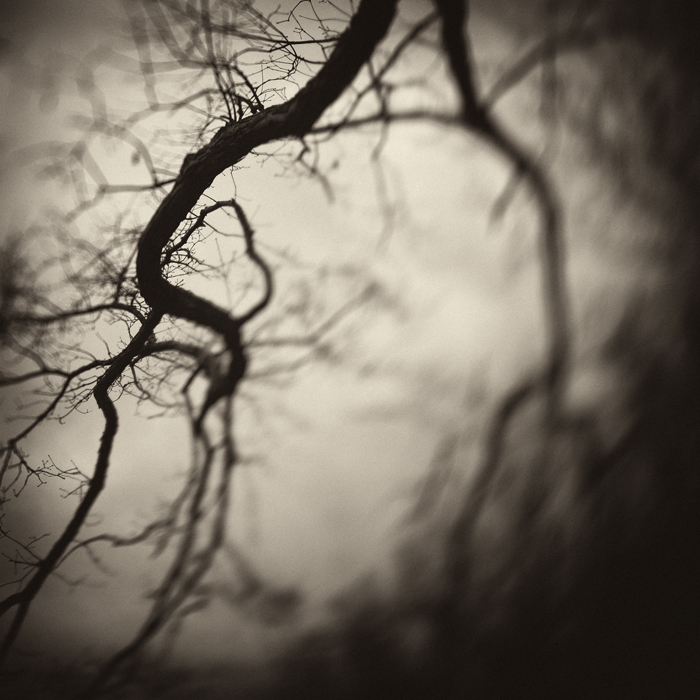 Pierre Dutertre, Fright, 2012{C}
 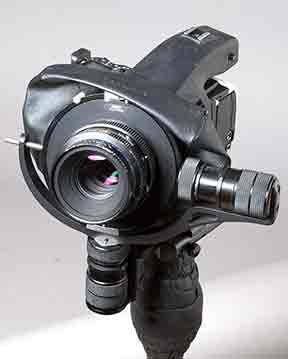 X2Pro with flawed Phase One P25 back, broken Mamiya RZ lens
 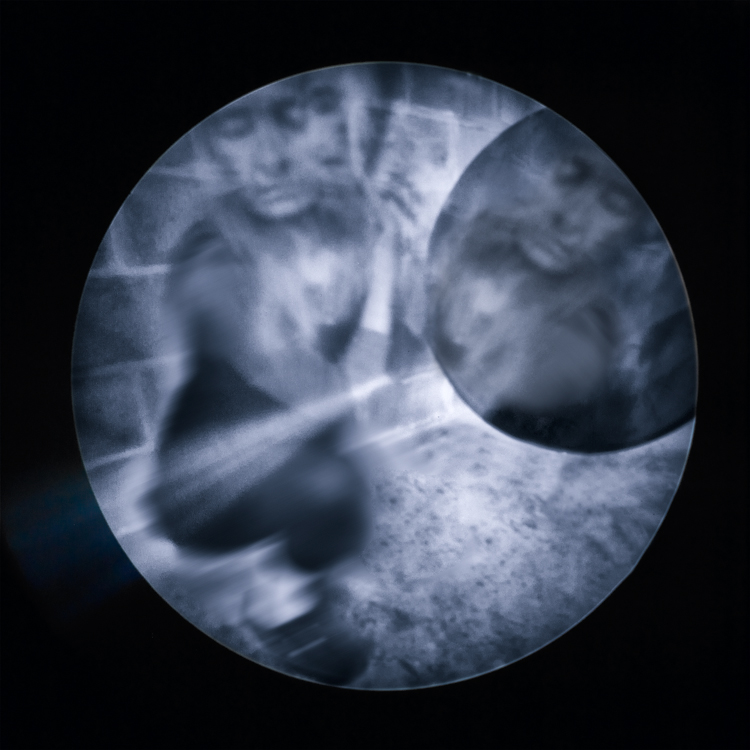 Cathy Dutertre, Foresight, 2013
 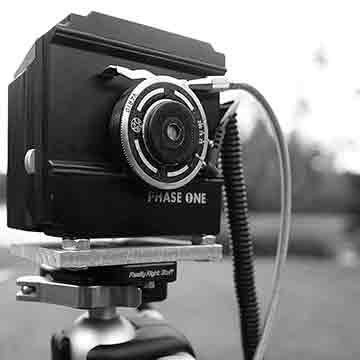 Homemade pinhole medium format digital camera
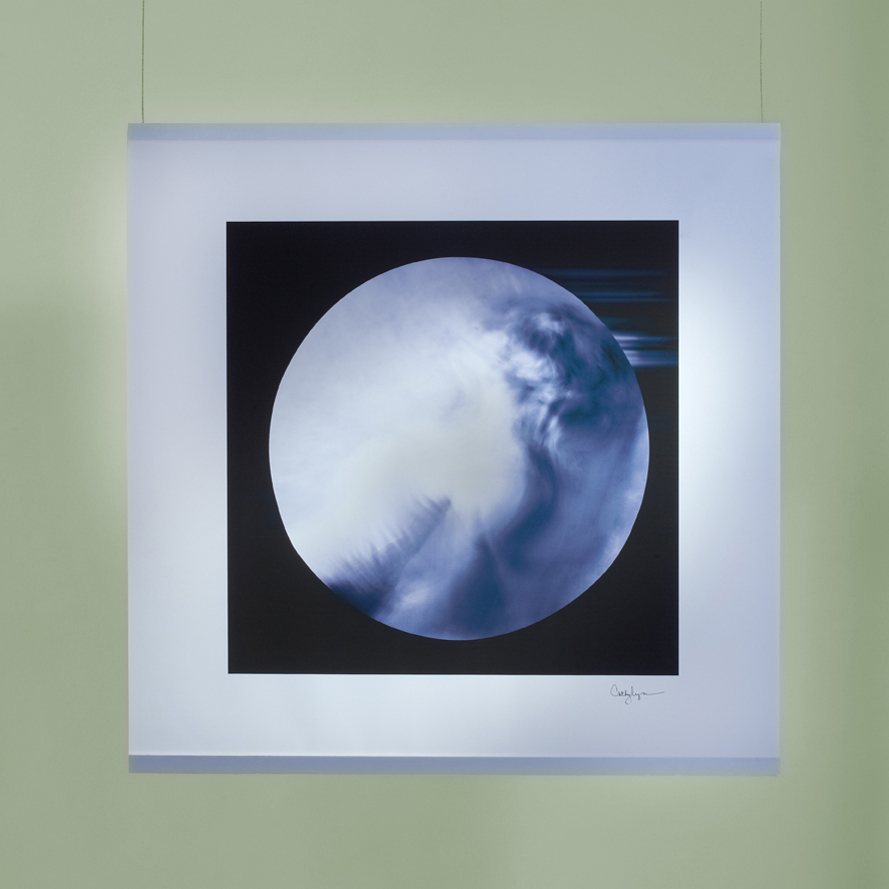 Cathy Dutertre. Installation using large images printed on semi transparent fabric, suspended by steel cables in a 3-dimensional space, back and front lighting, multiple heights and free standing. The passage of the viewer between the images will create a gentle wind motion and a soft sway of the prints.
 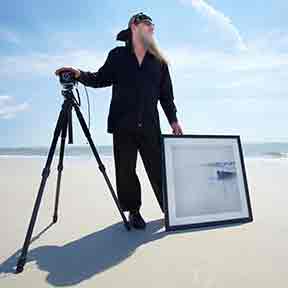 Pierre Dutertre, classic framed presentation, captured in the environment.
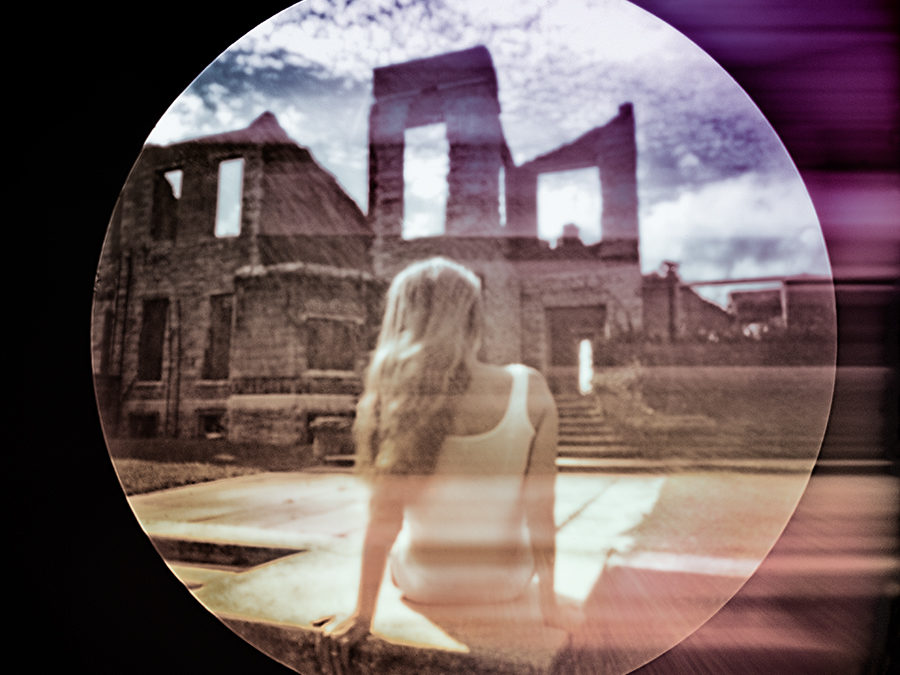
 Unknown author. Kodak box camera, circa 1890
 Image # 2: Custom fabricated medium format digital camera
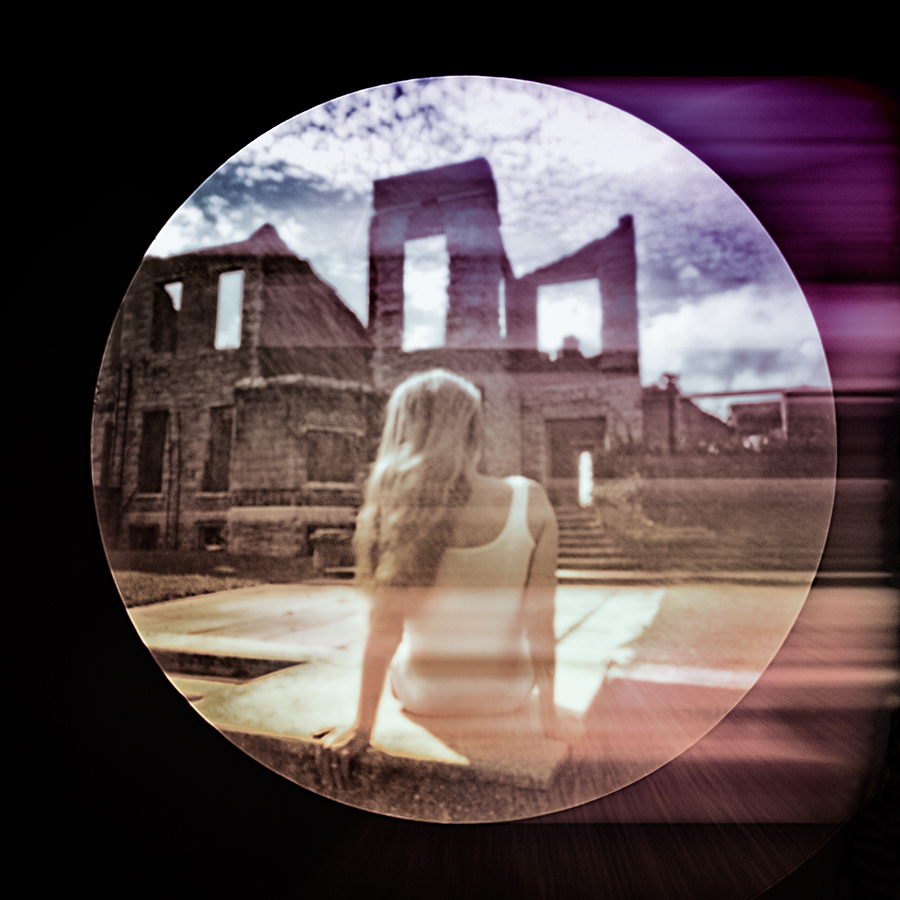
 Cathy Dutertre, Deity, “Behind the Veil” series, 2014
 Cathy Dutertre. Loss, “Quest” series, 2013
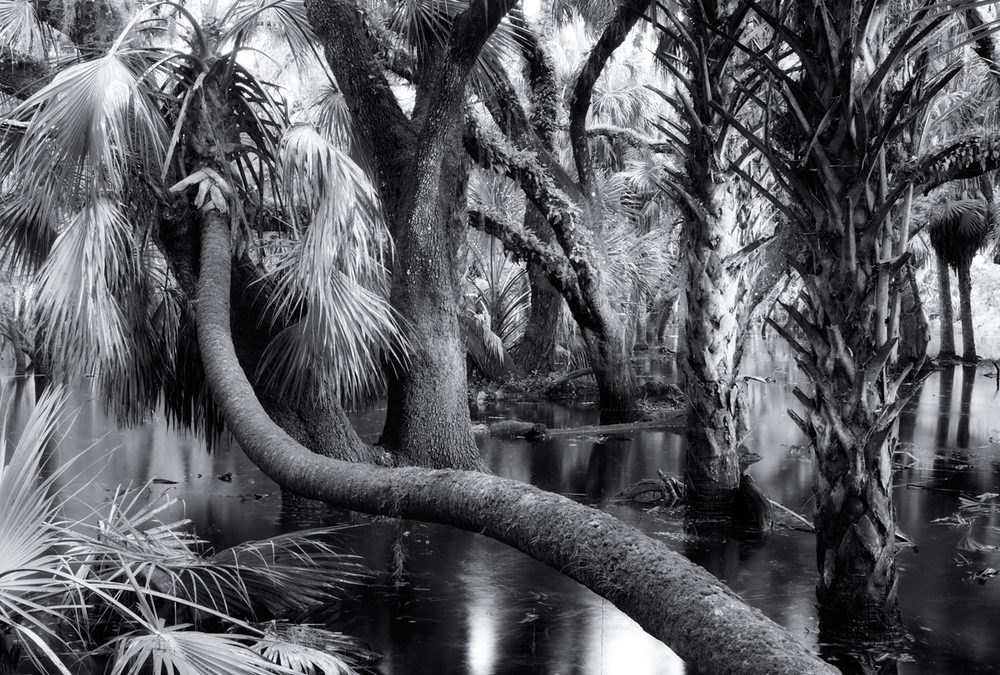
 “Myakka Park Drive 1, Sarasota” by Scott Bolendz
 “Remnant Mangrove, Tampa Bay” By Scott Bolendz
 “Remnant Mangrove, Terra Ceia Bay” By Scott Bolendz
 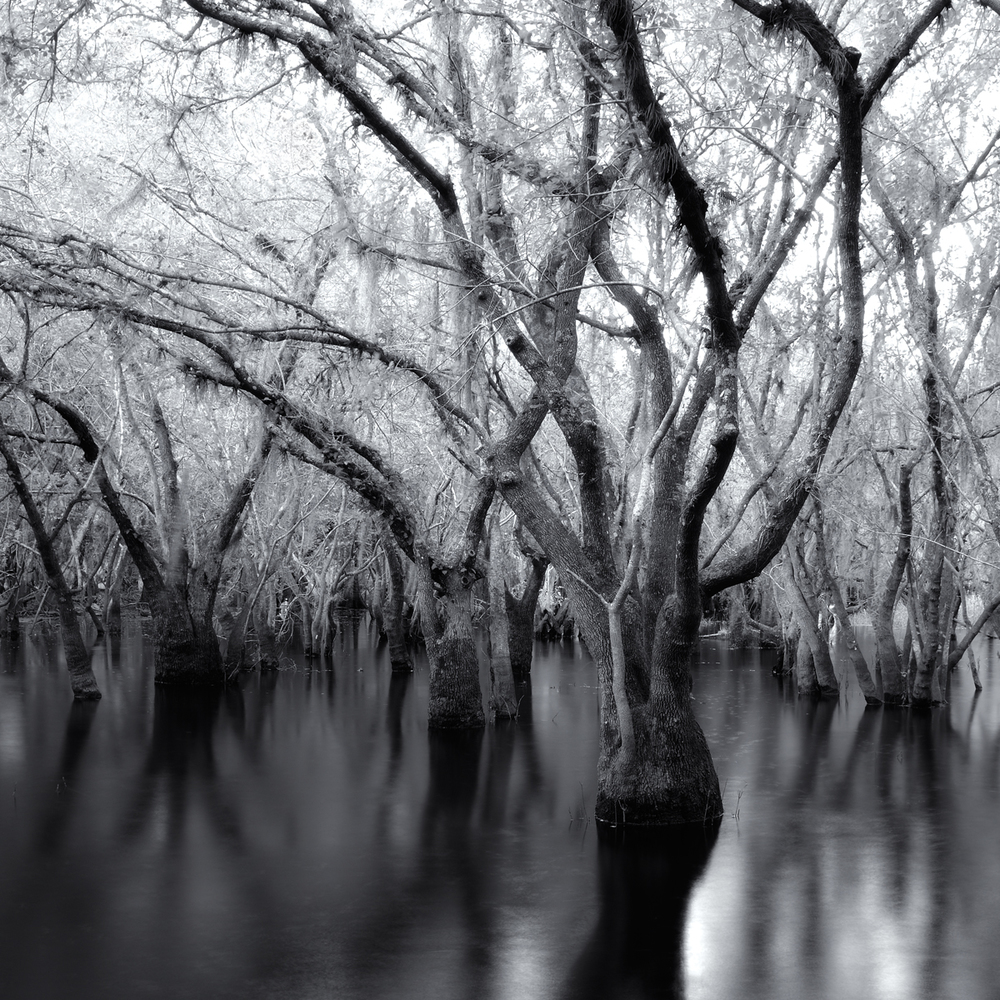 “Myakka Park Drive 2, Sarasota” By Scott Bolendz
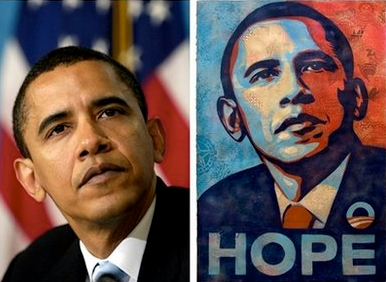 Photograph by Mannie Garcia (AP) / Artwork by Shepard Fairey
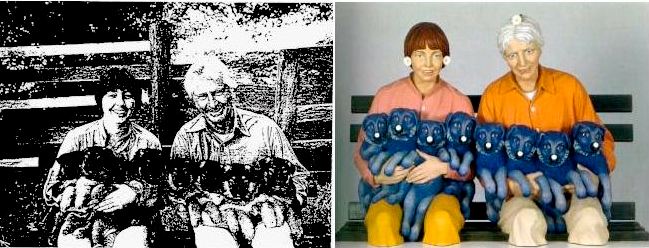 Photograph by Art Rogers, 1980 / Sculpture by Jeff Koons, 1998
 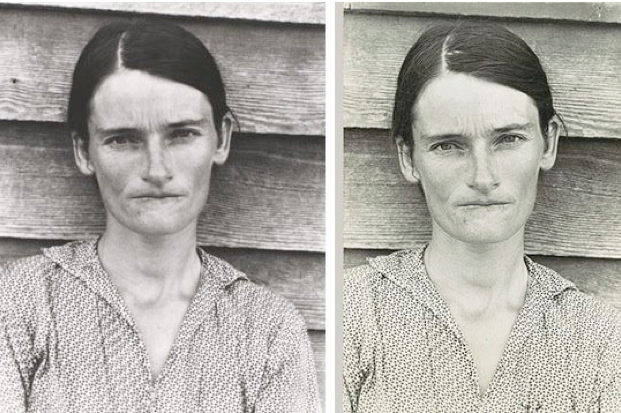 Photograph by Walker Evans, 1936 / Re-photographed by Sherry Levine, 1981
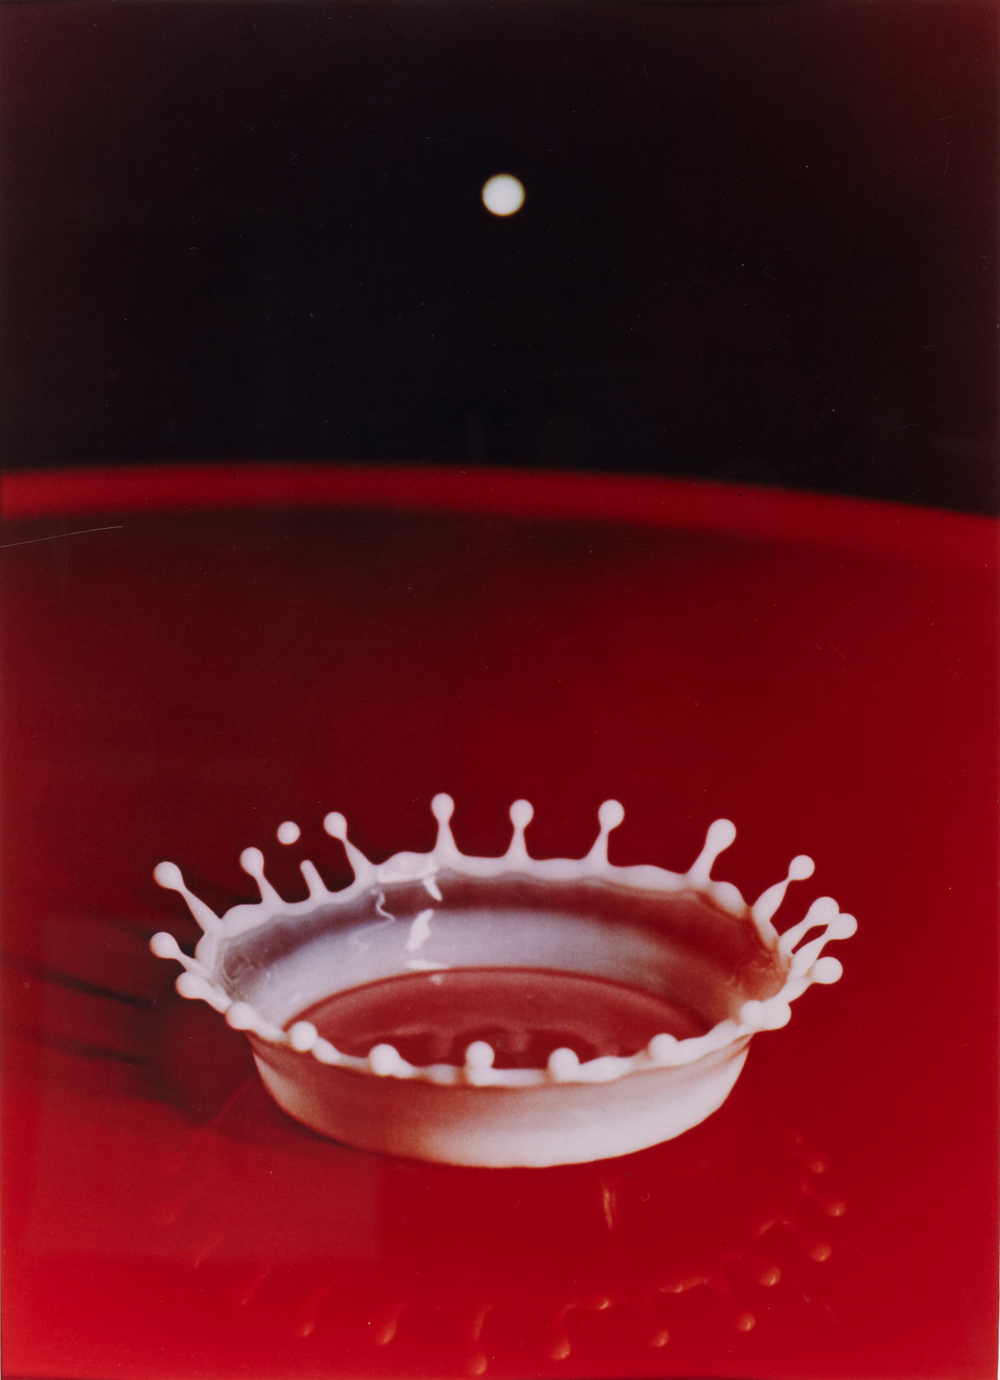 Photo Credit: Edgerton Harold
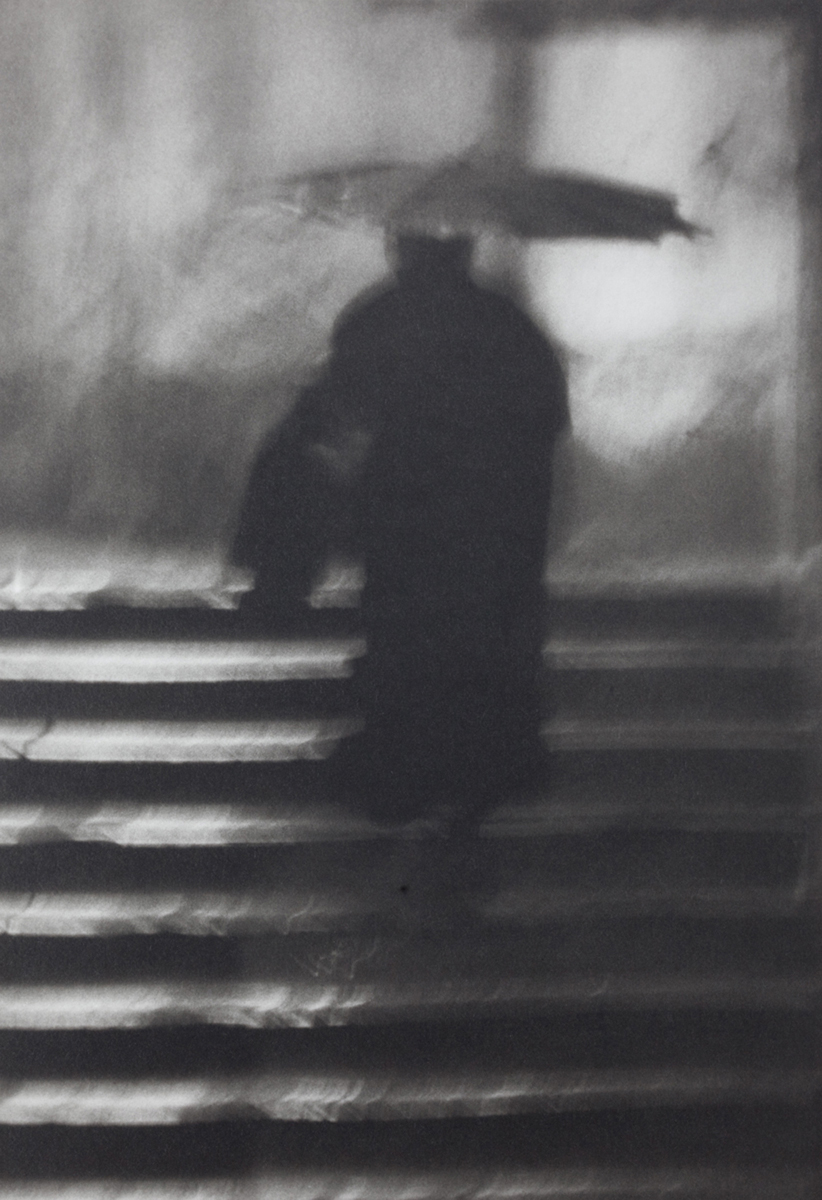 Photo Credit: Richard Copeland Miller
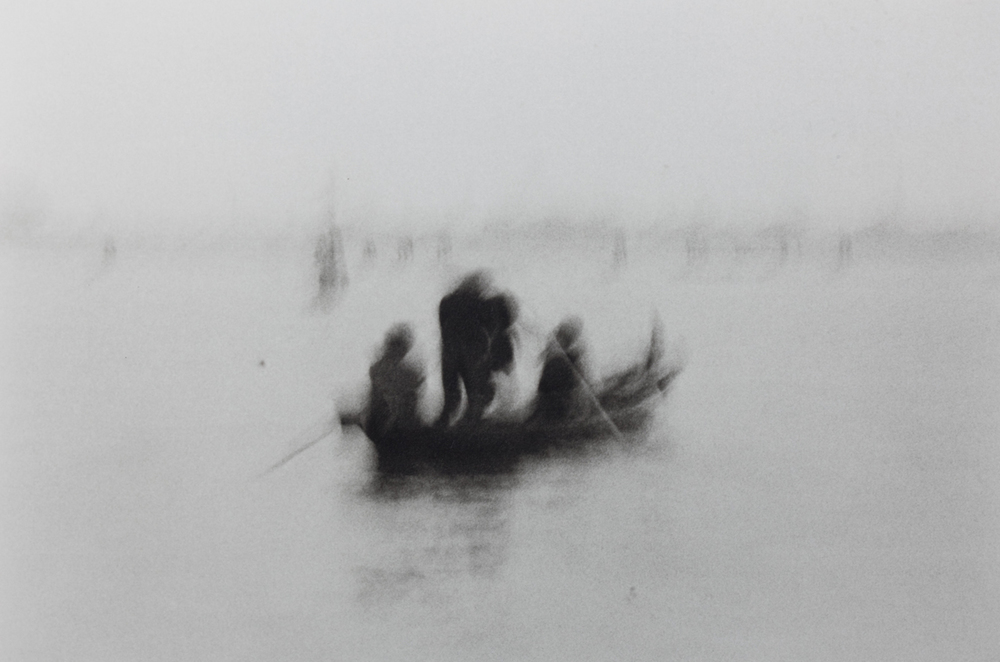 Photo Credit: Richard Copeland Miller
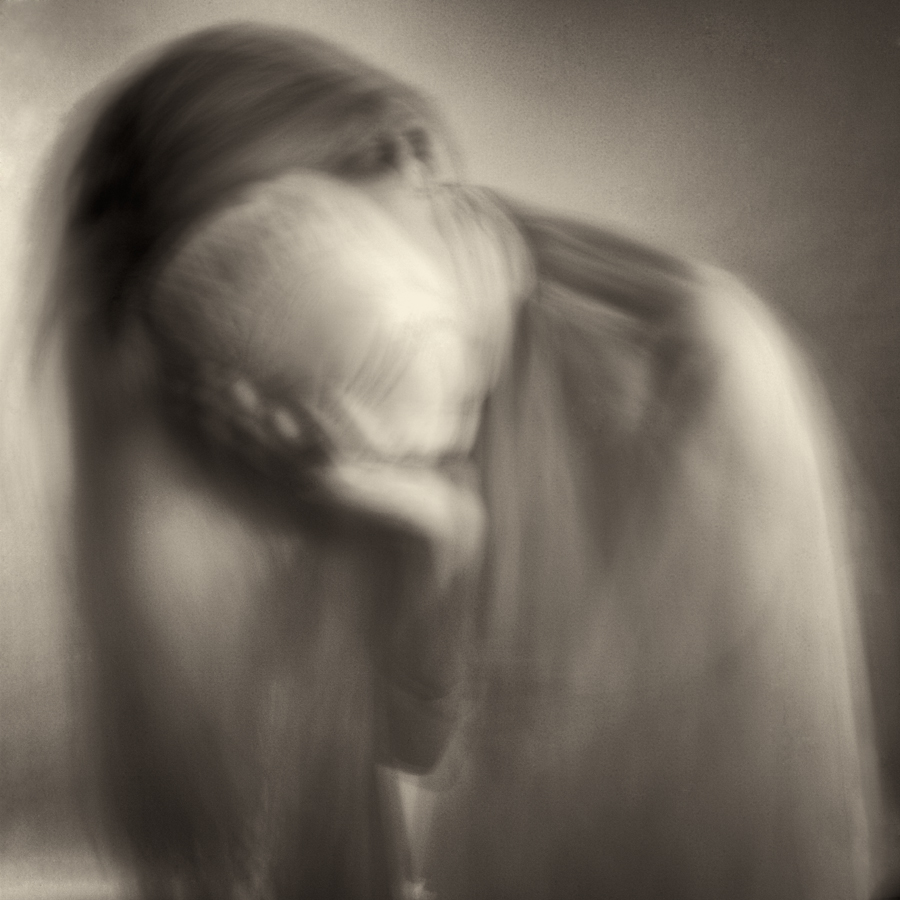 Photo by Cathy Dutertre, 2014
 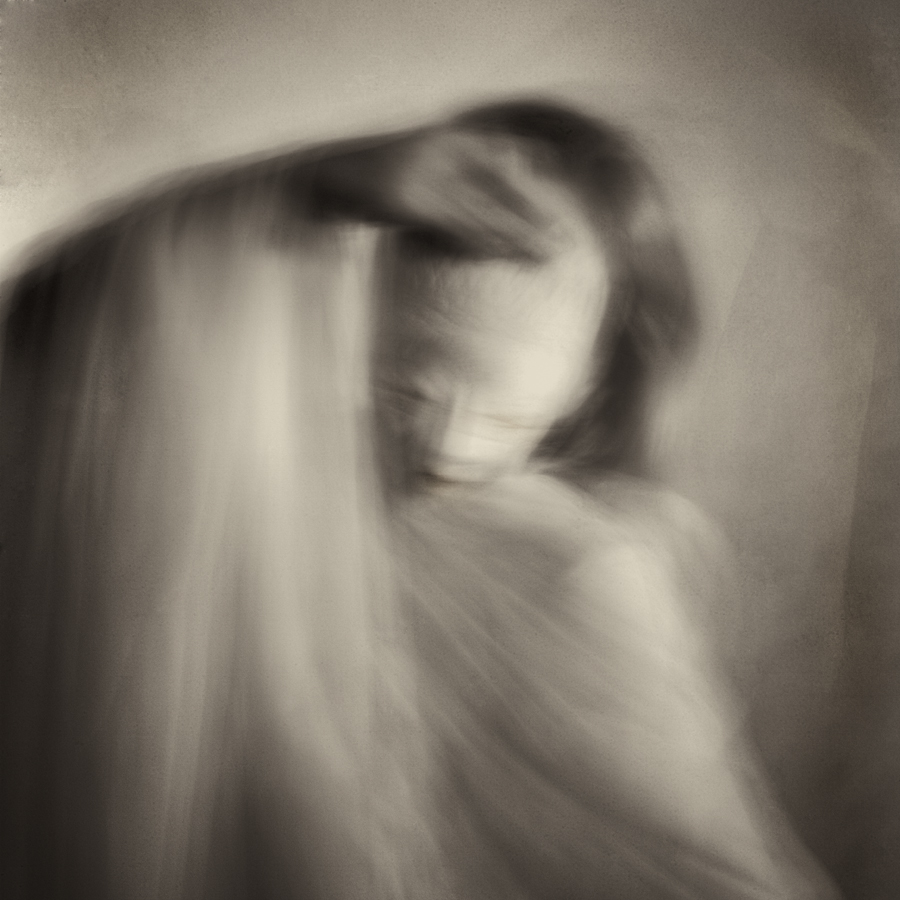 Photo by Cathy Dutertre, 2014
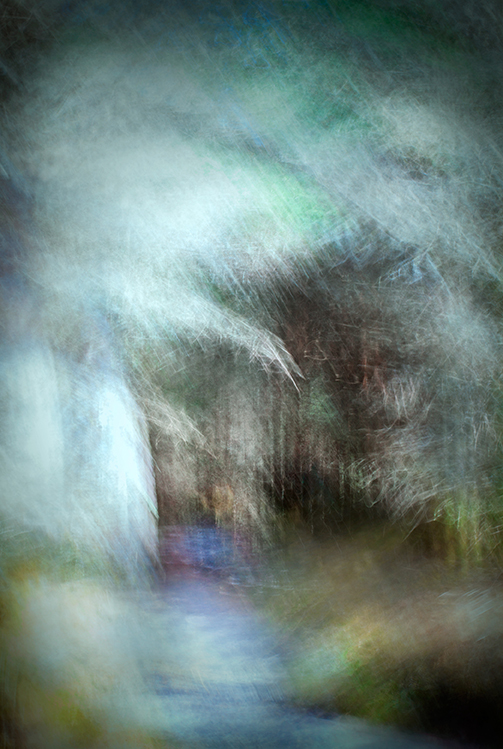 Photo by Cathy Dutertre, 2014
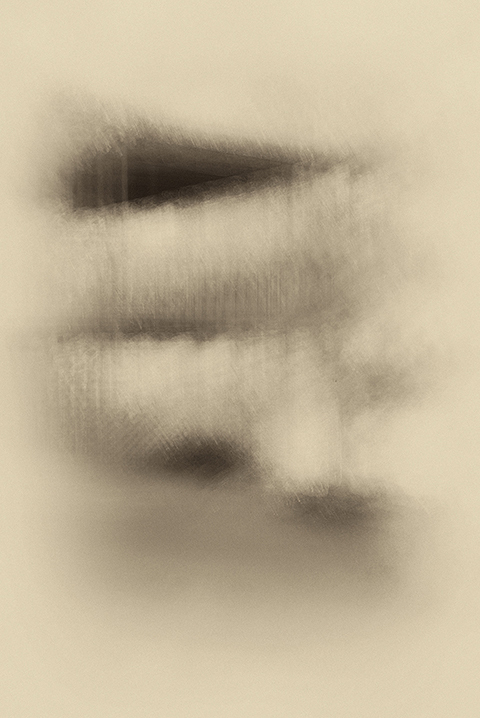

 Photo by Pierre Dutertre
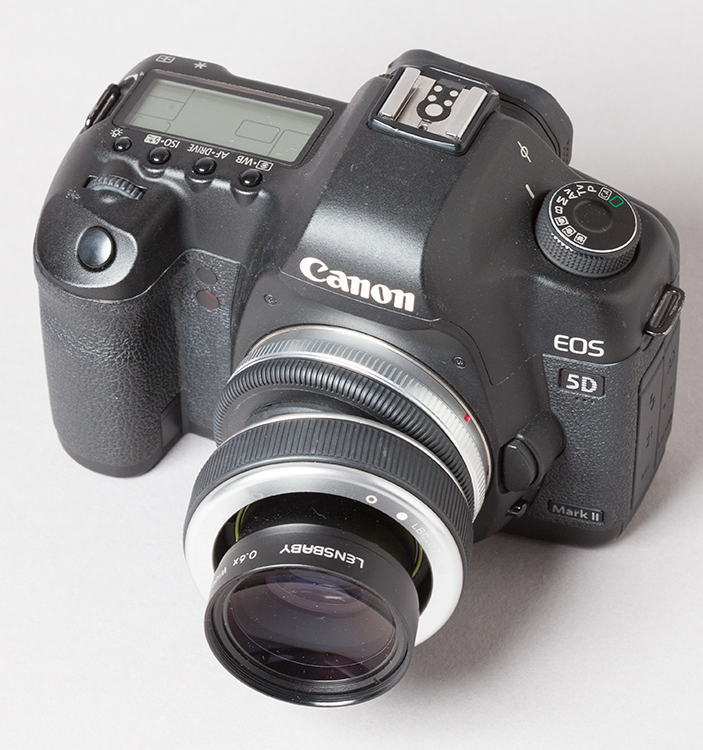
 Photo by Cathy Dutertre, 2012


Recent Comments