
by Pierre Dutertre

1: You need a clear direction. Before you embark on taking photographs randomly, waiting on the chance factor, one needs a clear plan of action when it comes to subject matter. Unless you are a photojournalist or street portraitist, visual opportunities will not come to you; instead you must seek a particular subject matter and plan for capturing precise images.
2: Do not look at your images on the camera’s display. The display on your camera is lying to you and in addition you are creating a false mental image of what the images should look like according to your visual experience, one far removed from what the camera captures. Use the camera display to only show you the histogram, in other words to display the technical exposure for your images, only.
3: Wait to preview your images. Just like a fine wine images have to be viewed several days after you create them. Initially, you are biased by the knowledge of where, when and how you took these images; this mental bias will inhibit you from examining the images in an impartial and free manner, often dismissing the deep and potentially important aspects of a particular photograph.
4: Take fewer images. The prevailing thinking in photography resides in taking more images and getting better by doing so. WRONG; by applying yourself in the viewfinder and carefully thinking about what and how you are capturing a photograph you will follow the intellectual and emotional aspects of what the medium is all about, namely conveying a statement to your viewer, emotional or aesthetic.
5: Less technology, more thinking. Think about the cost of every image, around $1.00 per capture considering the costs of DSLR’s lenses, software and computers, all with a limited lifespan. The digital photo world is wonderful, but no less expensive than the analog realm. You do not need to take every piece of equipment you own on very photo excursion, just the right items according to your pre-planning. Go lighter, your body will thank you.
by Pierre Dutertre
5 Tips for a Successful Portfolio
Written by Pierre Dutertre
1: Your portfolio is the sum total of your photographic experience, technical and artistic skills as well as your individual style, the way you see the world. Without a portfolio you can only say that you are a photographer, but cannot substantiate that statement.
2: Creating a portfolio together with a body or bodies of uniform work can be challenging, as it becomes too easy to become distracted or confused with the unity of your imagery, in terms of genres, styles or expected outcomes with the viewer.
3: The sequencing of images within your portfolio is an essential component to its expected presentation; too often, this sequencing is based upon personal preferences or artificial and rigid categorizations. In other words, a photographer assembling his or her own portfolio can easily become biased due to their intimate and usually confusing knowledge of each image, their circumstances and memories associated with these that are irrelevant to the viewer.
4: Your portfolio is only as strong as your weakest image. The sequencing of images for a portfolio can be achieved by printing small thumbnails of your images, cutting them and then physically assembling galleries that are unified stylistically, by genres, colors, compositions and communicative expressions. Some of the weaker images will often be left out at the end, thereby eliminating less valid or repetitive photographs.
5: It is essential to refine your portfolio. Having an industry professional, curator or consultant review your portfolio on a regular basis will help you refine the sequencing of the images, establish weak or strong categories of work, eliminate unnecessary photographs, as well as establish future directions and potential projects. The reviewer must be completely impartial, extensively experienced in such reviews and able to apply the formal critique principles used in the evaluation of the visual arts, whether commercial or fine art based.
by Pierre Dutertre
Many thanks to UPA Gallery – and Pierre Dutertre in particular – for inviting back me to write this follow-up blog on neutral density filters. I’m grateful for the opportunity to share my image capture workflow with readers of this educational blog series.
Neutral Density Filters and Zoom Lenses
In my last UPA blog post ( http://www.upagallery.com/blog/2014/7/2/the-use-of-natural-low-light-and-neutral-density-filters ) I reviewed how I use neutral density (ND) filters with prime lenses to create water-blur effects in my concept-based, Florida landscape series. In this post I’ll review my “Dark Mountains” project and how I use ND filters with zoom lenses to achieve cloud-blur effects.
Let me begin by first emphasizing that I prefer using prime lenses for landscape photography. Their sharp clarity, reduced barrel distortion (compared to a zoom lens) and ease of use with ND filters make them ideal for when I can get up close to my subject. But this isn’t always possible – or even advisable – in some cases. Another “issue” with prime lenses: when I’m traveling overseas, the last thing I want to do is haul around a bag full of different lenses! So, as a practical matter, a good zoom lens with a decent focal range (including wide angle) offers versatility for a variety of settings. The main zoom lens I carry is a Nikkor 28-300/1:3.5-5.6 VR. It’s a great lens with a great focal range – especially for travel photography! However, using ND filters with a zoom lens can be a little trickier than with a prime lens. I’ll review this in more detail shortly.
First, a quick review: what’s an ND filter? Basically, an ND filter is a lens made of dark glass (like sunglasses) that reduces the amount of light reaching a camera’s sensor. This allows for much slower shutter speeds in order to create motion-blur effects. There are different kinds of ND filters – slot-in, screw-in and variable – each with different density ratings that give various f-stop reductions. There are pros and cons to using each type that’s beyond the scope of this blog post, but a quick Google search using the terms “ND Filter” will pull up many useful articles for further reading.
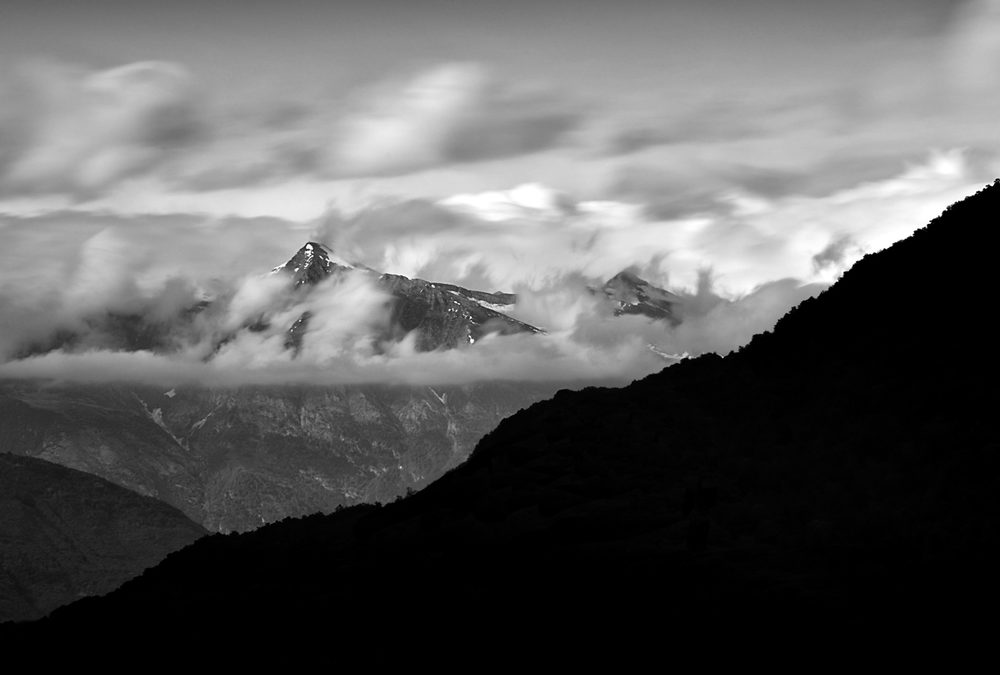
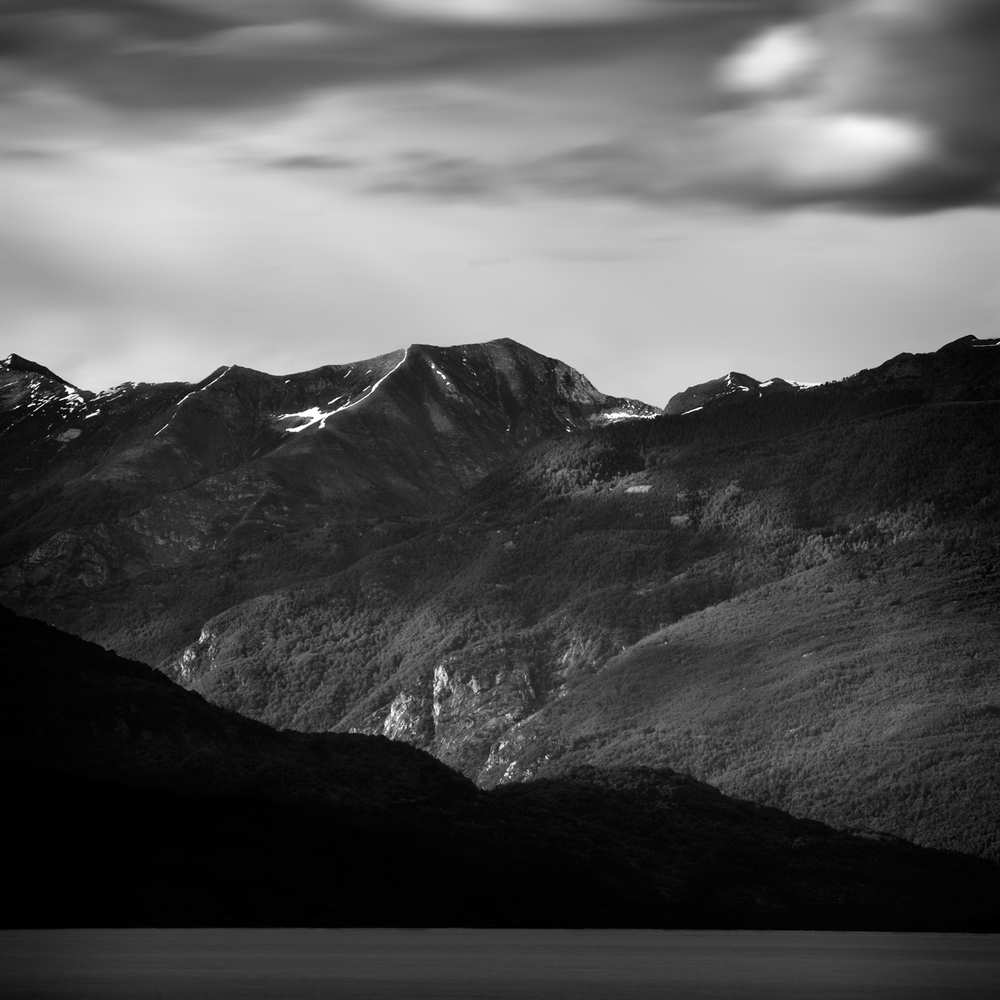
 “Dark Mountains 1” by Scott Bolendz
“Dark Mountains” is a project that began in the rugged and majestic Italian lakes region. The looming proximity of so many ancient mountains so close to the populated lakes offered a blunt perspective on the human footprint: how inconsequential we seem compared to these hulking, geologic shapes. Although these mountains have been the familiar backdrop for thousands of years of local human history, their age, jagged mass and atmospheric volatility also gave them an air of danger and mystery. Here, one is made freshly aware of just how small, transient and vulnerable creatures we are in a much bigger, timeless physical universe. These images invite the viewer to reflect upon the enduring, elemental, often intimidating beauty of this alpine landscape. Unlike the warm, welcoming, spiritualized portrayal of mountains by Ansel Adams and others, these mountains are cold, shadowy and darkly sublime.
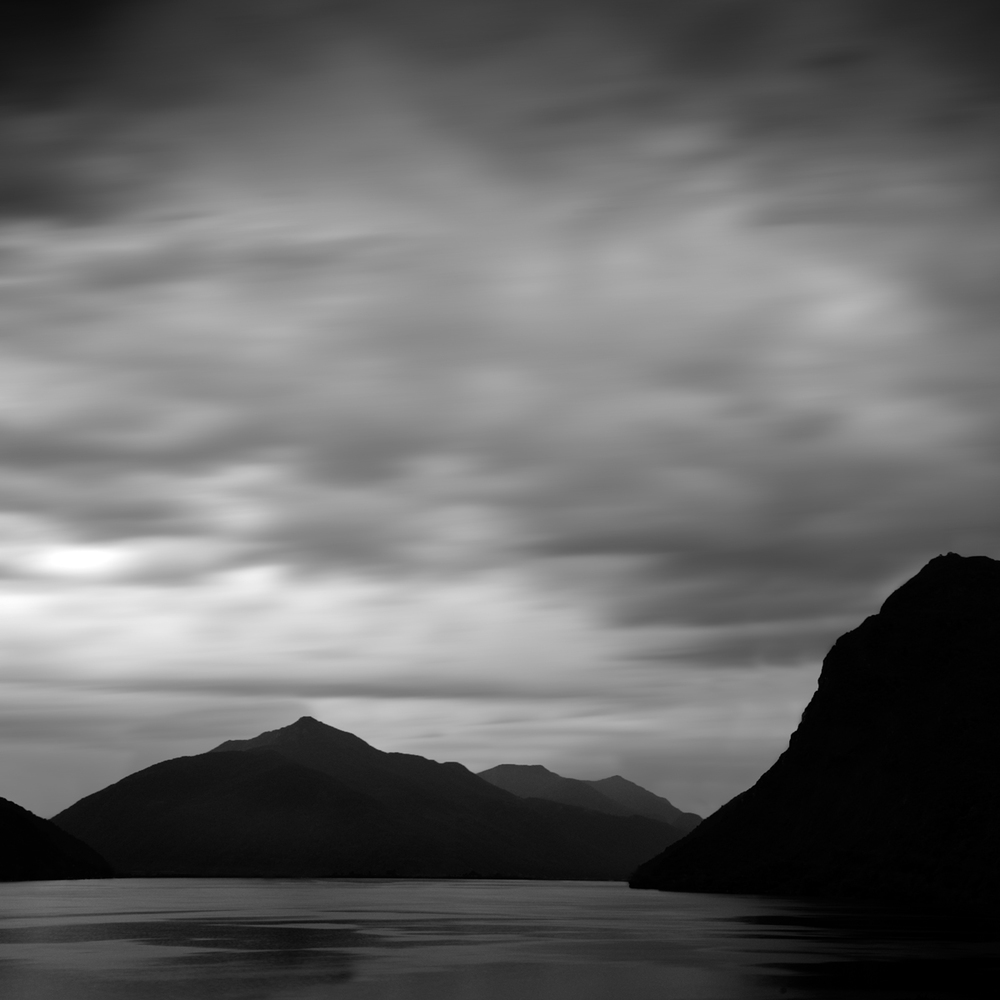
My reaction to this visually dramatic environment was a mixture of awe, humility and fear which is manifested in the moody atmosphere of the images in “Dark Mountains.” The aesthetics of this series are driven by three key elements that, when put together, convey a personal, emotion-driven understanding of this unique topography. These three elements are:
1. A sense of time passing by (conveyed by the moving, sometimes turbulent clouds).
2. A sense of timelessness (conveyed by the enduring geologic shapes).
3. A sense of the intimidating “otherness” of the alpine environment (conveyed, in part, by the extensive use of dark tones and large areas of pure black – a Bill Brandt influence).
The human presence is intentionally obscured in order to emphasize the elemental physical beauty of this landscape in a contemplative, rather than idealized, way without any distracting details.
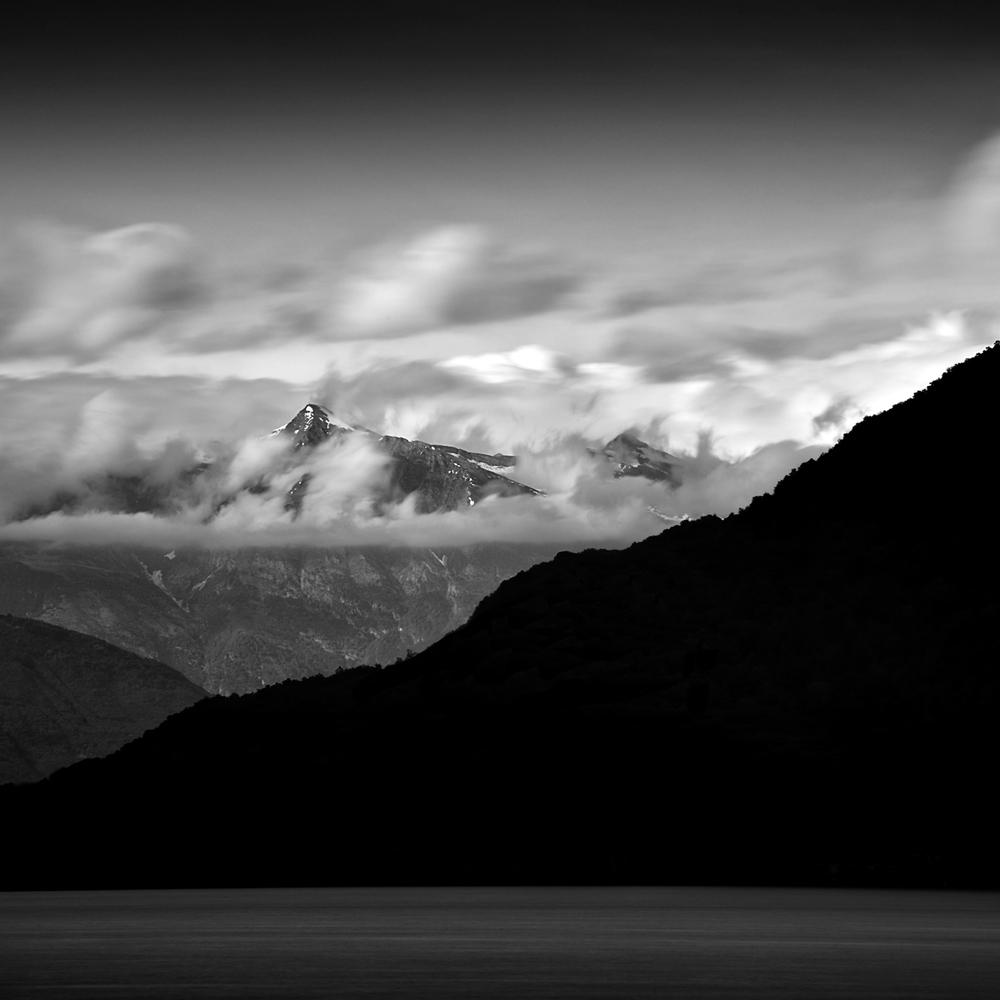 “Dark Mountains 4” by Scott Bolendz
The image “Dark Mountains 4” was shot in Connobio, Italy on the shores of Lake Maggiori just after sunset. On this particular evening, the clouds looked promising with their slow, dramatic swirl around the peaks of the Swiss alps in the distance. I wanted to capture the atmospheric turbulence, so the exposure needed to be long enough to somewhat maintain the cloud shapes AND convey a sense of motion – but not too long to transform the sky into a smooth, serene surface blur (i.e. Michael Kenna).
When using ND filters, it’s necessary to compose and meter the scene prior to attaching the filter (the viewfinder is too dark when the ND filter is attached). Here is the workflow I used for this particular image:
1. Set the camera (a Nikon D600) on a tripod.
2. Use Aperture Priority (AP) Mode and Auto-Focus (AF) to compose and focus the scene.
3. I set the AP to f/18, with a focal length of 100mm and ISO 100 for a reasonably good depth of field and long enough exposure anticipating the use of a 1000x ND filter (for a 10-stop reduction).
4. Now check the shutter speed. It was 1/50 for this particular camera setting.
5. Enter the 1/50 shutter speed value into a long exposure calculator (free apps are available on iTunes!) to see what new shutter speed would be required for a similar exposure if a 1000x ND filter were attached. In this case the calculated shutter speed would have to be 25 seconds, which seemed about right for the kind of cloud-blur effect I was after.
6. Next, put the camera setting on full manual and replicate all the previous settings from the AP mode (f/18, ISO 100, etc…) and select a new shutter speed of 25 seconds (to account for the 1000x ND filter).
7. Change Auto-Focus to Manual Focus.
8. Gently attach the 1000x ND filter to the zoom lens AND be extremely careful not to alter the focal length! This is crucial: if the focal length changes even a few millimeters the original focus will be lost and you’ll have to begin the process all over again.
9. Use a wireless shutter release or the camera’s timer to take the picture.
I often have to increase or decrease the calculated shutter speed based on what the first captured image actually looks like on the camera’s LCD screen. The image may be under or over-exposed (I only shoot RAW files so I can tweak the exposure in post-production). If you decide to re-compose the image, remove the ND filter and start the process all over again.
Here are two additional long-exposure images taken along Lake Maggiori with a zoom lens/1000x ND filter combination:
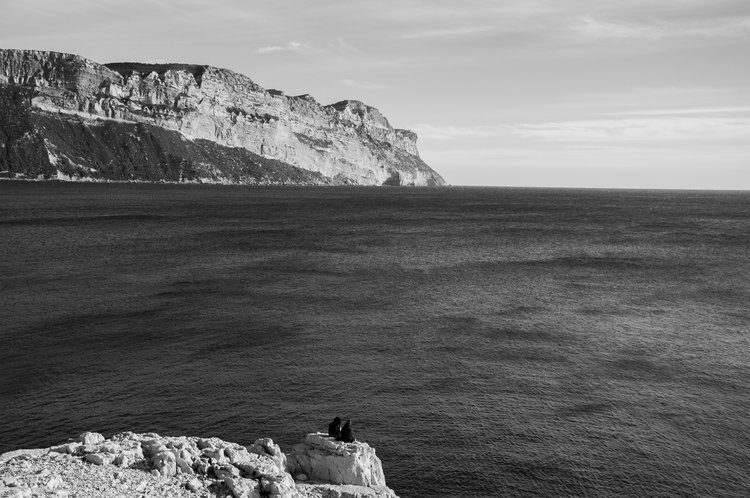
 “Dark Mountains 8” by Scott Bolendz
 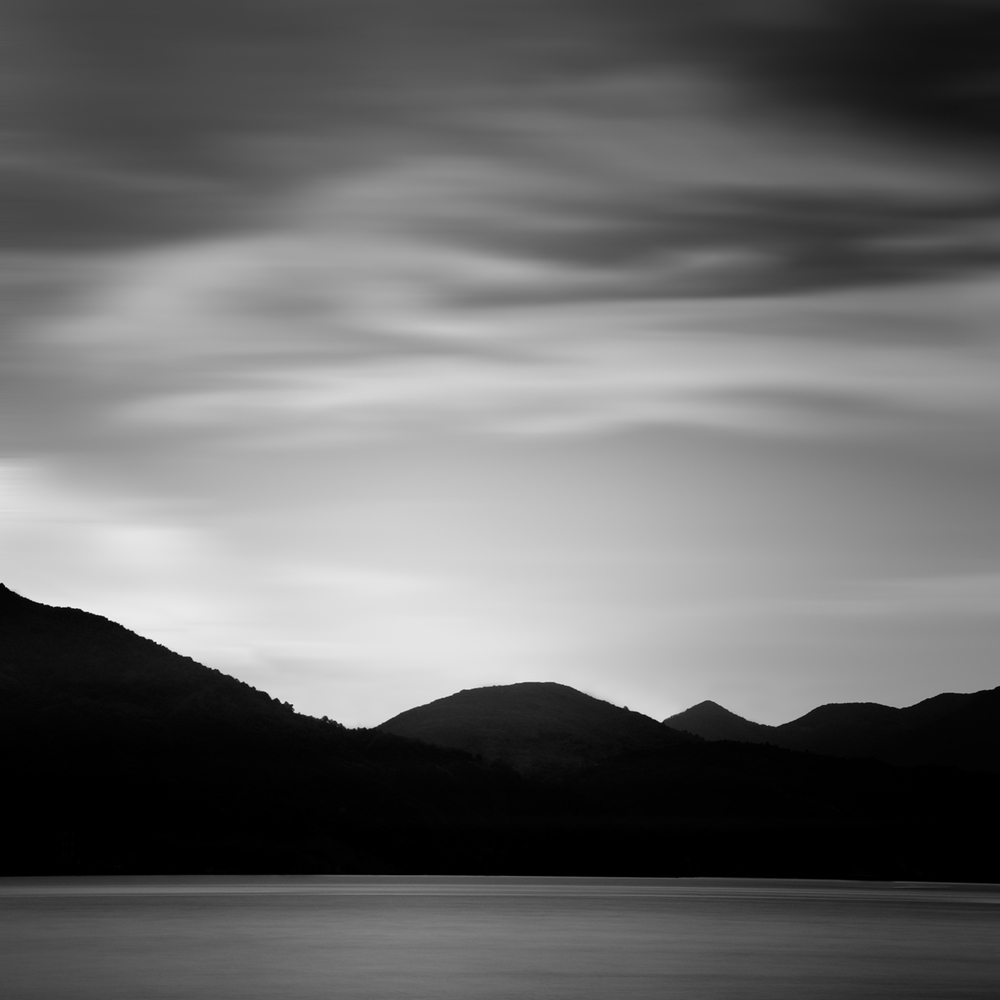 “Dark Mountains 12” by Scott Bolendz
Final Thoughts
ND filters can be quite challenging and frustrating to use at first, but with enough time, patience and practice they get easier to use and their range of possible aesthetic effects increases exponentially. They’re a powerful tool among many photographic tools that I use to help me produce intellectually-driven, concept-based visual art that conveys my personal understanding of the physical world in which we live. I invite you to see more of my landscape portfolios at www.scottbolendz.com and my Facebook page “Scott Bolendz Photography.”
By Scott Bolendz
Scott Bolendz is an emerging fine art photographer. His landscape images have won several awards at The Florida Museum of Photographic Arts in Tampa

Recent Comments