by admin
The Use of Natural Low-Light and Neutral Density Filters in Concept-Based Landscape Photography
I want to thank UPA Gallery – and Pierre Dutertre in particular – for inviting me to write this guest blog. I’m grateful for the opportunity to introduce my work to the readers of this unique educational blog and appreciate UPA’s commitment to giving exposure to emerging fine art photographers.
Stormy Weather
Monster hurricanes… saturating heat … biblical rains … what’s not to love about summer in Florida? At least when it comes to photography. When the skies turn dark and stormy and people seek shelter indoors, I grab my camera gear and go to work outside.
In this blog post I’ll review how I use low-light conditions – especially rainy low-light conditions – and ND filters in my concept-based landscape photography, specifically for lighting aesthetics and water-blur effects. We’ll take a detailed look at two images from my Florida series, called “Remnants,” to see examples of how I approach low-light conditions with and without ND filters.
First, it’s important to understand what an ND filter is. Basically, it’s a lens filter made of dark glass (like sunglasses) that reduces the amount of light reaching a camera’s sensor. This allows for much slower shutter speeds in order to create motion-blur effects, among other things. There are different kinds of ND filters – slot-in, screw-on and variable – each with different density ratings that give various f-stop reductions. There are pros and cons to using each type that’s beyond the scope of this blog post, but a quick Google search using the terms “ND Filter” will pull up many useful articles for further reading.
Natural Low-Light Effects
My Florida portfolio is called “Remnants” on www.scottbolendz.com . It documents small moments of modest natural beauty – what I call the “diminished sublime” – in remnant green spaces along Florida’s heavily developed Gulf Coast. The images have a delicate, compressed, dream-like quality due to the contingent, often fleeting, nature of the depicted scene. This project is influenced, in part, by Clyde Butcher’s Florida series and Michael Kenna’s long-exposure work.
I like shooting in rainy low-light conditions because the camera can transform a relatively mundane landscape into something otherworldly. Such low-light is often sufficient by itself for longer exposure times, which can be especially useful if groundwater is present (as is often the case in Florida). One of the challenges of shooting the lush Florida landscape is the visual complexity of the vegetation. Water reflections often add distracting elements to an image (at least to my eye). Longer exposure times, however, can soften or even obliterate water reflections and give a smooth, silky, almost dream-like surface plane that can add depth and simplify a composition. ND filters allow for even longer exposure times when necessary.
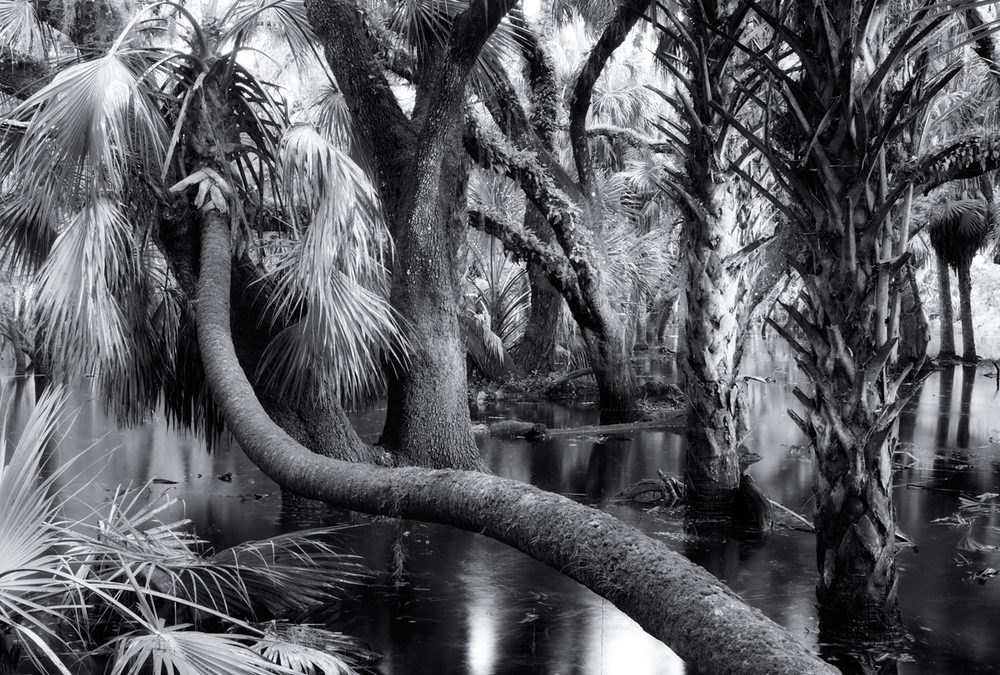
 “Myakka Park Drive 1, Sarasota” by Scott Bolendz
My photograph “Myakka Park Drive, Sarasota” was shot immediately after a thunderstorm. I set my Nikon D600 on a tripod (a definite must for long-exposure work!) and tried to get a long exposure time without using an ND filter. I was using a Nikkor 24 mm/2.8 prime lens. I set my camera/lens to manual focus (infinity), aperture priority f/16 and ISO 100 which gave me a shutter speed of 5 seconds. This was long enough because raindrops were still falling from the wet foliage onto the groundwater surface, creating small disturbances that would help in achieving a nice water-blur effect. This, in turn, would create a clean background plane to highlight the layers of lush, complex foliage. And – voila!
ND-Filtered Lighting Effects
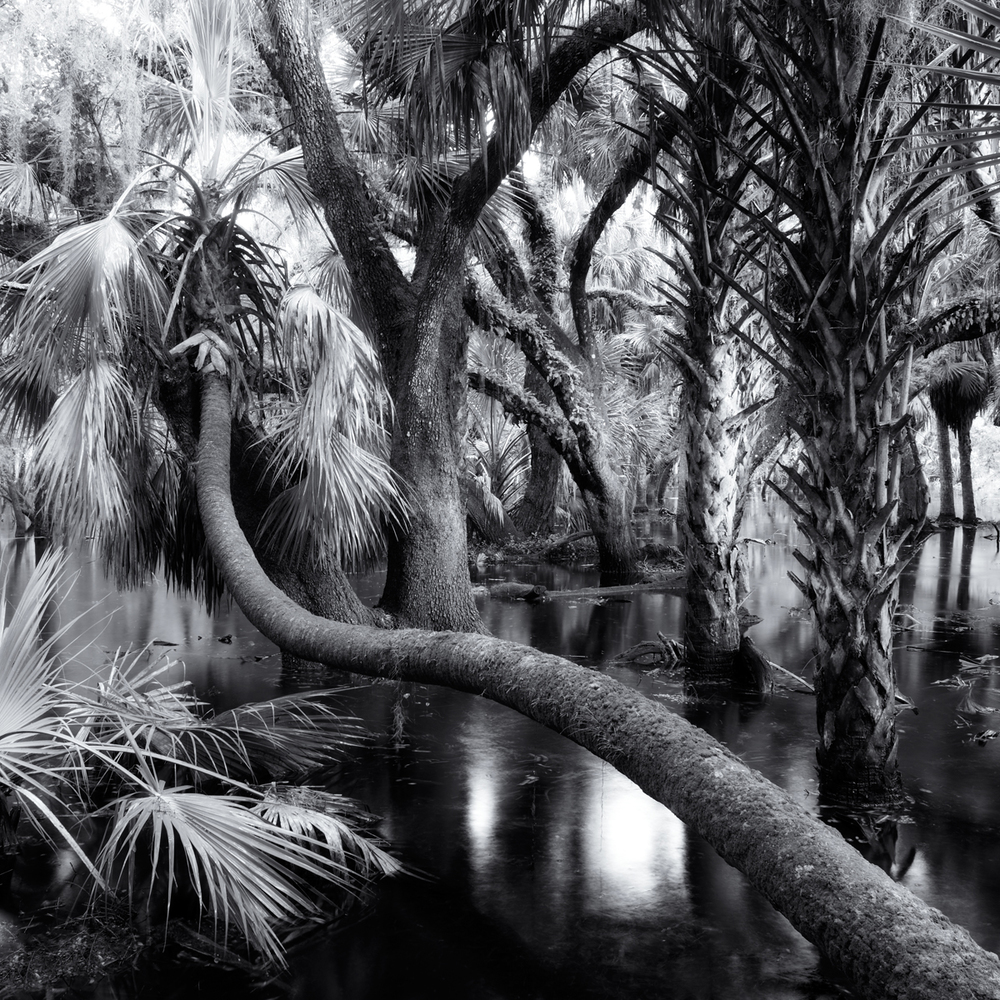
 “Remnant Mangrove, Tampa Bay” By Scott Bolendz
My photograph, “Remnant Mangrove, Tampa Bay”, was shot at mid-day using a 64x ND filter during a brief interlude between coastal storms at Emerson Point in Bradenton, Florida. The clouds and water were both moving slowly, but the light was too bright for longer exposures without the benefit of an ND filter. Even at f/22 and ISO 100 the shutter speed was 1/20 second (too fast for motion-blur).
I only carry 2 high-quality screw-on ND filters: a 64x (6-stop reduction) and a 1000x (10-stop reduction). These 2 filters offer a decent range of f-stop reductions for most lighting situations I encounter.
The workflow for this image is more involved because it’s necessary to compose and meter the scene prior to attaching the ND filter (the viewfinder is too dark when the ND filter is attached):
1. Set the camera on a tripod.
2. Use manual focus (set to infinity) and frame the scene – I used my 24 mm prime lens.
3. I metered the scene using aperture priority f/22 and ISO 100 for the longest exposure possible prior to adding an ND filter.
4. Next, check the shutter speed. It was 1/20 for this particular camera setting.
5. Enter the 1/20 shutter speed value into a long exposure calculator (free apps are available on iTunes!) to see what new shutter speed would be required for a similar exposure if a 64x or 1000x ND filter were attached. The results: 3 seconds (64x) and 51 seconds (1000x). Based on current conditions, I chose the 64x.
6. Next, put the camera setting on full manual and replicate all the previous settings from aperture priority (f/22, ISO 100, etc…) and select a new shutter speed of 3 seconds (to account for the 64x ND filter).
7. Carefully attach the 64 x ND filter to the prime lens.
8. Use a wireless shutter release or the camera’s timer to take the picture.
I often have to increase or decrease the calculated shutter speed based on what the first captured image actually looks like on the camera’s LCD screen. The image may be under or over-exposed (I only shoot RAW files so I can tweak the exposure in post-production). If you decide to re-compose the image, remove the ND filter and start the process all over again.
Here are a few more examples of my Florida series shot in rainy low-light conditions with ND filters. Again, notice how the blurred water surface provides a clean plane that nicely highlights a visually complicated subject.
 “Remnant Mangrove, Terra Ceia Bay” By Scott Bolendz
 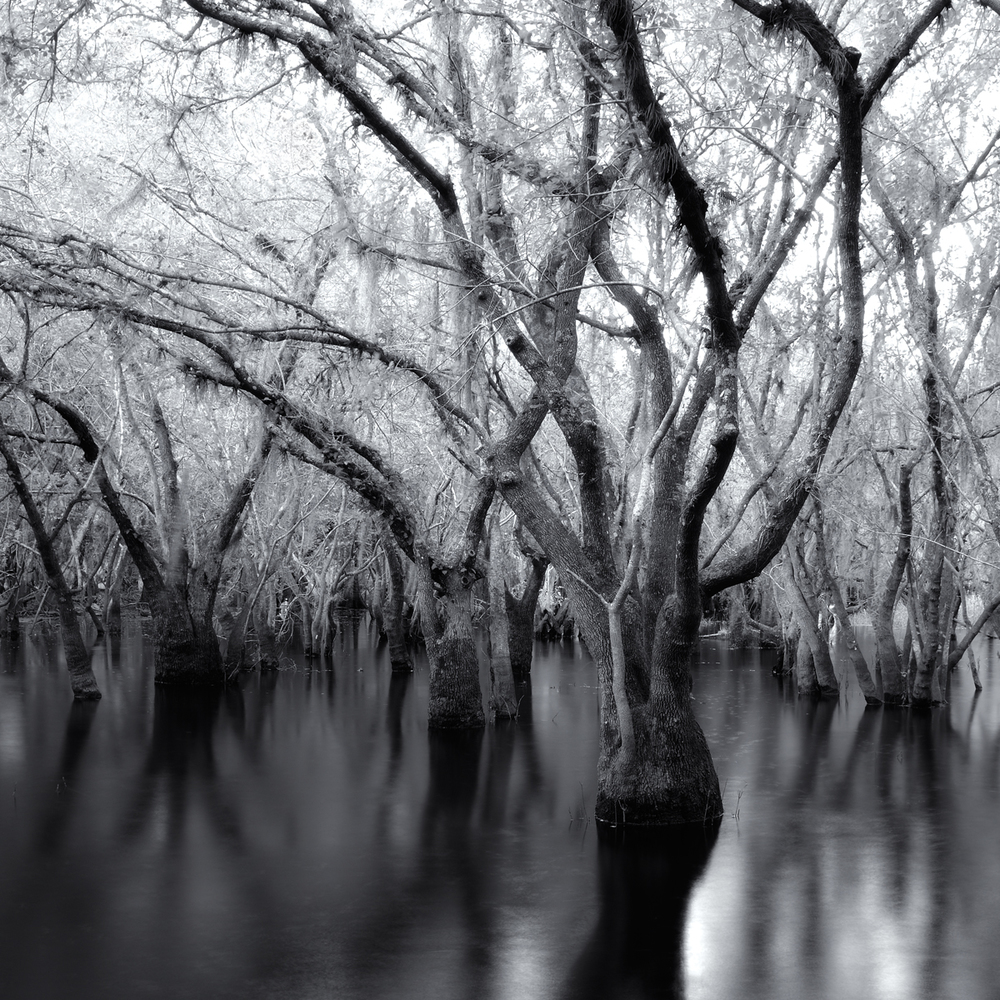 “Myakka Park Drive 2, Sarasota” By Scott Bolendz
Some final thoughts
First, since I mainly shoot with a prime lens for my Florida series, the workflow process described in this blog post applies to prime lenses. Use of an ND-filter on a zoom lens is a somewhat different – and more difficult – workflow which I will review in a future UPA Blog post. Second, when shooting long exposures for either water or cloud-blurring effects, it’s important to be aware of even slight movements of your subject. This is less of an issue if the subject is a mountain or city buildings. But with vegetation and wind movement – like coastal mangroves, for example – you may need to be very patient until the subject is absolutely still. And if you’re shooting in rainy low-light conditions, patience is a virtue!
Scott Bolendz is an emerging fine art photographer. His landscape work has won several awards at The Florida Museum of Photographic Arts in Tampa. To see more of his images you can visit his website www.scottbolendz.com or follow him on Facebook at “Scott Bolendz Photography.”

by admin
The use of movement and slow shutter speeds for concept-based intents and visual experiential outcomes.
 Photo Credit: Edgerton Harold
The uniqueness of the medium of photography resides in its ability to capture the passage of time, either with a long exposure or just freezing a moment in time. High-speed photography allows us to observe the fast actions of the world, the hidden spatial movements of humans, animals, as well as the physical properties of actions and laws of physics.
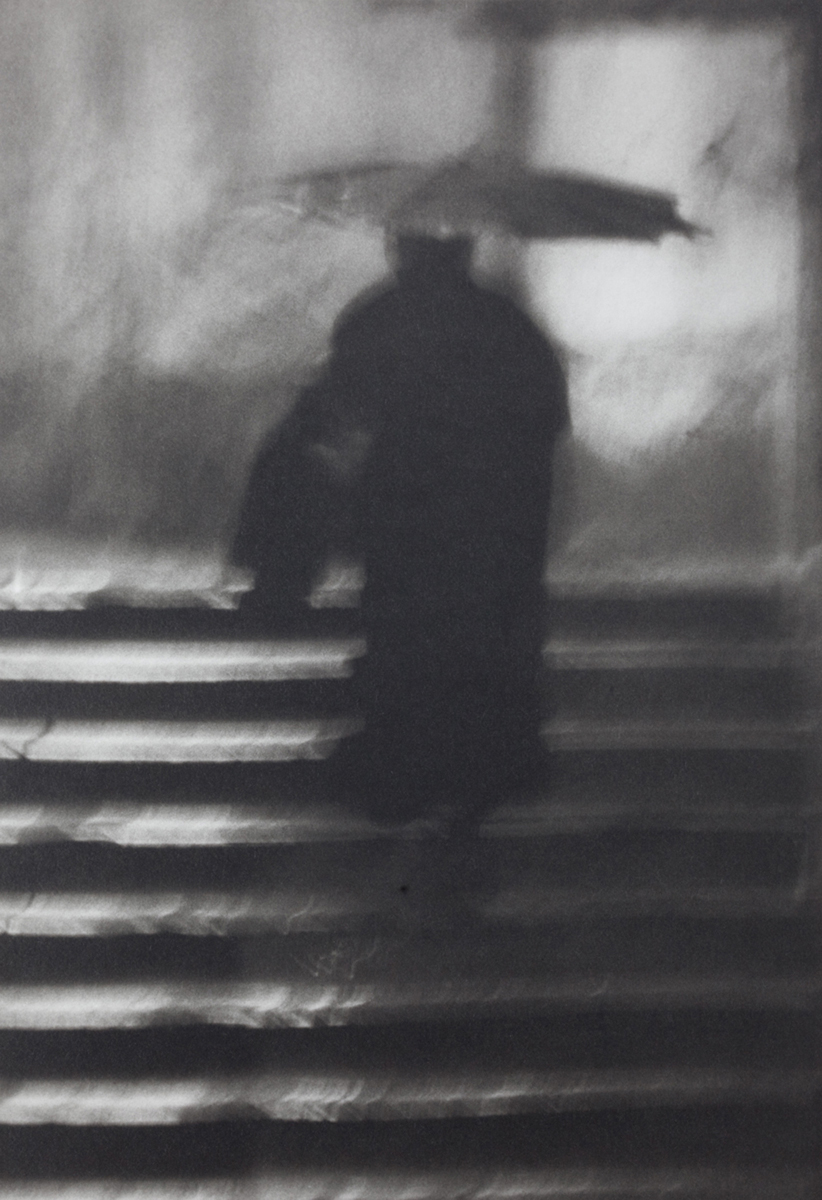 Photo Credit: Richard Copeland Miller
The reverse of high -speed photography, the capture of movement has also immense potentials for expressive outcomes, the study of the passage of time as a unique characteristic of the medium. Extrusive time, an academic term, refers to slow shutter speeds, long exposures and movements within the subject or scene, as well as with the camera as we will explore shortly. Although many artists have explored extrusive time, either due to the limitations of their historical process, one with low sensitivity such as the Daguerreotype or wet collodion, or even slow optics, others have used these inherent limitations to record the passage of time for an emotional and ephemeral outcome. One of my greatest influences resides with Richard Copeland Miller who photographed the country of Romania in his book entitled “Passage Europe” in a most somber and immensely emotional manner, using both extrusive time and camera shake to imbue the viewer with an extraordinary sense of sadness and nostalgia for a country left behind in the 20th Century. Sadly, he passed away at an early age, yet his work resonates the deepest within my soul.
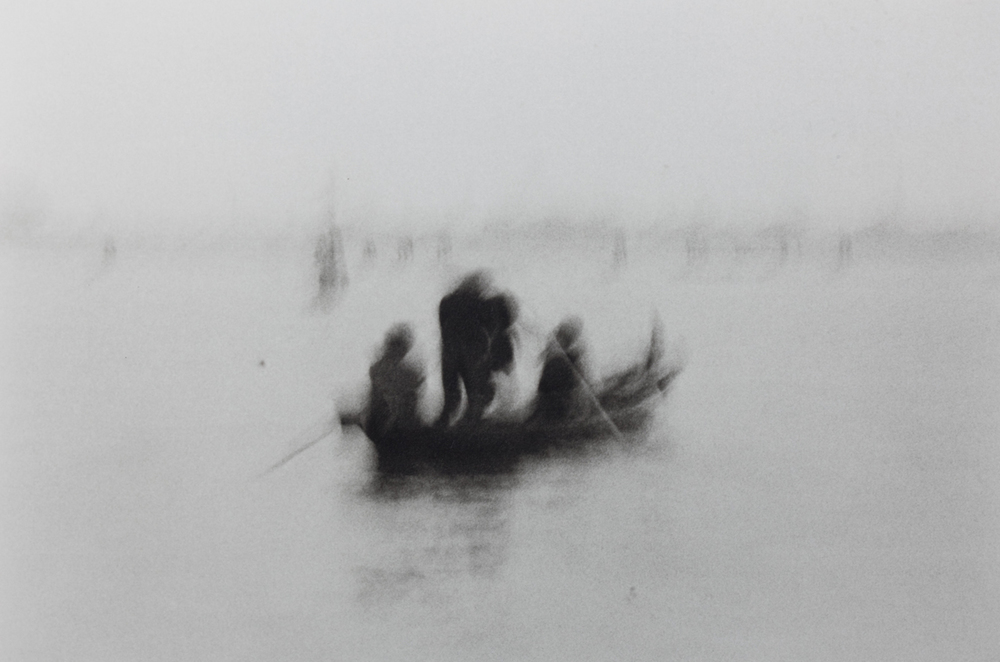 Photo Credit: Richard Copeland Miller
 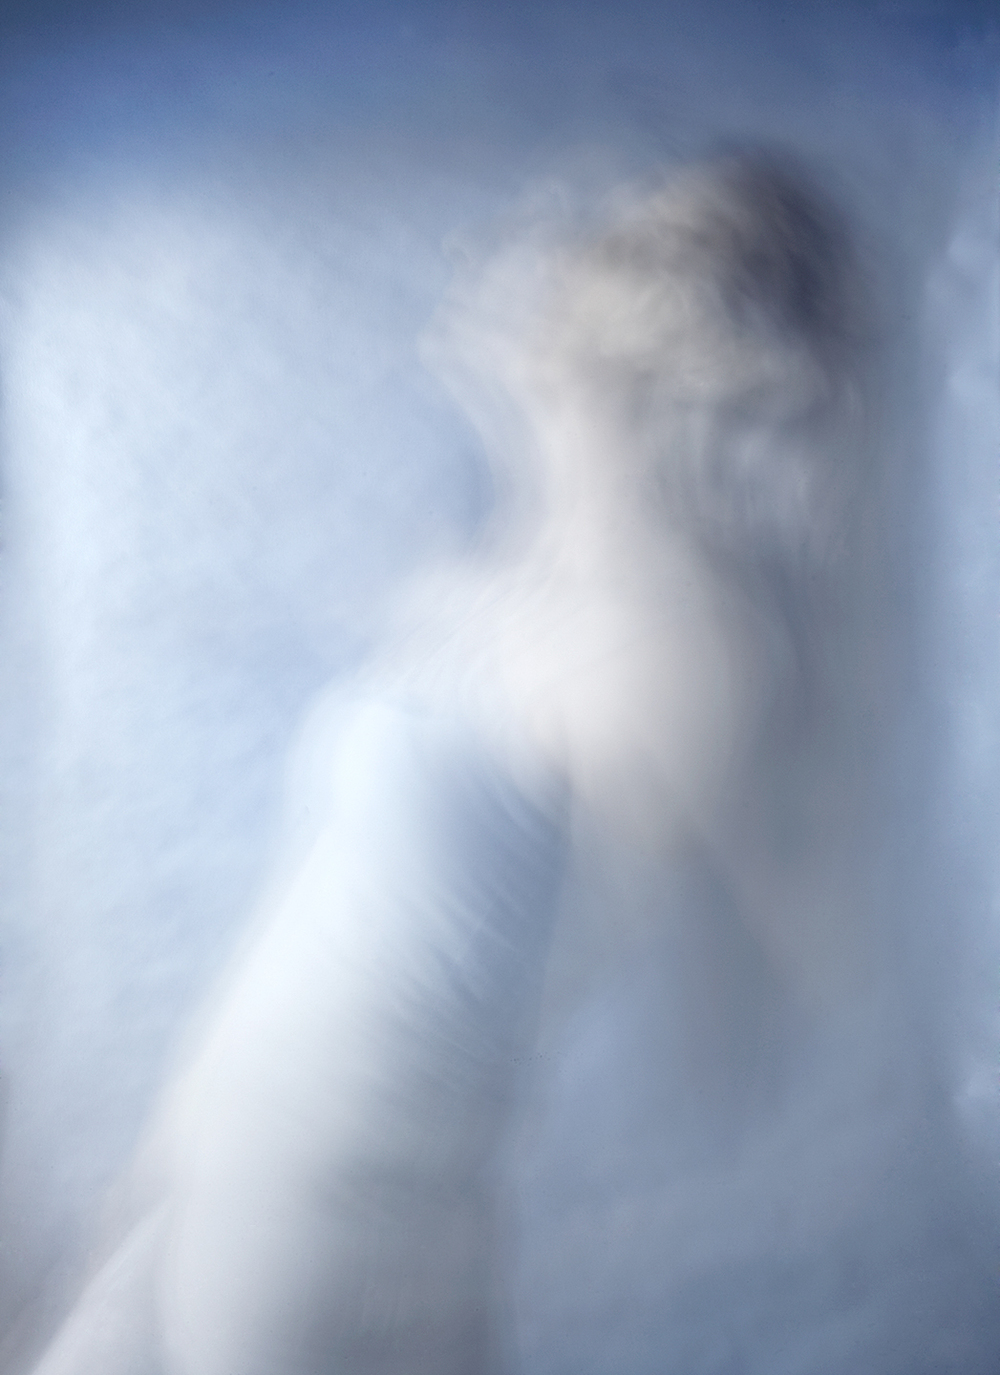 “Ephemeral” by Cathy Dutertre
Cathy Dutertre has made extensive use of extrusive time with several of her current projects, “Behind the Veil” and “Behind the Mask”. Using a tethered stationary camera, she will produce a performance (another academic term that designates a sub-genre of self-portraiture) together with various props in order to arrive at highly expressive images. The exposures are often in the 30 second to several minutes’ ranges, the tethering allows her to adjust her movements in order to arrive at a precise artistic outcome.
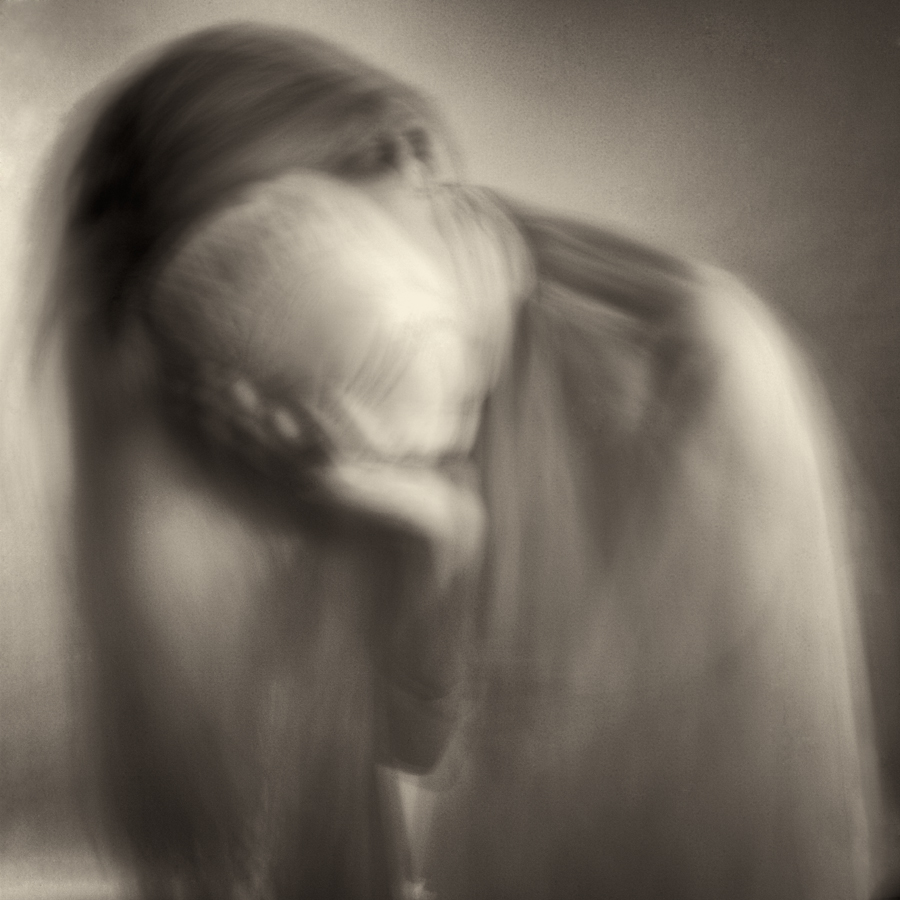 Photo by Cathy Dutertre, 2014
 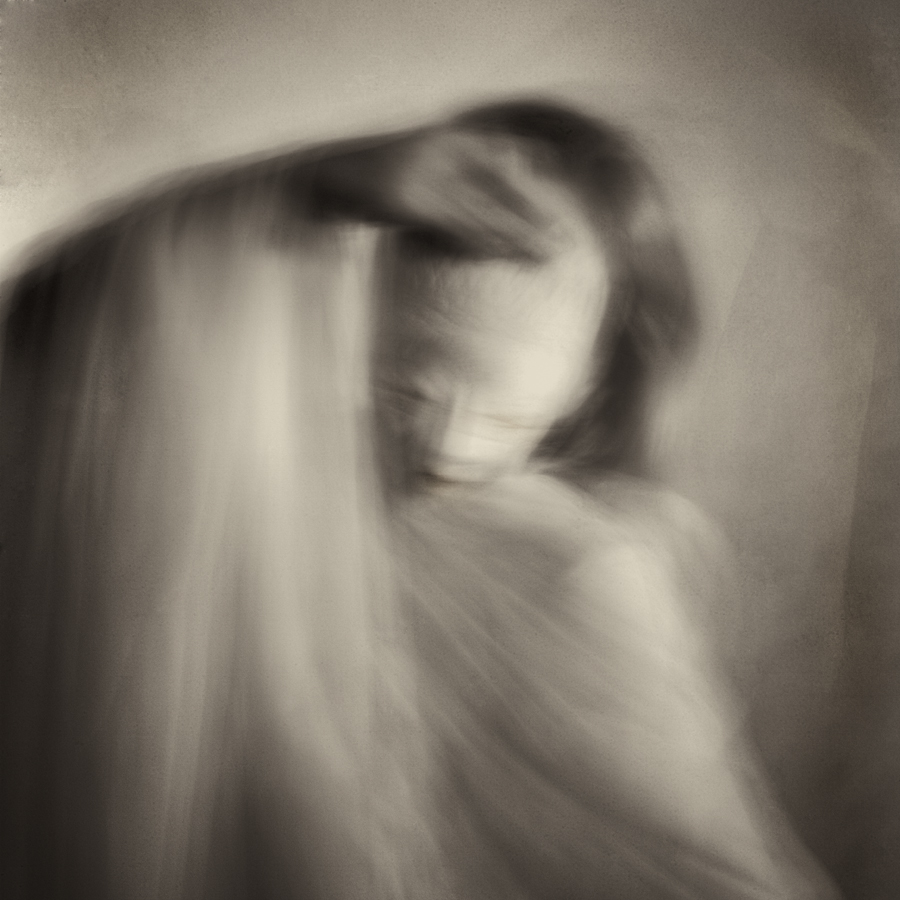 Photo by Cathy Dutertre, 2014
Another aspect of illustrating movement resides in the camera’s movement during capture, the act of altering and deconstructing the scene using a variety of techniques including ND filters, variable movements of the camera and rear sync flash.
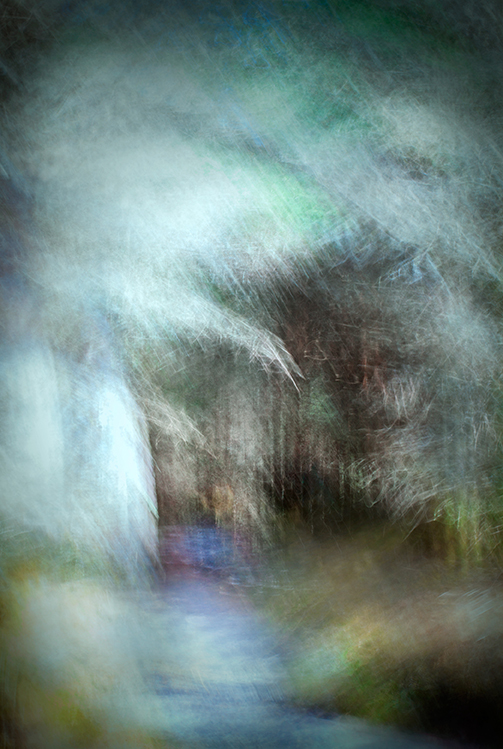 Photo by Cathy Dutertre, 2014
 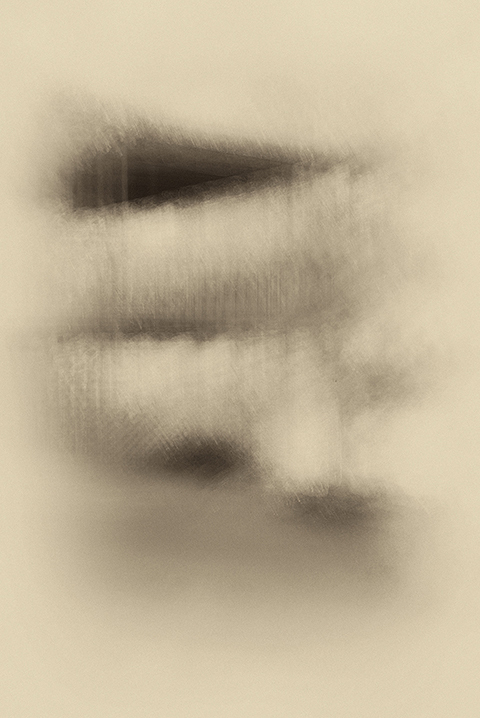 “Chinoiserie” by Cathy Dutertre
Using movement, either from the subject or the recording device can be extremely emotional as the viewer re-interprets the image from a mental and emotional rather than physical points of view, whereas the use of extrusive time allows the artist to remodel the world at large, exposing the viewers to the astounding ability of the medium to record the passage of time.

by admin
Photographing the Night
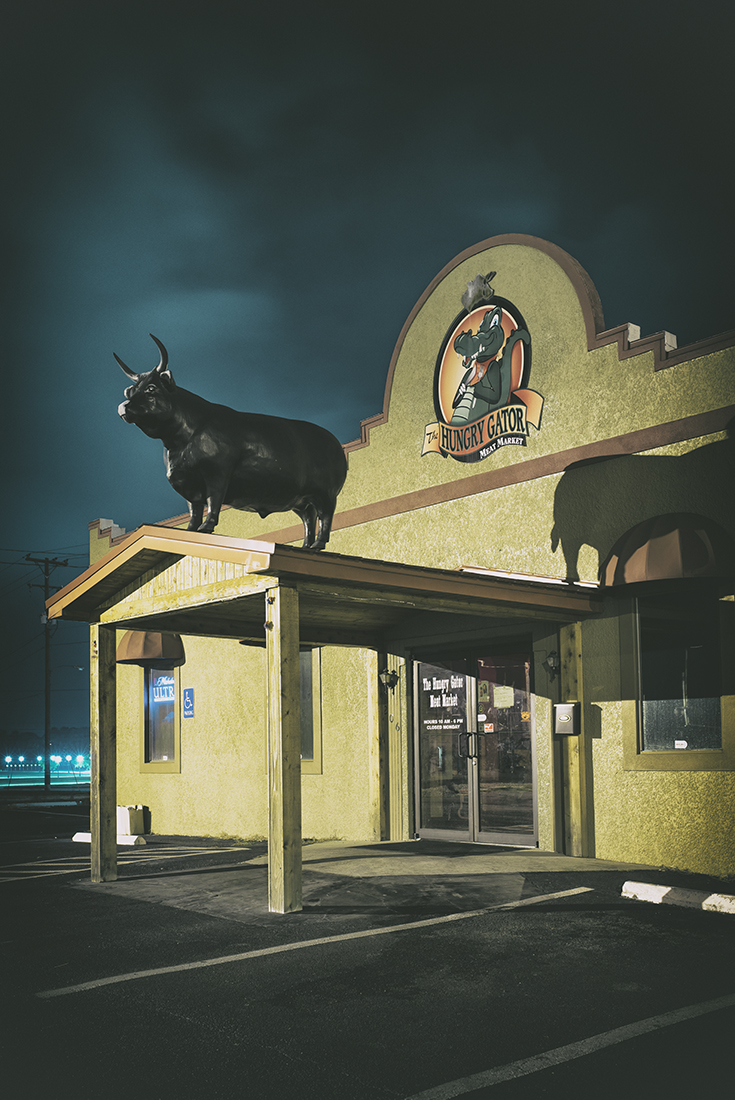 Hungry Gator & Bull
Ah, night photography. Camping out under the open sky, recording trails as the stars creep across the heavens, exposing the glorious Milky Way as only a camera can see it…
Nope, that’s not happening in the city!
A Persistent Love
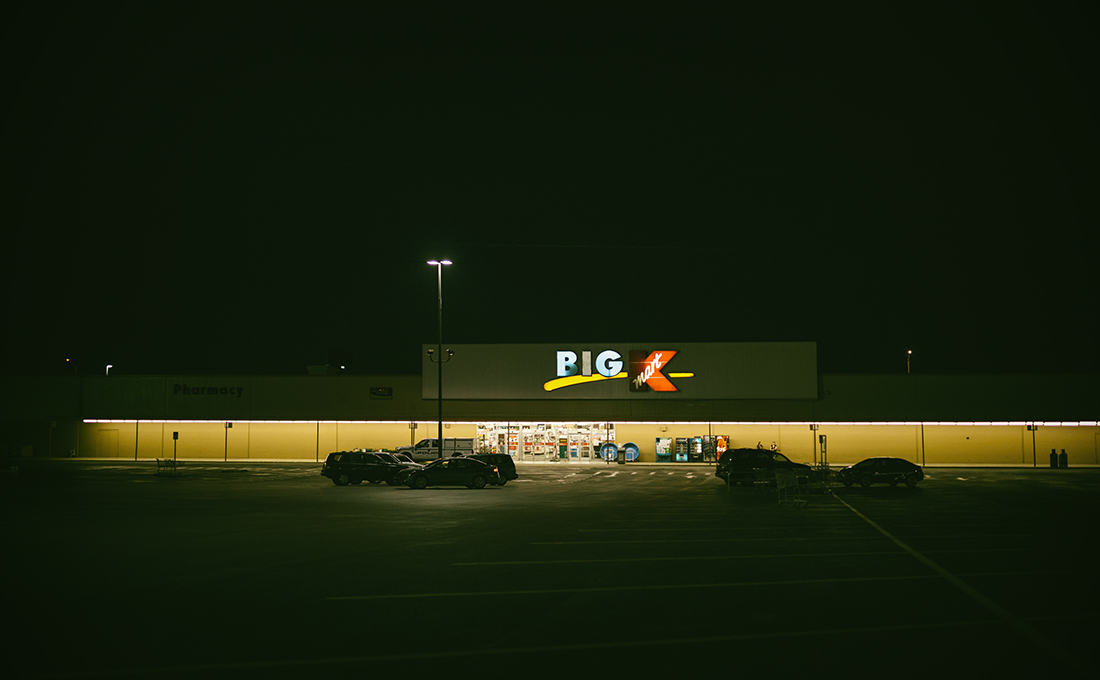
One of my favorite kinds of photography to both create and view is nighttime exposures of urban light. I have always felt such an affinity for the nighttime. By nature, I’ve always been a bit nocturnal, at my best after sun down. For this reason, nighttime urban photography exists within a deep affection that I may never let go of. Prowling around when the sun has hung up his hat for the night, the light and shadow begins to play in an artificial dance under the street lamps. Photographs made of the night hold such mystery and magic for me. Shadows become distorted, colors become surreal, static scenes whisper a different story than the one they assert in daytime.
Below are two examples of daytime versions using some of my favorite nighttime photographs as guides.
 4PM versus 4AM, Day & Night Opposites
 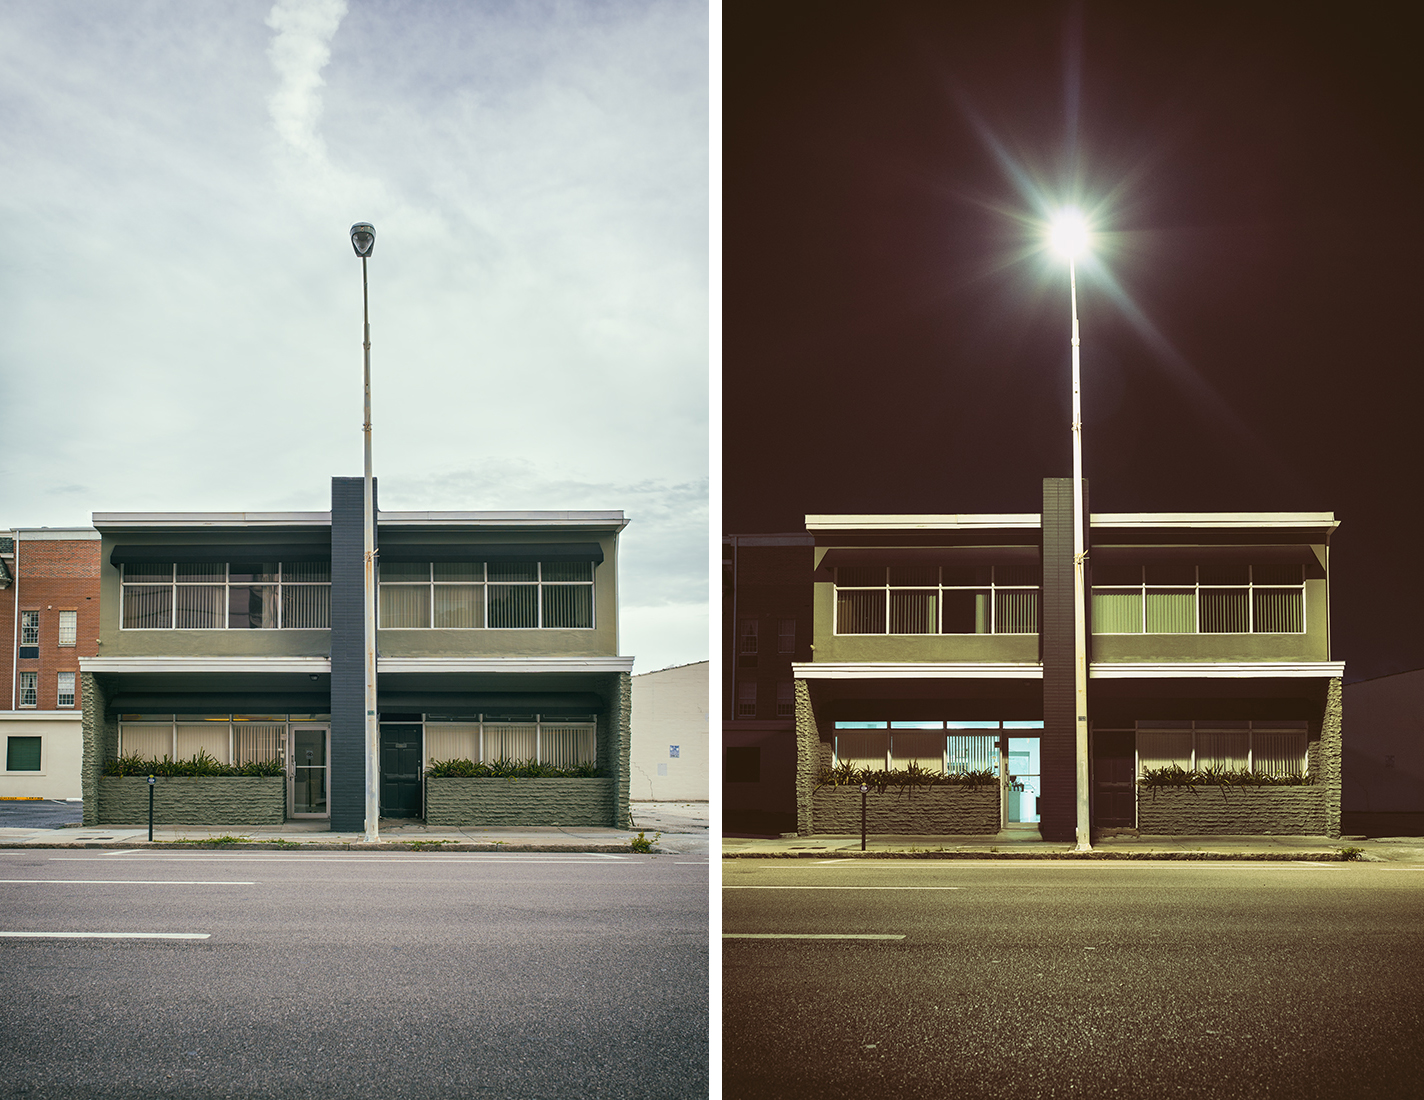 Day & Night Opposites, Featuring the photo “Lure”, by Linz Welch
Looking at these comparisons, the daytime counterparts don’t hold the ambience and clandestine personality I seek. The stark atmosphere and deep darks of the evening versions call for my investigation. The photos in daylight just seem more still and obvious in their existence to my eyes.
My Trusty Steed
During the night, one of the most important pieces of equipment for me is a solid, yet packable tripod. A good tripod is integral to my style of photograph creation at night, as most of my nighttime exposures are from 15 seconds through 4 minutes. I tried many models of tripod before finally discovering my beloved 3 Legged Thing. This is a really gorgeous and understated tripod. It remains versatile, while being just enough unlike other tripods to feel like it is more than only a utilitarian item. On that note, I’ll stop making verbal love to my tripod here, and save the review for later.
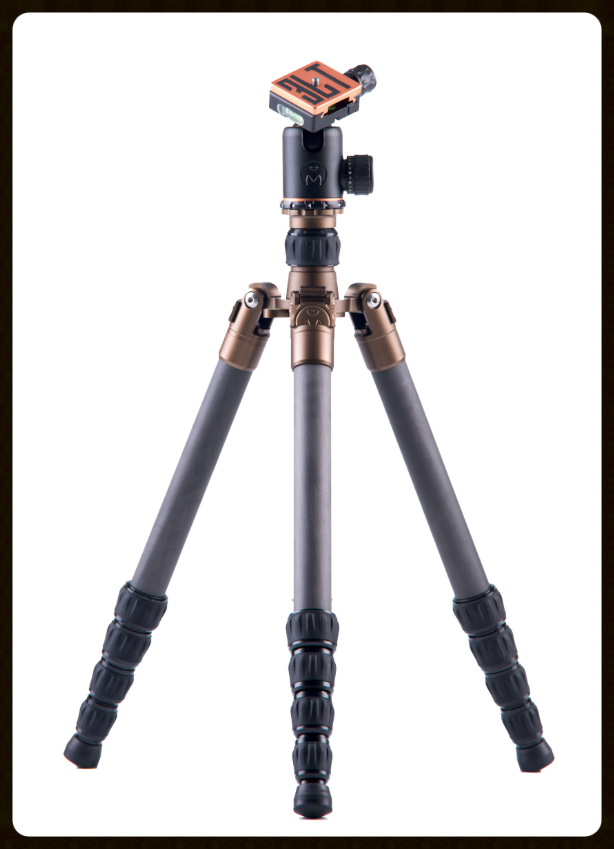 3 Legged Thing: Eddie
The two most important aspects of this tripod choice are that it is carbon fiber and only about 16.5″ folded. Carbon fiber is important because it resists transmitting vibrations up through the camera while remaining much lighter than other materials. The solid foundation stops speeding traffic from causing shake to my longer exposures. Carbon fiber is also ceases vibration faster than metal, so wind and camera shutter slap is more easily damped. The small size and weight means that it can fit inside my backpack, allowing me to carry only one bag which makes those long treks through the sub-urban jungle more bearable.
Another piece of equipment you will find in my bag is actually the one you won’t find. I almost never use flash in my night exposures, preferring to work with the conditions as I find them.
In The Best Light of the Light
When creating photographs that include light sources, one of the most essential aspects to me is rendering the visual character of the light as I see it in my minds eye. For this reason I choose to almost always stay within the aperture ranges f/5.6-7.1 despite loss of depth of field and complete sharpness throughout. While this exact setting can vary dependent on the lens’s construction, this is what is true of the lenses I am currently using. However, what remains always true is: the smaller the aperture (higher number, ex f/11) the sharper the light appears when it enters the lens; and the larger the aperture (smaller numbers, ex f/1.4) the more hazy the light, as it has a larger opening through which to enter.
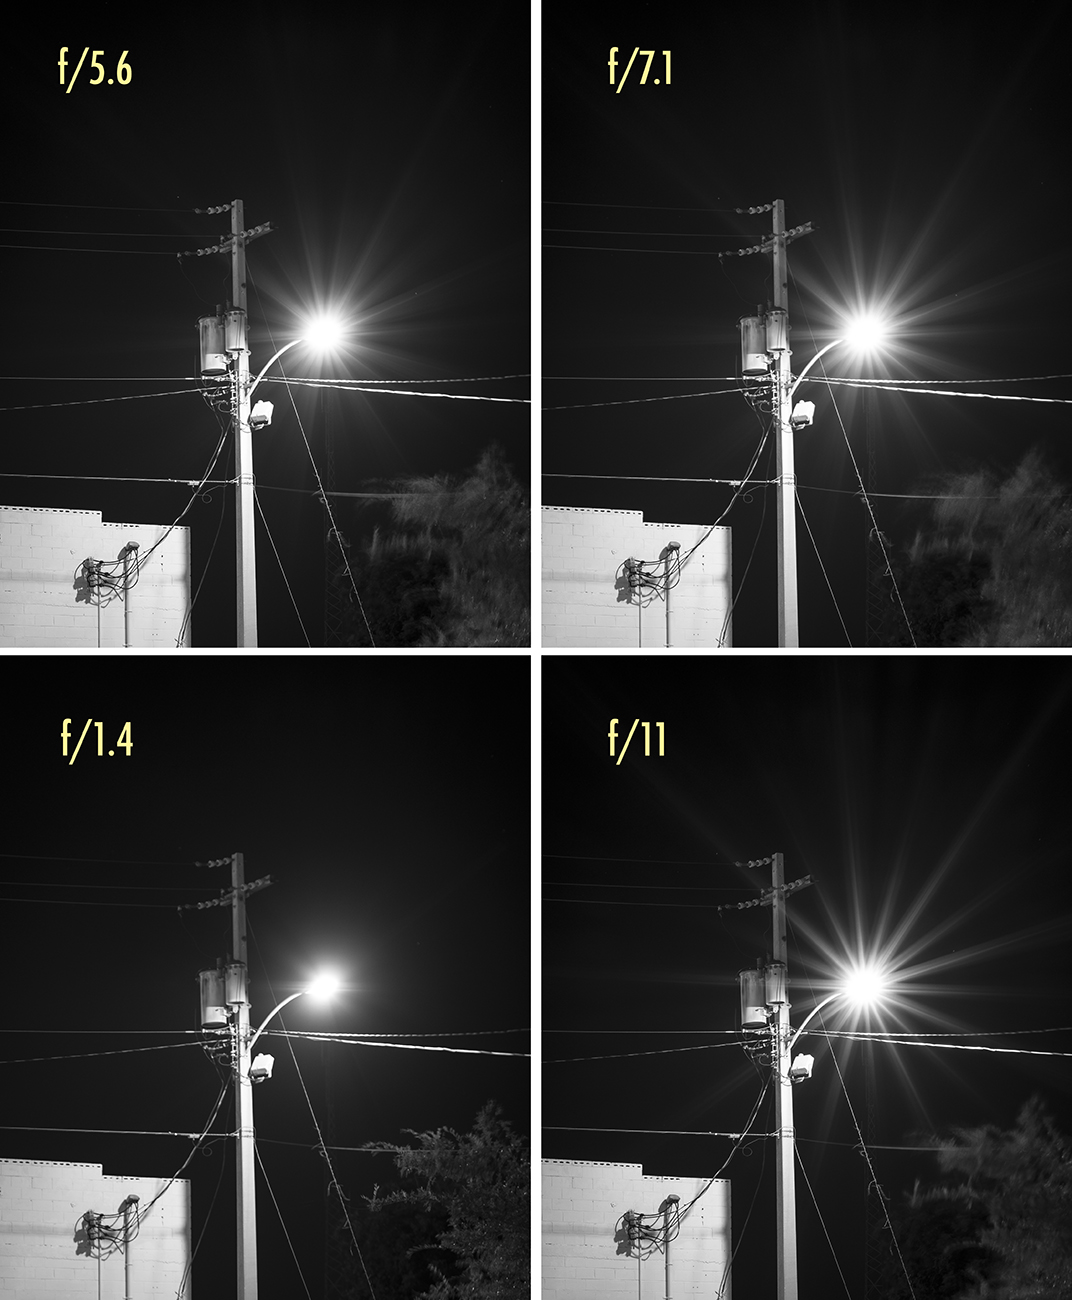 A Comparison of Different Flares
As shown in this picture, the top two examples at f/5.6 and f/7.1 are the kind of light source flare that I am simply in love with. It just barely begins to form a star while remaining slightly ethereal and equivocal. In the example for f/1.4, the light source has no personality; it just sits there and adds nothing of itself beyond the light in the scene. In the f/11 example, the star effect feels too abrasive; too sharp and defined, it begins to call all attention to itself as its shape geometrically contradicts all other forms in the photo.
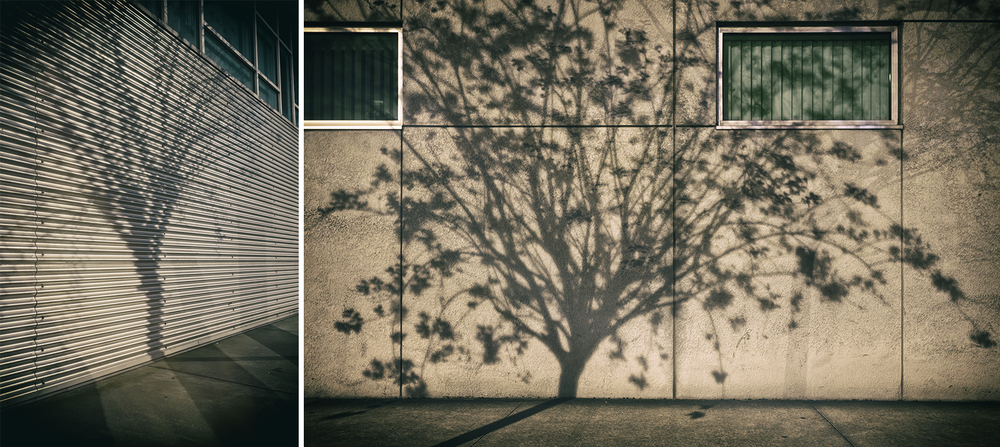 Nighttime Shadow Trees, Featuring the photo “Stand”, by Linz Welch
A Few Tidbits To Remember
Having my ideal aesthetic and foundation in mind, there are a few more pieces of advice that are essential to a night of photographic urban safari. Below is a list of things to consider when setting out with a camera after sundown.
-
Do use a tripod and remote, or the camera’s self-timer.
Touching the camera while activating the shutter button can cause unwanted blur.
-
Do be aware of surroundings and never be in the way.
Sometimes photographing empty areas at night can be a bit of a risk, be aware of who is around you and evaluate potential risks. The sad truth is there are people out there that might take the opportunity to run away with your gear! On the other side of the equation, be aware that when deploying your tripod, you don’t want to hinder vehicle or walking traffic around you, or cause people to trip on your tripod. It’s best to find an unobtrusive area you can hang out in, thus allowing you to concentrate on capture.
-
Do look at the way the light changes the subject.
You don’t have to have use street lamps necessarily, but interesting lighting conditions are optimal studies for the conditions that are only available at night.
-
Don’t expose for the subject, but rather the quality of light.
The object here is to do the most justice to the light itself, with the exposure of the subject being complementary to the light.
-
Don’t be afraid of the mundane, sometimes the simplicity of the light is all that’s needed.
At times, simplicity wins; all of the interesting angles and perspectives can’t compete with good old fashion geometry. Don’t be afraid to try the obvious approach.
-
Don’t be temped into high ISO settings.
The lowest ISO and long shutter speeds will maintain subtle gradients and dark tonalities. As noise or grain in the media increases, details can become mushy and unique nighttime tonalities can be lost. Don’t be afraid to open the shutter for several minutes or more.
 “The Path of Night”, by Linz Welch
Into the Night
I hope you’ve enjoyed reading my approach to stalking around in the dark. As you can see, not all photo adventures need to take place in waking at 6am, and some of the real jewels only become apparent in the evening. Our modern days are so busy, and full of running from here to there, that we often forget to enjoy this world of artificial light we have created for ourselves. Of course with it, all the stars of the heavens are missing in action as more sprawl brings more light pollution. Finding stars for photographs means venturing ever farther away from home for many. However, rediscovering the uniqueness of the world of man, as seen at night, means adventures can also be found in just a few steps outside.
Well, what’re you waiting for? Get out there and lose some sleep to the glory of night photography!
 “Pig < “, by Linz Welch

Recent Comments