
by Pierre Dutertre
In the first part we explored the foundational keywords associated with formulating a concept, The What and The Why.
In this section we will focus our attention on The How and The Who, namely how is the medium of photography specifically used to create images that support the overall concept, and finally who is the audience for your work and what type of presentation is needed to completely resolve your concept.
The HOW is a crucial process in the full realization of a concept, choosing the right tools and methodology in order to create photographs that are completely substantiated by a specific process. Rather than using whatever tool you have at hand, as a convenience approach, one must be able to decide what aspect and limitations of the medium are most appropriate to your conceptual involvement. In other words, perhaps a film based camera system may yield the results sought, over a perfect and sleek 35mm DSLR, or an alternative process such as Cyanotypes, Van Dyke Browns, platinum prints, the wet collodion process and so on could enhance the aesthetics and linguistic message embedded in your concept approach. A good example of such a radical approach can be seen in the wet collodion images of Sally Mann, with their eerie and mournful exploration of the past culture of the Deep South. The optical and physical flaws of the process are embraced by Mann to imbue a sense of time deconstruction and nostalgia.
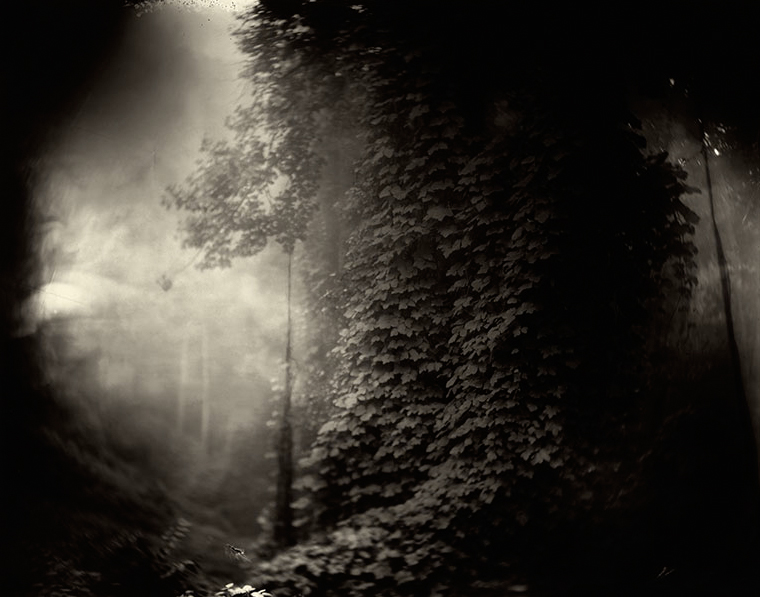 Sally Mann, In The Deep South, 1996, wet collodion process
Keith Carter is another established artist who uses a rare system made for architectural photographers years ago by Hasselblad with the ability to swing, shift and tilt the front lens in order to correct extreme perspectives. However, Carter uses this camera to precisely create narrow fields of focus in the scene for expressive and creative purposes.
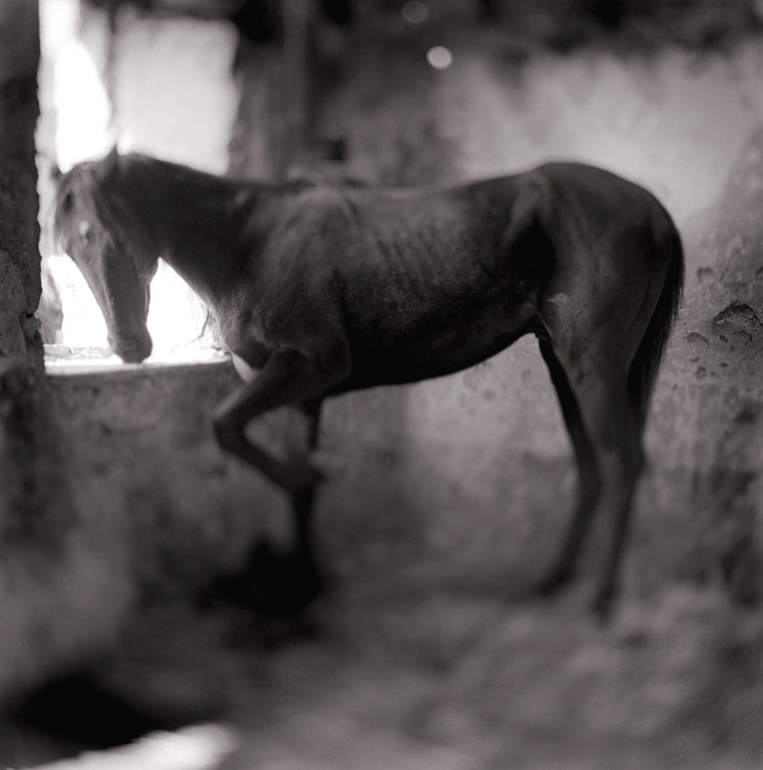 Keith Carter, young stallion, 1998
  Hasselblad Flexbody system{C}
The expressive and moody nature of Carter’s images was reinvented for my Deep Forest project by creating a medium format digital camera that replicates the Hasselblad system, using several flawed components, an older digital back with the whole system not designed for in the field use. Yet, the aesthetics created by this home-assembled camera were the exact results needed to support the narrative and medium-based conceptual intents, not an easy task but one needed to effectively articulate my concept visually.
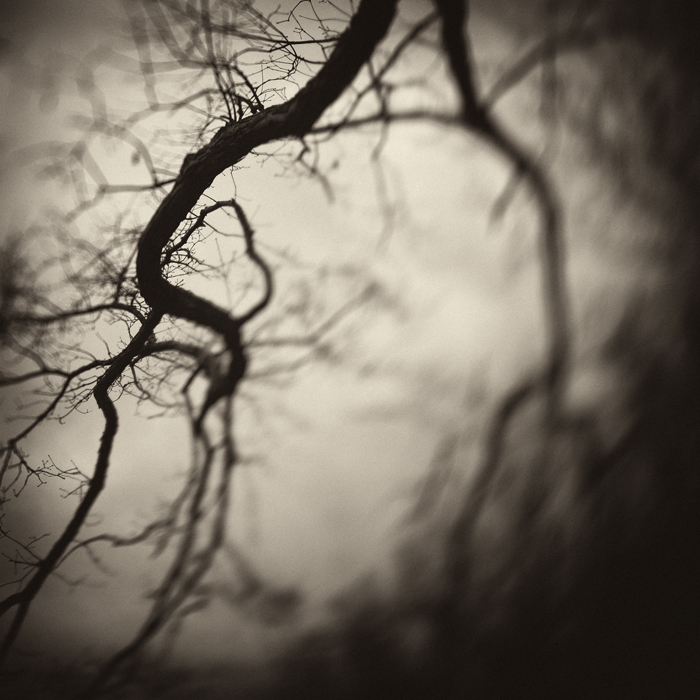 Pierre Dutertre, Fright, 2012{C}
 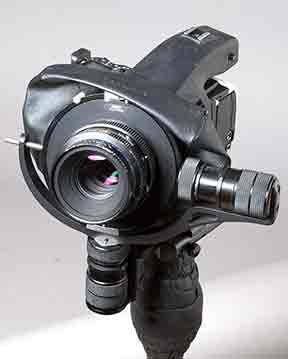 X2Pro with flawed Phase One P25 back, broken Mamiya RZ lens
 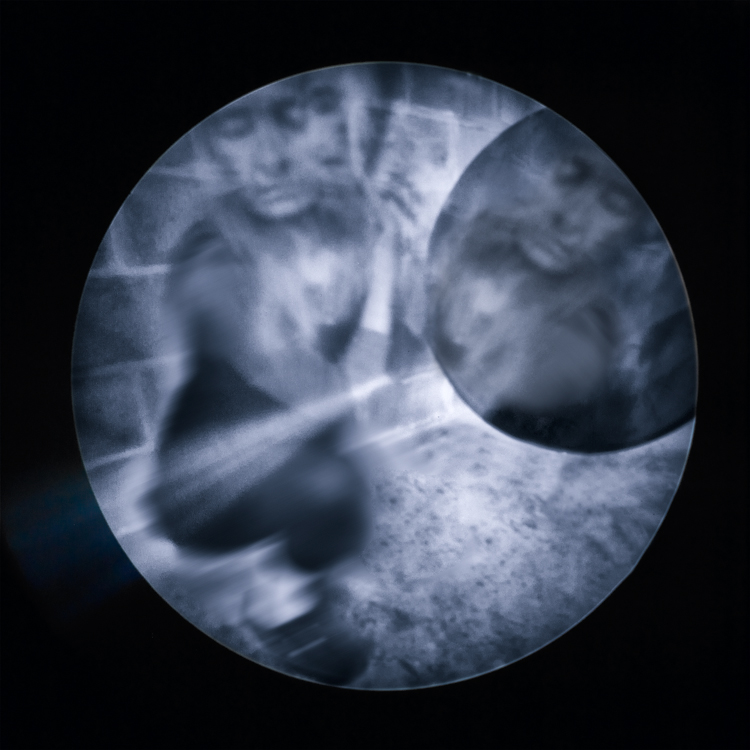 Cathy Dutertre, Foresight, 2013
 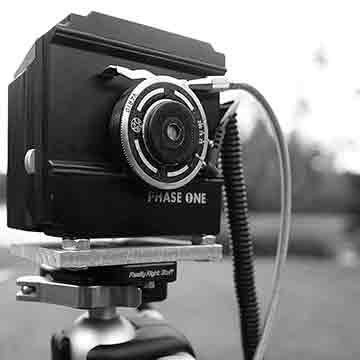 Homemade pinhole medium format digital camera
There are an almost infinite amount of decisions to be made when resolving the HOW:
What kind of focus will you be using? Sharp, soft, out of focus, partial planes of focus?
What kind of time? Frozen or slow shutter speeds, long exposures?
What kind of camera? Analog or digital, 35mm or larger formats, toy cameras, home made cameras? Flawed systems? Pinhole?
Black and White photographs? Color? Manipulated colors? Polaroid?
What vantage points?
What kind of light? Hard, bright or subdued? Night photography? Inclement weather?
What kind of compositions? Busy or quiet? Frenetic or silent?
What kind of framing? Active or passive?
As with other decisions made during the concept planning stages, the HOW is often a complex approach requiring research, innovation and some budget. Most likely you will need to experiment with the aesthetics of the images until you arrive at the perfect solution to resolve your visual intentions. In my case, it took almost a full year before I was able to build a system that allowed the desired aesthetics to support my narrative, after experimenting with view cameras, perspective correction lenses and a lens baby that was simply too imprecise.
Last, We also need to resolve the WHO, namely your audience and presentation. Knowing your audience before you begin a project can be a difficult task if the concept is medium based, such as abstractions or classical landscapes, thereby of appeal to the masses, as opposed to social documentaries, environmental issues or a feminist / gender bias, in which case your audience may be more refined. Ultimately, one needs to discern if your audience is clearly refined and in which geographical areas, where are they likely to view your work and who is potentially a buyer or collector of your work.
The location for the presentation of your images will impact your display decisions: Are you seeking a large gallery space? A museum? An intimate location? Are you printing your images very large for a visual impact? Or very small for an intimate connection with your audience? Are you going with a classic framed presentation or an installation? What kind of lighting are you faced with in the exhibit space?
These decisions are also likely to affect your choices of equipment, insofar as printing an image at 6’ by 10’ will likely require a high end medium format camera for the original capture whereas a 10” by 10” print from a cell phone could work equally as well. This leads us to consider the all important budget question. The greatest portion of your financial decisions when developing a concept resides in the final presentation method. An average size 20” by 20” print, matted and classically framed to 30” by 30” can cost around $300 plus, much more if you use the exotic but amazing Optium optically clear acrylic glass at around $600 per frame. If you have a solo show at a gallery with say 30 pieces, your initial investment is around 18K plus shipping, insurance and packaging. Again, this kind of research is important to refine during the concept development, but not as a roadblock necessarily. Cheaper presentation solutions are available and digital only showings are perhaps appropriate, although I am a firm believer that photography is never quite finished until it is printed as a firm and permanent surface for viewing. I would also say that presentation is a key link on how a concept is viewed and received by your audience, yet that step is often ignored altogether by emerging photographers who scramble at the last minute after their work is accepted into a show (crowd funding is slow and unpredictable for such a posit).
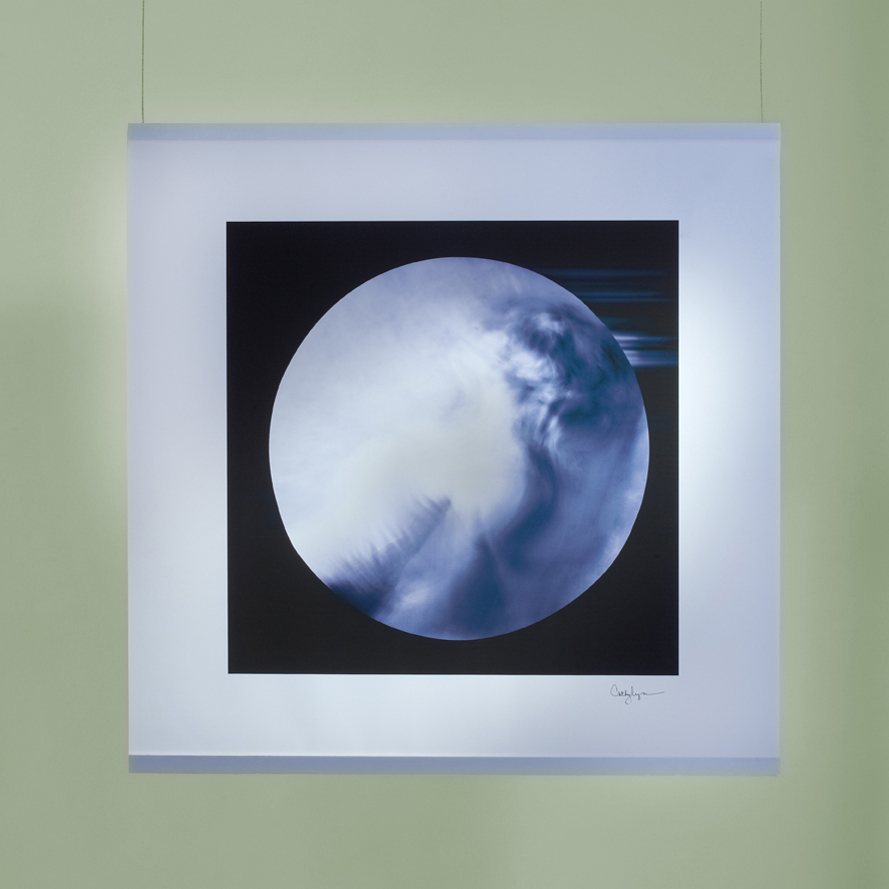 Cathy Dutertre. Installation using large images printed on semi transparent fabric, suspended by steel cables in a 3-dimensional space, back and front lighting, multiple heights and free standing. The passage of the viewer between the images will create a gentle wind motion and a soft sway of the prints.
 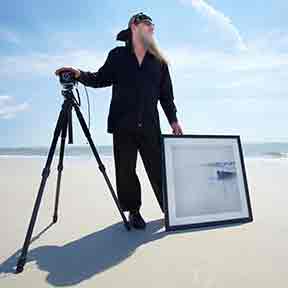 Pierre Dutertre, classic framed presentation, captured in the environment.
In conclusion, what separates a confused photographer from an emerging artist resides firmly in the application of a concept onto the work produced. From random images (nothing wrong with great single images, as they may well lead to a subsequent concept) to a body of unified and intellectually resolved images, lies the process of establishing a concept for your work, a direction or operations manual. It does not need to be a roadblock, or an impossible pre-visualization, an unwanted school essay or a tedious task. It however needs to be established BEFORE you begin creating images, as the only path to creating bodies of work that will surely help you grow artistically and intellectually within the medium. Your intellectual and research investments in creating a solid concept(s) will always result in growth and surprising outcomes on many occasions.
Now, let’s see you become image-makers, rather than image takers.
Pierre Dutertre conducts extensive workshops, entitled Journey Through Personal Creativity, on the topic and application of a concept based approach at the Florida Museum of Photographic Arts.
Posted by Pierre Dutertre in concept-based photography
by Pierre Dutertre
It never ceases to amaze me how many of the photographers I have taught in a variety of settings over the years approach the creation of photographs in a chaotic and reckless manner. Having packed a bag full of gear, lenses and accessories equivalent to a US Marine backpack, most photographers venture out with 16 gig media cards with absolutely no clear intention as to what they are attempting to do. After thousands of captures of inconsequent subjects with no predestined direction they return to their computer caves and attempt to “find” a good image, the posit residing in the foolish belief that if one takes many images, one photograph is bound to be good. Certainly, there exists a chance element in photography, but that is akin to relying on winning the lottery for your weekly groceries or future retirement.
What clearly separates the amateur photographer from an emerging or established artist is the application of a concept-based approach to creating a body of work that is intellectually as well as technically resolved, unified and presented in an engaging and appropriate manner. Such an approach begins with establishing a concept, the physical, intellectual and emotional answers to 4 key questions: WHAt are the intended images about, WHY do you want to create these photographs and what is the desired response from the audience, HOW will the photographs be produced to fit the concept, WHO is your audience and how does that impact these previous decisions?
All these decisions must be made BEFORE you even consider the process of taking the photographs that will support the concept.
The WHAT is the first question: Is the concept linguistically driven, the use of images to communicate a story, statement or idea (Cig Harvey, Julie Blackmon)? Or is the concept medium-based, when photography takes precedence over any message conveyed and the beauty of the image reins supreme (Ansel Adams, Clyde Butcher)? Some concepts use a mix of the above approaches, but there is always a predominance of linguistic or medium-based elements. You must also identify the literal subject matter, the real message communicated behind the photographs, as opposed to the actual subject in front of the camera. For example if you seek to illustrate poverty in America it would be simple to capture poor people, the homeless, shelters and food banks as easily identifiable subjects. On the other hand, a different approach could use images of the ultra wealthy, mansions, exotic cars, exclusive parties and so on, effectively demonstrating the gap between the poor and rich. The literal subject matter in this case is still a social study of poverty and inequality, with the actual subject being the excesses of the wealthy as a contrast that carries the intended message. In addition, you must be clear in your intentions: Do you seek to simply depict your subjects, or create a personal statement? Is your concept purely medium-based in its depiction of nature or abstracts, or is illustrative of specific social or environmental conditions? What other artistic influences impact your concept, other photographers, contemporary or historical? Do painters, sculptors or writers also influence your artistic vision?
The WHY is a deeply intellectual search for your artistic intentions: Are you just recording the scene or situation at hand (being aware of the limitations and transformative powers of the medium)? Do you seek to communicate a specific message through images? Are your images completely constructed such as still life or complex sets (including Photoshop generated or heavily manipulated imagery)? These decisions will lead to the next stage, your intended outcome for the work: Do you want your imagery to be persuasive, to change opinions or expose conditions (socio-economic, environmental, conflicts, cultural)? Do you wish for your work to become reflective, exposing your viewers to new situations (people, places or things) or your own personal visual and intellectual vision? Lastly, do you want your audience to experience the images themselves, as works of art, a mixture of personal technique and aesthetics?
 Pierre Dutertre, Weeping, Deep Forest concept, 2012
The WHAT: a medium-based concept with a strong linguistic undertone. The subject matter resides in the trees and the forest scenery, the literal subject exists within the primordial fears humans experience and project onto the environment (loss, death and life after death). The images are both expressive and form-based.
 Pierre Dutertre, Barren, Deep Forest concept, 2012
The WHY: a communicative project that approaches personal anxiety, existentialist questionings and depression. Intended to be reflective and experiential, the images offer an alternative view of nature as I relate to the environment, projecting a personal psyche onto the world at large. Influenced by Edgar Allen Poe, Jean Francois Millet, Keith Carter and Richard Copeland Miller.
In the second part of this blog, we will explore the HOW and WHO, using the Deep Forest concept as well as several others, including some collaborative work with Cathy Dutertre.
At first you may find these concept ideas overly complex or futile, but the Deep Forest concept was fully resolved and explored at length from an intellectual point of view BEFORE the first image was ever created. In effect, having a solid concept before you undertake taking any photographs is the key to becoming an IMAGE MAKER rather than an IMAGE TAKER.
More to come in part 2 next week.
Posted by Pierre Dutertre in concept-based photography

by Pierre Dutertre
The realm of infrared electromagnetic wavelengths begins close to the red visible light and continues from 750 nanometers up to 1000,000 nanometers within the deep infrared segment, also known as FIR or heat seeking cameras for law enforcement and military applications. In terms of photography, filters start close to visible light (with some odd color renditions) and progress from 665nm, 720nm and 830nm as the deepest filter usually available with practically no ambient color captured.
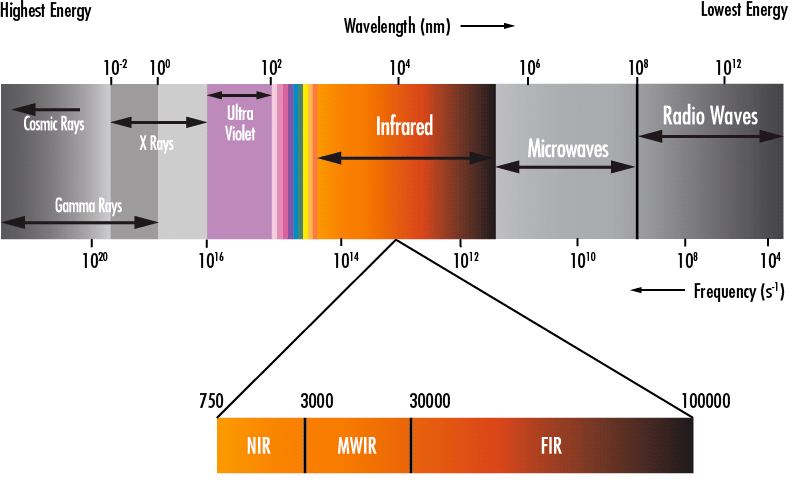 Electromagnetic wavelength chart
Traditionally, an infrared filter can be applied to an unmodified digital camera but it will result in average results due to the existing IR and UV filters already applied to digital sensors that will negate the capture of infrared wavelengths to some extent. In addition, and beyond the 6 or more stops of sensitivity losses, the camera must be fixed on a tripod and the scene framed before the application of the filter that will render the viewfinder useless due to its extreme density.
The alternative resides in having a DSLR permanently modified by first removing the IR and UV filters already present in the sensor and subsequently attaching an infrared filter. This is a complex operation, relatively expensive, but one that can be reversed in the future with an additional investment. Due to the very delicate nature of this process only a few labs can successfully actuate this modification in a clean room environment. http://www.lifepixel.com/ is a reliable company that we have used on several occasions, offering many different filter wavelengths for a variety of results (many of which will quickly become a novelty and mundane after a short while).
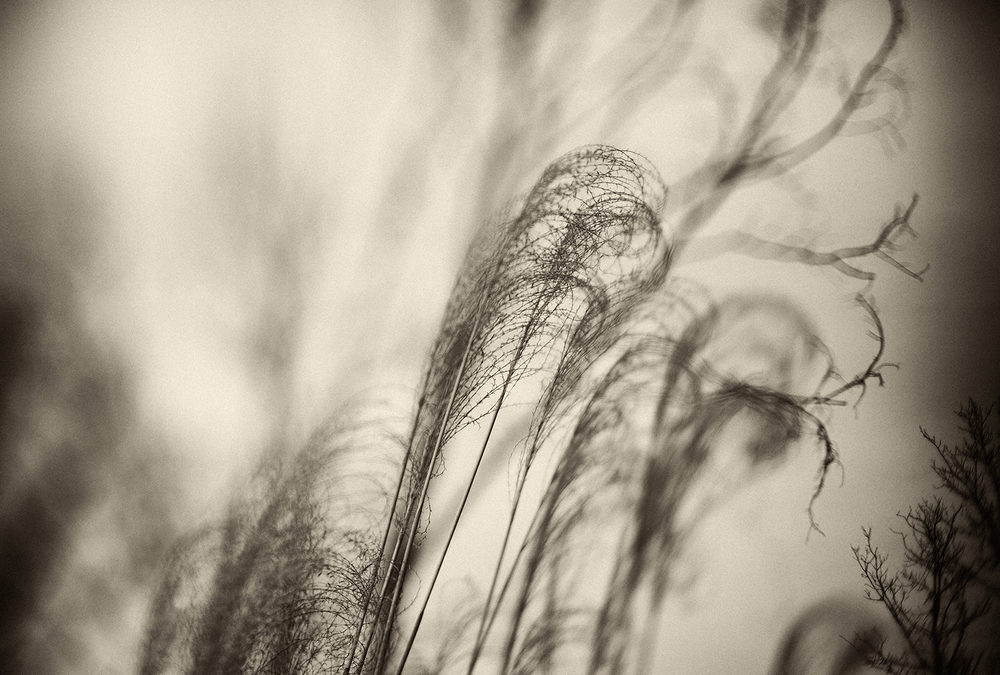
 Pierre Dutertre, 2012, Canon 5D, 720nm, 35mm lens
The drawbacks of a permanently modified IR DSLR are worth mentioning. Besides the loss of sensitivity, roughly 6 stops of exposure and an increase in noise, the infrared wavelengths do not fall on the same plane as visible light. This necessitates the operator to manually adjust the focus very slightly clockwise (from the photographer’s point of view behind the camera). Many lenses have a small red dot as an indication of the shift in focus. Auto focus lenses are tricky to get the focus right and work better in manual focus mode. However, Lifepixel can adapt a specific auto focus lens to focus automatically for an IR image (at additional costs, including shipping), yet this is often a process fraught with uncertain results. Finally, some lenses will produce a hot spot in the center of the frame as a result of the internal coatings of the elements, with post processing as the only remedy.
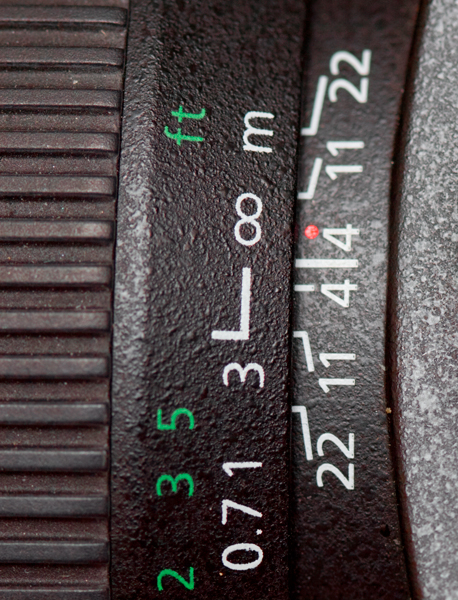 . Infrared focus indicator
Ultimately, the choice of converting a camera into an infrared system must reside within a clear artistic concept, the pursuit of the unseen as part of the magic of the medium. If such a system is used for expressive and creative outcomes, the novelty will not wear off after a few weeks. Keeping to a 720nm or 830nm filters can also prove aesthetically valid, avoiding the weird and false colors of filters with a lower wavelength. Our current IR camera is based on a Canon 5D MKII modified with a 725nm filter made by Jenna Optik in Germany, a very thin filter that produces little noise overall. It is in constant use within many different genres, including self-portraiture. Our preferred lens for this custom system is a Canon TS-E (tilt shift) 24mm f3.5, manual focus that enables precise focus planes in addition to clear infrared images.
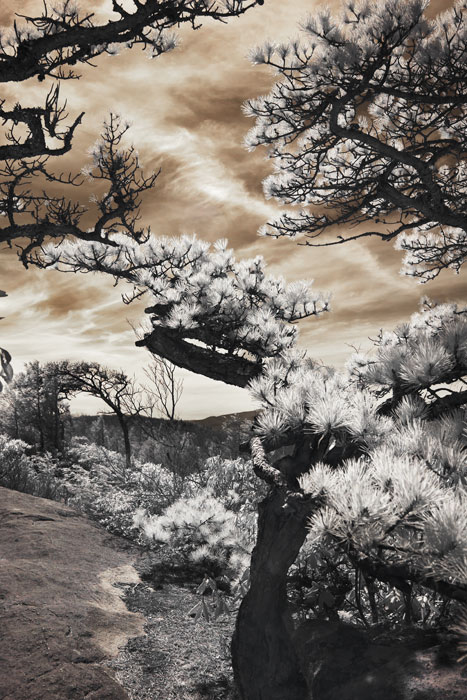 Pierre Dutertre, 2012, Canon 5D MKII, 725nm, 28mm TS-E lens
Using a permanently modified IR camera involves creating a custom white balance, usually a solid green background, and applying it at the beginning of the captures, thereby avoiding a strong pink cast. Different hues of green will also produce varied effects, and to that extent we have a library of custom white balances for variable lighting conditions. Infrared captures are best achieved with strong contrast and a mixture of sunlight and clouds, with anything green in the scene turning pure white; low light produces a completely different effect, more moody and mysterious. Finally, the bronze background color of a 720/725nm filter can be inverted in the channels to a saturated cyan/blue for yet another kind of visual interest
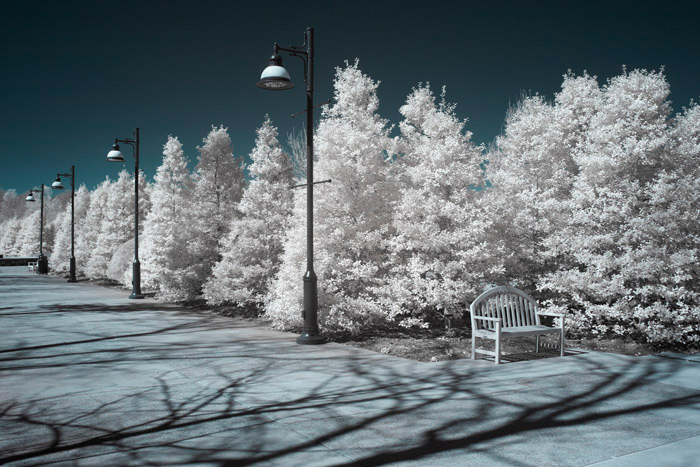 Pierre Dutertre, 2013, Canon 5D MKII, 725nm, 28mm TS-E lens, blue conversion
 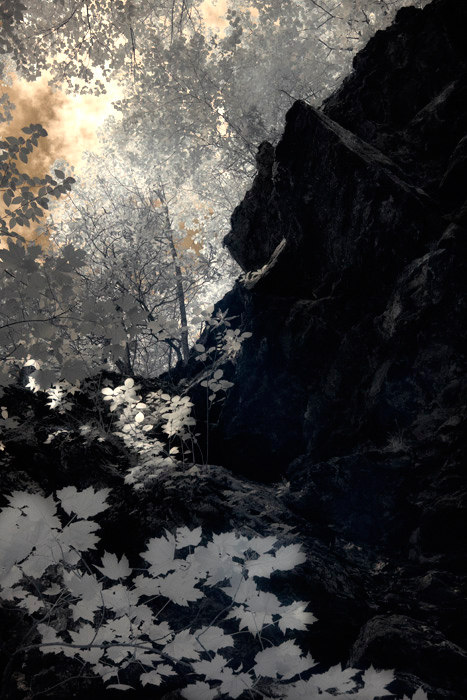 Cathy Dutertre, 2012, Canon 5D MKII, 725nm, 28mm TS-E lens
 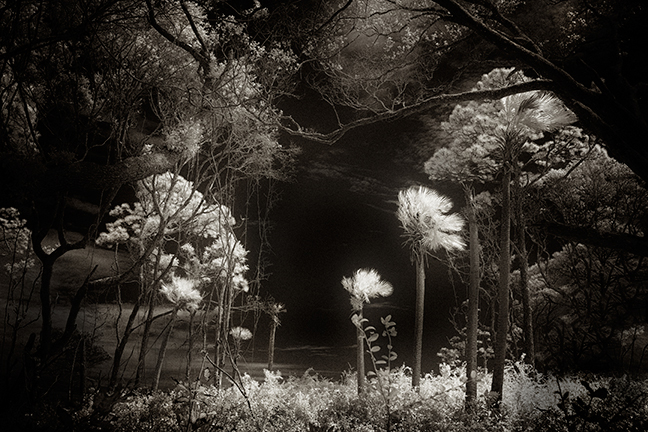 Cathy Dutertre, 2013, Canon 5D MKII, 725nm, 28mm TS-E lens, black and white conversion
By Pierre Dutertre. Artist, Educator, Photographer

Recent Comments