The Daguerreotype & The Calotype: Photography’s Parallel Histories
The Daguerreotype & The Calotype: Photography’s Parallel Histories
The Daguerreotype and the Calotype were the first widely usable photographic processes to be introduced to the world. Each method arriving to the same conclusion though different means of execution, and producing technically different outcomes, both processes would take photography into the mainstream practice that we know today. These methods would both inspire wide use of the camera, as well as present problems for later photographic techniques to solve, taking photography from its early beginnings in the end of the 19th century to the modernity we now enjoy. The Daguerreotype and Calotype have similar histories in similar timelines, but reached their fruitions through a parallel yet contrasted path by inventors of different persuasions. The very makeup of the two methods would go on to create some of the aesthetic building blocks of present photography, as well as influence an era to continue the active invention of ever newer and more practical photographic methods, all while changing the very face of art. What inspired these inventions began with drawing aids, using basic physics man has been aware of for centuries.
Almost as long as there had been artists in the world, devices such as the Camera Obscura and the Camera Lucida took advantage of the natural phenomenon in physics of focused light to render scenes from reality. Constructions similar to the Camera Obscura were described as far back as the 5th century B.C. by Chinese Philosopher Mo-Ti, where a small hole was used to direct the straight rays of light against a wall in a darkened room, creating an image reversed of that found on the outside (Historic Camera). Later, by the 15th century, Leonardo Da Vinci would describe clearly a similar device, now coined by its name as Camera Obscura, that followed the same principals but in a smaller instrument consisting of a wooden box. By the 16th century, a lens is added to the configuration to have greater control of the light entering the device. This Camera Obscura was used essentially as a drawing aid to help artists render their creations closer to the reality they saw via tracing the reflections of light into a two dimensional image (National Media Museum). In 1807 a device possessing a similar principal was patented to assist drawing by Sir William Hyde Wollaston, known as the Camera Lucida, which consisted of a prism at the end of an arm which when viewed from the upper face transposed an image from ahead over the drawing media with which to trace(Garcia and Levin). Both devices helped artists create truer renderings on canvas and paper, putting their artistic vision within closer grasp.
 Basic Camera Obscura Figure (Snelling)
Though these instruments had more humble beginnings as artists aids for the start of a masterpiece, the question recurred: what if the image being show was able to be captured, allowing nature itself to draw the beauty before your eyes? To be able to fix the image so that one may be able to return to that moment again and again. To create what we know today as photography, or painting with light.
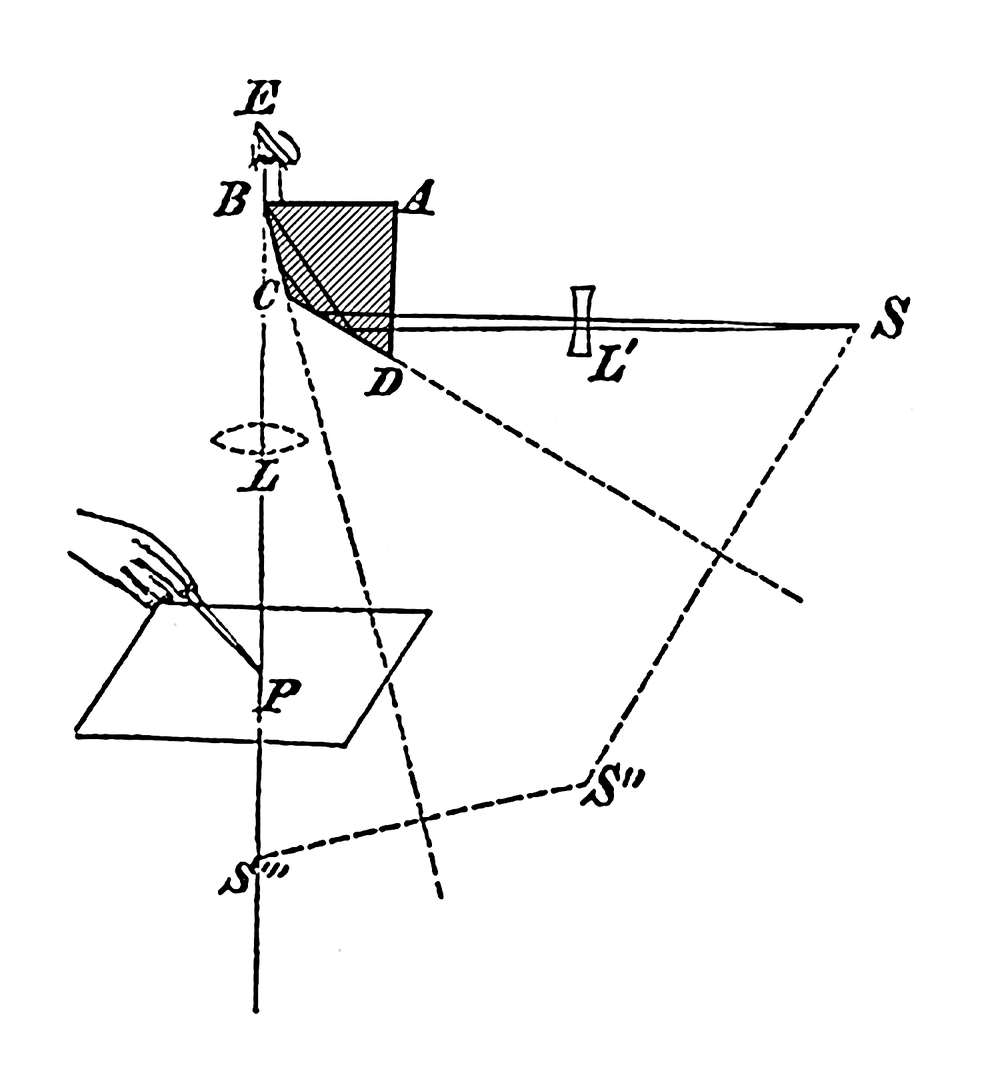 Wollaston’s prism optics, 1807 (Garcia and Levin)
There were many people interested the theoretical invention of what would later become know as photography, and several quite viable attempts had been made prior, but the Daguerreotype and the Calotype were the first to succeed in what we know today as standard photographic process. These two seemingly similar yet wholly different processes came about at roughly the same time in history by two entirely different individuals attempting to succeed in the same outcome; to create a method by which light focused into image could be permanently affixed to a media in a lasting and easily viewable manner. The inventors of these processes wished light to paint what nature saw.
 A daguerreotype portrait of Louis Jacques Daguerre by John Jabez Edwin Mayall , a photographic artist who established a studio in London in 1847 and later set up a photographic studio in Brighton, Sussex. This daguerreotype dates from 1846. (Sussex PhotoHistory)
Both inventors announced their findings within several short years of each other, giving the masses a choice in execution from the very beginning. In Paris, France 1838 the invention of the Daguerreotype by Louis-Jacques-Mandé Daguerre was revealed to the world as the first ever successfully refined process of practicable means with which to create an exact replica of an image reflected into a camera. That same year in England, William Henry Fox Talbot announces a way to record images without a camera by way of his photogenic drawings, and goes on to refine the technique into camera use; ultimately patenting a refined version of this in 1841 that he would name the Calotype (Library of Congress).
 Joseph Nicephore Niépce (1765-1833) (Hemphill)
The Daguerreotype’s invention began when artist and painter, Daguerre, already interested in fixing images with the Camera Obscura, began working with Joseph Nicephore Niepce in 1829 (Sussex PhotoHistory). Niepce too was searching for a similar outcome, but coming to it from the perspective of an unrealized appreciation for lithography talent. By the time Daguerre entered into partnership with Niepce, Niepce had already created what is known as the first photograph in an experiment that produced a heliograph (or sun painting) via an eight-hour exposure, which was eventually denied by the Royal Society. Not to be discouraged, this partnership would prove successful in its task. Niepce died in 1833, he would not live to see this final result. However, his input remained integral to the Daguerreotype’s advent just five years later (Hemphill).
After the death of Niepce, Daguerre continued experimentation with copper plates coated in silver iodide. These experiments by 1835 lead to a light sensitive media that resulted in a direct positive image of the reflected light by bringing the latent exposed image to development after additional exposure to warmed mercury fumes, in turn these images were able to be made in under an hour as apposed to the eight hour process first attempted by Niepce. By 1837, Daguerre formulated a way to fix the image with common salt giving the exposed image permanence and preventing further exposure in the image when viewed in the light. Now, he had a way of both producing images from light in the relatively short time, and a way of preserving them successfully. An additional improvement was made when Daguerre followed a suggestion by Sir John Herschel to use hyposulphate of soda instead of just salt, thereby improving the permanence and overall process (Sussex PhotoHistory). The process now complete, replicable and ready for use, the Daguerreotype was announced to the world in 1839 Paris, France. The first practical means of producing a photograph was born, considered a ‘gift to the world’ and the method was offered freely without restrictions (Nelson). The method created strikingly detailed monotone images of the subject, but because it was a direct positive, they were not reproducible so only one unique copy of each image could be made.
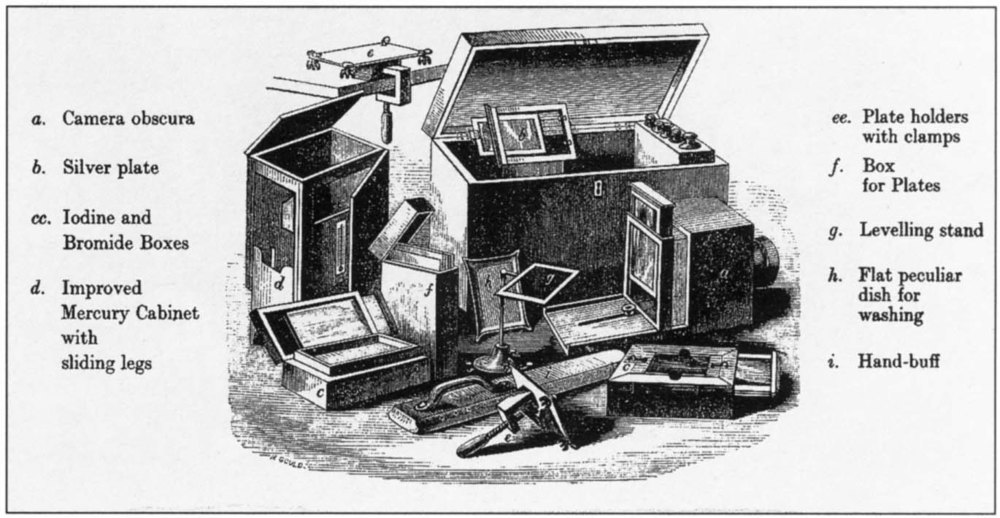 Apparatus and equipment for making daguerreotypes, from an advertisement published in 1843. (Sussex PhotoHistory)
The process of making a Daguerreotype is complicated and somewhat dangerous considering the chemicals involved, it took much time compared to the ease of use we experience photography today. One would start with a plate of copper that has been coated in silver, and begin polishing and buffing the surface to a mirror like finish making sure to keep the silver intact. This plate would then be sensitized through exposure to iodine and bromine fumes within an airtight container. These combine with the silver in a chemical reaction to form a light sensitive media that is able to record the lights and darks of a scene. This sensitized plate is then placed into the light tight holder with a removable slide on one face, and then finally into the camera. The camera itself was a simplistic design featuring a crafted wooden box with a fixed lens resembling a tube on one side and a plate holder on the other. Some versions of the camera were focused via moving an inner box back from an outer box which the lens was attached to.
![“The real old school -- we're talking 1839 here -- was all about wooden boxes and brass lens protrusions, as you can see above. The double box design of the Daguerreotype lets you achieve focus by moving the smaller inner box away from the front-mounted 15-inch lens. Exposure times can take up to half an hour, though, so you might wanna budget for a sturdy tripod as well. Speaking of budget, if you know the meaning of the word you're not probably not the target audience here, as a May [2010] auction in Vienna is set to start at €200,000 ($280,000), with predictions placing the final sale price closer to €700,000 ($980,000).” (Savov)](http://static1.squarespace.com/static/52c88269e4b02010862a7bc9/52c8860ae4b0df7dc79d02f2/53d0de68e4b086627a600bab/1406197354152//img.jpg) “The real old school — we’re talking 1839 here — was all about wooden boxes and brass lens protrusions, as you can see above. The double box design of the Daguerreotype lets you achieve focus by moving the smaller inner box away from the front-mounted 15-inch lens. Exposure times can take up to half an hour, though, so you might wanna budget for a sturdy tripod as well. Speaking of budget, if you know the meaning of the word you’re not probably not the target audience here, as a May [2010] auction in Vienna is set to start at €200,000 ($280,000), with predictions placing the final sale price closer to €700,000 ($980,000).” (Savov)
“The real old school — we’re talking 1839 here — was all about wooden boxes and brass lens protrusions, as you can see above. The double box design of the Daguerreotype lets you achieve focus by moving the smaller inner box away from the front-mounted 15-inch lens. Exposure times can take up to half an hour, though, so you might wanna budget for a sturdy tripod as well. Speaking of budget, if you know the meaning of the word you’re not probably not the target audience here, as a May [2010] auction in Vienna is set to start at €200,000 ($280,000), with predictions placing the final sale price closer to €700,000 ($980,000).” (Savov)
At this point, the subject is placed into position using any manner of posing stands, head rests and clamps to keep the subject as still as possible. This is when the removable slide would be is slid out of the way as the photographer became ready to make the photograph. Finally the cap over the optics in the camera would be removed for a period of time so the image is allowed to expose to the prepared plate. By the time of common use of this method, some improvement had been made to the exposure times by John Frederick Goddard. Now, an exposure could take anywhere from ten seconds all the way up to or beyond ninety seconds, a gain over the original thirty minutes to an hour, but still too long to avoid posing stands.
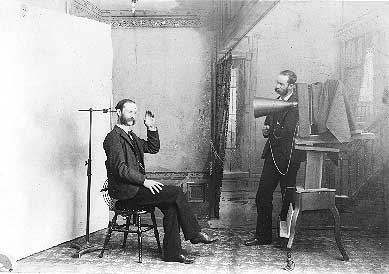
 Inside a Daguerreotype Studio (The DagLab)
  Anna Cora Mowatt. Photographer unknown. Date unknown. Sixth plate. The Arthur and Elizabeth Schlesinger Library on the History of Women in America (A/K62-12) (SL-44) (Harvard University)
After all is completed in camera, it was time to develop the image. The plate would be suspended over a dish of mercury inside a fuming box. The mercury was heated, allowed to permeate the silver on the plate surface, and a clear and detailed image appeared. Following this, the image would need to be fixed, or made permanent upon the plate, by bathing the plate in hyposulphate of soda [or modernly known as sodium thiosulphite]. The resulting images contained astonishing sharp detail with a seeming glow because of the metal base, but the image itself was delicate and very prone to degradation by surface marring. The image would have to be mounted behind glass and then set in a metal case in order to preserve it from the elements and wear from touch. Optionally, one could choose to have the finished image gilded or hand colored by an artist using pigment powder and gum arabic (Sussex PhotoHistory). Because of the heft of the metals used, the images were generally small; the final image being a direct positive, they were laterally reversed, and finally, featuring the metal backing, they had to be held a certain way to the light to see the entirety of the image. As they were also quite detailed because of the use of a fine surface and application of emulsion, along with their encasement, they were treated like heirlooms, often having small inscriptions or locks of hair placed into the case to create a unique memento for the keeper, similar to earlier miniature portraits.
Stepping back several years, during the time that Daguerre was preforming his final experiments, William Henry Fox Talbot in England had a similar idea.
 Portrait of William-Henry Fox Talbot, Calotype Salt Print (The James Irvine Foundation )
In the 1830’s Talbot, frustrated with his attempts at drawing via a Camera Lucida, began experimentation with what he called photogenic drawing. Photogenic drawing was Talbot’s first attempt at creating a photograph through direct exposure of an object lain on a silver nitrate sensitized sheet of paper. His progressive experimentation revealed that layered silver nitrate and salt would produce the best images when exposed damp, however, typical exposures took over an hour making the process not suitable to most subject matter, in addition the image resulted in what could be considered a negative. He did not make a vigilant attempt at refining and publishing the process at this time.
However, upon hearing of the advent of the Daguerreotype in 1839, he felt moved to action to fully refine the process that he had begun work on. He was able to shorten his exposure times greatly and started using a similar form of camera for exposure onto his prepared paper negatives. Talbot also invented the salted paper print when experimenting with his photogenic drawings, and used these to incorporate the negative image created in camera with the salted paper contact print to produce a positive image. By 1840, he had done what he set out to do in the form of what would be called the Calotype [or ‘Talbotype’ as was casually used at the time] and salt print. Talbot announced the discovery in 1841, and subsequently received a patent for it in that same year thus restricting access to the process pending a fee. The Calotype was the first process of its kind that resulted in a negative paper image that could be reproduced into many positive images after its exposure, in contrast the Daguerreotype (Morris and Stubbs). The resulting positive print produced an image lacking in the detail of the Daguerreotype, but one that expressed a moodiness in its character, and allowed an ease of production for the consumer.
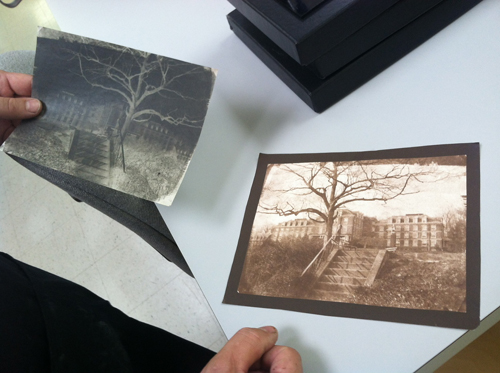 Here is a real waxed calotype negative and a salted paper print made from it. (The Photo Place Bus)
Creating a Calotype uses much of the same basic equipment as found in Daguerreotype making. A similar camera type, though there were many variations for both methods, similar ways to expose the image and similar way of preparing, although the Calotype offered a somewhat safer process.
 An example of the types of cameras used for the Calotype (Vince)
The Calotype begins by first preparing the paper. One would first need to find suitable paper, Talbot preferred fine rag writing paper from Whatman Co., but any satisfactory paper of fine grain and without watermark could work. Preparing the paper is to iodize it by first brushing on a solution of silver nitrate in distilled water and allowing it to dry under gentle heat. Next, the barely damp paper would be immersed in a solution of potassium iodide for two or three minutes, then finally washing the paper to free it of excess chemicals, and then dried again. This first stage allowed a prepared medium that could keep for some time, so at this stage paper was usually iodized in batches until ready to make the image.
 William Henry Fox Talbot, Two Men in the North Courtyard of Lacock Abbey, 1841-1844, calotype negative, waxed, 15.9 x 20.0 cm, corners rounded. (Kraus)
Directly before the photograph was made, a solution of gallo-nitrate, consisting of silver nitrate and gallic acid, was mixed. This solution was volatile, and had to be used as quickly as possible. In a darkened room the prepared paper was coated in this solution then partially dried using blotting paper. The paper was more light-sensitive when used partially damp, but could be used dry as well, though because of the nature of the solution one could not wait longer than a few hours before use. This finally coated paper was then loaded into the camera in almost total darkness. At this point, the photographer is ready to expose the paper and make the photograph. An exposure took anywhere from ten second up to almost an hour for average conditions. At this point a latent image is formed and the paper is ready for development. This would involve mixing a fresh portion of gallo-nitrate solution, then washing this over the freshly exposed paper, once again in a darkened room. Here, the photographer would choose when to halt development to taste, usually in under a minute. When he felt that the image was ready, the development would be fixed by using either potassium bromide or hypo, which is similar to modern fixing agents. A final washing and drying completed the negative. The resulting negative would have a deeper brown or black monotone, small details could be corrected here with use of a pencil as the media was still basically paper. The negative could be waxed on the back at this stage, as it would help with transparency, but this step was optional. At last, the Calotype is made. This resulting negative is the Calotype proper. From here, there is a different process for producing a positive print.
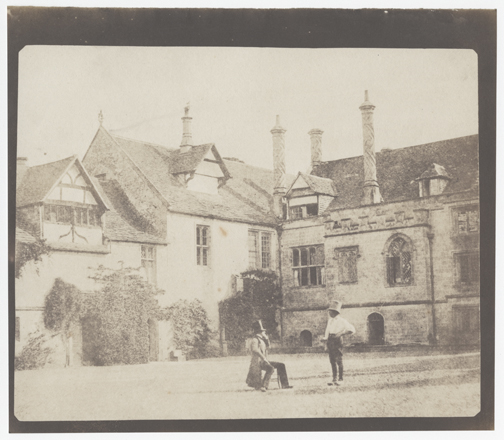 William Henry Fox Talbot, Two Men in the North Courtyard of Lacock Abbey, 1841-1844, salt print from a calotype negative,15.9 x 20.0 cm on 18.4 x 21.0 cm paper. (Kraus)
The salt print, also invented by Talbot, was the process of choice for making positive images out of the Calotype negatives, often even on the same kind of paper as used for the negative. This paper would first be soaked in what was essentially a solution of table salt, then after drying, it was brushed on one side with silver nitrate. This allowed silver chloride to embed within the paper’s fibers making the side light sensitive. Now the finished negative would be placed over the salted and sensitized paper and then placed in bright light, perhaps outside in the sun. It would take about fifteen minutes for an image to appear in the salted paper, leaving a final step of fixing the image in similar fashion to fixing the negative (University of Glasgow). The final image would have a brownish huge that sometimes tended toward reds and purples dependent on the fixing agent used. Where salt was more heavily used, the color tended toward reds and purples, or if hypo was used the image would be more brown. Other methods were utilized to tone the image creatively such as ironing, use of sulfur or gold toning (Early Photography). The final result, though quite detailed to being with, was a paper positive with a decidedly contrasty and diffused quality possessing texture and unique tactile flaws because of the papers used.
The world was now met with two totally new and unique ways of producing imagery. People now had a choice of methods accessible and obtainable by the public, both methods offering the photograph at the end of the creation process. However, there were stark differences between the outcomes and actual making suitable to different subject matter.
Aesthetically, the differences between these two processes were vast. While both created a monotone image, the visual similarities stopped there. The Daguerreotype created pictures with the finest minute details recorded, clean even highs and lows across the tonality, a glow from within the image due to the metal. These elements combined made for a medium that was well suited to subjects requiring absolute depiction and definition. The image was a startling resemblance of reality; the image detail itself was held within the very molecules of the chemicals being the metal base had no grain. The produced image was one of a kind and could not be recreated, this made each rare and coveted, as an original painting would have been, implying the value of the finished piece.
Conversely, the Calotype and salt print had a much different appearance. This image tended to have high contrast between lights and darks as a result of the chemicals being absorbed into the paper fibers. Additionally, because of the paper fibers, the image would present with a grain that would diffuse the details. Because it was a paper to paper positive negative process with chemical applied directly by hand, further detail would be lost between the transfer to positive, adding further smear to the image. It had a distinct atmospheric effect that lent itself well to moodiness in the image. The somewhat uncontrollable result of toning combined with further choice of coloration based on fixing agents used, meant that the final image would have a more painterly artistic quality lending itself to addition interpretation (Rayazansky).
 A Daguerreotype next to a Calotype and salt print. Both portraits, notice the difference in feel and mood despite similarities. (Found on Pinterest)
  A Daguerreotype next to a Calotype and salt print. Both portraits, notice the difference in feel and mood despite similarities.(From Wikimedia Commons)
The Daguerreotype method, being freely available, was hugely successful and within years of its introduction, portrait studios began cropping up in all metropolitan areas; the only exception of which was a patent obtained in England limiting its use slightly (This may have been in part as response to the Calotype’s immediate patent at its advent). People were not immediately warm to the idea, and as such newly learned photographers enticed political figures and celebrities into the studio (Library of Congress). It quickly took off and the manual for the process first published in France, became available across the world in various translations within months. Portraiture was now accessible to nearly all, not just the affluent as had been true with painted portraits; this also opened the doorway to mass commercial photography. The detail in these photos was so encompassing that the very name had become likened to the meaning of ‘truth’ and people viewed them as the very reality of the soul within the sitters. These small gilded images became almost commonplace as society at large flocked to have their likeness ‘taken’. The delicate little photos were cherished, cupped in the hand and admired closely because of the Daguerreotypes uniqueness and mirror-like qualities. The process was used for other subject matter, but its real commercial shine was in the portrait (Nelson). Some other uses of Daguerreotypy were for scientific measures, because of the clarity. Equally, it found a home in some of the first astrophotography (Catcher).
 Here is an example of a pretty famous daguerreotype. This is the first known photographic image of the moon. It was taken by John Whipple in 1851. (Rayazansky)
As the Daguerreotype was storming the commercial portrait front, so too the Calotype and salt print was gaining interest in its method and use. Unfortunately, the Calotype would see limited popularity because of the additional cost associated with its patent, and the scandalous lawsuits surrounding that fact; it still managed to garner enough of a competitive corner to gain wider use. The media involved in the process was lighter to carry and much less expensive to maintain. Because it was less dangerous, somewhat easier to process and the media was more durable, it was uniquely suited to travel, architecture and landscape photography. The pictorial qualities of the images combined with the deviations in toning, were well suited to artistic takes on photography; also suiting amateurs for the same reasons. As the process was able to reproduce prints from a negative many times, it had found a home within the sciences as well (Snyder).
 Dean Orphanage, Calotype ~View looking over Dean Village in the valley of the Water of Leith (Edin Photo)
The stage for these new mediums was set at the start of the industrial revolution in the 1830’s, with social and scientific reform underway. The world was quickly becoming faster paced and more expecting of instant gratification and mass production (Snyder) (O’Rourke). Scientific inquiry stimulated the minds of man to wish to see more acuity than was available in the illustration. The modern world was ready and eager for the advent of photography, and the accurate representation of reality as inspired by Renaissance times. Art was becoming more pictorial as whims began to move away from the traditional in being driven by the new middle-class. From newspapers to book illustration, family remembrances and desire for faster graphic art; the niches were ready and waiting for photography (All-Art.org). Having both the Daguerreotype and Calotype available for a wide array of photographic possibilities, photographic imaging was in a position to proliferate in the minds of men.
Daguerreotypy being easily available and becoming endeared by the public, tradesmen left their stations to become amateur daguerreotypists, despite the lack of artistic or design skill they were still able to turn a profit in the portrait making business, making it available to anyone. In America, photographic portraiture was quickly becoming the norm, with new studios becoming common place on the East Coat. The Calotype and salt print, though never to gain the popularity of the Daguerreotype, but being easily producible by the average person interested in the medium meant that for the first time tourist photos and proto-snapshots were also being created. The world was now flooded with images, however many mediocre images, lacking in any artistic value, than with any other medium. This drew the disapproval of some of the world’s most respected art critics, spawning all manner of famous critiques citing that photography was inferior to any of the true arts, and that it would eventually lead to the cheapening of art (Rosenblum). Further that because of the mechanical nature of photo making, photography would never be considered equal to drawing and painting (Library of Congress). Fanning the flames from the critics, photography brought with it the expected progression of photographic pornography. Depicting the naked body in such a way was almost voyeuristic in its depiction of a real person. Photography would struggle to gain a foothold in the arts for many years to come, with debate resounded throughout Europe and the Americas. However, it certainly touched the waters of the arts and created a perceived threat to certain individuals involved in them.
Perhaps not yet quite fine art by the time these methods were overcome by new photographic processes, the popularity and normality of photography had made its stand against time, these basic first methods opened the floodgates for creation and invention in the medium, and created world where photography would continue to shape and influence art. These processes planted the seeds of inspiration in the minds of inventors and artists alike. Near the end of these two method’s rein, and bridging into theses processes’ next generations, photographers such as Mathew Brady and Felix Nadar would pioneer visual techniques, compositional tools and advanced lighting. These advances gave photography more creative and technical value, further positioning it into the world of visual media and art; even gaining its own value as art, in time. The Daguerreotype and Calotype would fade away into history to be commonly replaced by the wet collodion glass negative and the albumen print within less than twenty years of their inventions (The British Library Board). Nonetheless, in their wake photographic production and reproduction had become a standard means of communicating and recording information. The unobtainable realistic beauty of the images swayed the minds of artists (Rosenblum). The mark of the unique qualities remained relevant even today. The Daguerreotype inspired future photographers to seek perfection and quality, while the Calotype created common ground in the necessity to have a positive negative system for unlimited reproductions, alongside inspiring artistic aesthetic in photographic medium (MMoA). This forward motion in photographic media would allow new philosophies that would examine the value and implications of photography progressing alongside a changing modern world and the changing mind of man. The black and white image, by default of technological limitations, granted a new format in which to see and create in the hypothetical monotone world. Without these first early and quickly passé methods of photographic reproduction, none of the world we now have would be possible. These early methods are responsible for all that is photography today.
Contributed By: Linz Welch
Originally written by Lindsey Welch (Linz Welch) for Academy of Art University GLA625 Spring 2014 as part of an academically graded assignment.
Sources & Photos Cited:
All-Art.org. “History of Photogrpahy.” No Date Given. A World History of Art. 12 March 2014 <http://all-art.org/history658_photography1.html>.
Catcher. Origins of Astrophotography. 5 June 2012. 10 March 2014 <http://www.catchersofthelight.com/catchers/category/History-of-Astrophotography.aspx?page=2>.
Early Photography. Calotype and other early paper processes. 2013. 10 March 2014 <http://www.earlyphotography.co.uk/site/gloss14.html>.
Edin Photo. Dean Orphanage. <http://www.edinphoto.org.uk/1_edin/1_edinburgh_calotype_club_album_2_35_dean%20orphanage.htm>.
Garcia, Pablo and Golan Levin. History. No Date Given. 10 March 2014 <http://neolucida.com/history/>.
Harvard University. Daguerreotypes at Harvard. No Date Given. 10 March 2014 <http://preserve.harvard.edu/daguerreotypes/highlight6.html>.
Hemphill, Jeffrey J. Joseph Nicephore Niépce (1765-1833). No Date Given. 10 March 2014 <http://www.geog.ucsb.edu/~jeff/115a/history/niepce.html>.
Historic Camera. Camera Obscura History. No Date Given. 10 March 2014 <http://www.historiccamera.com/cgi-bin/librarium/pm.cgi?action=display&login=camera_obscura>.
Kraus, Jr. Hans P. Talbot’s World: A Gallery of Natural Magic. No Date Given. 10 March 2014 <http://www.sunpictures.com/html/exhibition.php?e=113>.
Library of Congress. America’s First Look into the Camera: Daguerreotype Portraits and Views, 1839-1862. No Date Given. 12 March 2014 <http://www.loc.gov/teachers/classroommaterials/connections/daguerreotype/file.html>.
—. Daguerreotypes Timeline. No Date Given. 10 March 2014 <http://www.loc.gov/pictures/collection/dag/timeline.html>.
MMoA. “The Daguerreian Era and Early American Photography on Paper, 1839–1860.” No Date Given. Heilbrunn Timeline of Art History – MMoA. 12 March 2014 <http://www.metmuseum.org/toah/hd/adag/hd_adag.htm>.
Morris, Richard and Peter Stubbs. Photogenic Drawing. 2001. 10 March 2014 <http://www.edinphoto.org.uk/1_early/1_early_photography_-_processes_-_photogenic_drawing.htm>.
National Media Museum. Camera Obscura PDF. No Date Given. 10 March 2014 <http://www.nationalmediamuseum.org.uk/~/media/Files/NMeM/PDF/Collections/Photography/CameraObscura.pdf>.
Nelson, Kenneth E. A Thumbnail History of the Daguerrotype. 1996. 11 March 2014 <http://daguerre.org/resource/history/history.html>.
O’Rourke, Julie. “Daguerreotype Essay.” No Date Given. The Ryerson Photographic Preservation and Collections Management Program. 12 March 2014 <http://www.imagearts.ryerson.ca/topographica/DaguerreotypeEssay.html>.
Pinterest Member. Daguerreotype Example. 12 March 2014 <http://www.pinterest.com/pin/118219558941558401/>.
Rayazansky, Maxim. Calotypes vs. Daguerreotypes. 18 October 2008. 12 March 2014 <http://photohistorybymax.blogspot.com/2008/10/calotypes-vs-daguerreotypes.html>.
Rosenblum, Naomi. A World History of Photography. 4th. New York: Abbeville Press, 1984.
Savov, Vlad. Giroux Daguerreotype is world’s first mass-produced camera, about to become the most expensive one too. 29 January 2010. 10 March 2014 <http://www.engadget.com/2010/01/29/giroux-daguerreotype-is-worlds-first-mass-produced-camera-abou/>.
Snelling, Henry H. “THE HISTORY AND PRACTICE OF THE ART OF PHOTOGRAPHY.” 1849. Project Gutenberg. 11 March 2014 <http://www.gutenberg.org/files/168/168-h/168-h.htm#chap05>.
Snyder, Don. Calotype. No Date Given. 12 March 2014 <http://www.imagearts.ryerson.ca/topographica/Calotype.html>.
Sussex PhotoHistory. The Daguerreotype Process. No Date Given. 10 March 2014 <http://www.photohistory-sussex.co.uk/dagprocess.htm>.
The British Library Board. “Photographic Processes.” British Library – Online Gallery of Historic Photographs. <http://www.bl.uk/onlinegallery/features/photographicproject/photographicprocesses.html>.
The DagLab. Welcome / Home Page. No Date Given. 11 March 2014 <http://www.thedaglab.com>.
The James Irvine Foundation . Potrait of William-Henry Fox Talbot. No Date Given. 10 March 2014 <http://www.usc.edu/schools/annenberg/asc/projects/comm544/library/images/457.html>
The Photo Place Bus. George Eastman House and the 3-day $525 GOAL, plus more as usual. 2012 August 2012. 10 March 2014 <http://thephotopalace.blogspot.com/2012/08/eastman-kodak-house-and-3-day-goal.html>.
University of Glasgow. The Calotype Process. No Date Given. 10 March 2014 <http://www.gla.ac.uk/services/specialcollections/collectionsa-z/hilladamson/calotypeprocess/>.
Vince. Past and Present. 2012. 11 March 2014 <http://vinceable91.wordpress.com>.
Wikimedia. Calotype of an unknown man. <http://commons.wikimedia.org/wiki/File:Calotype-adamson.jpg>.

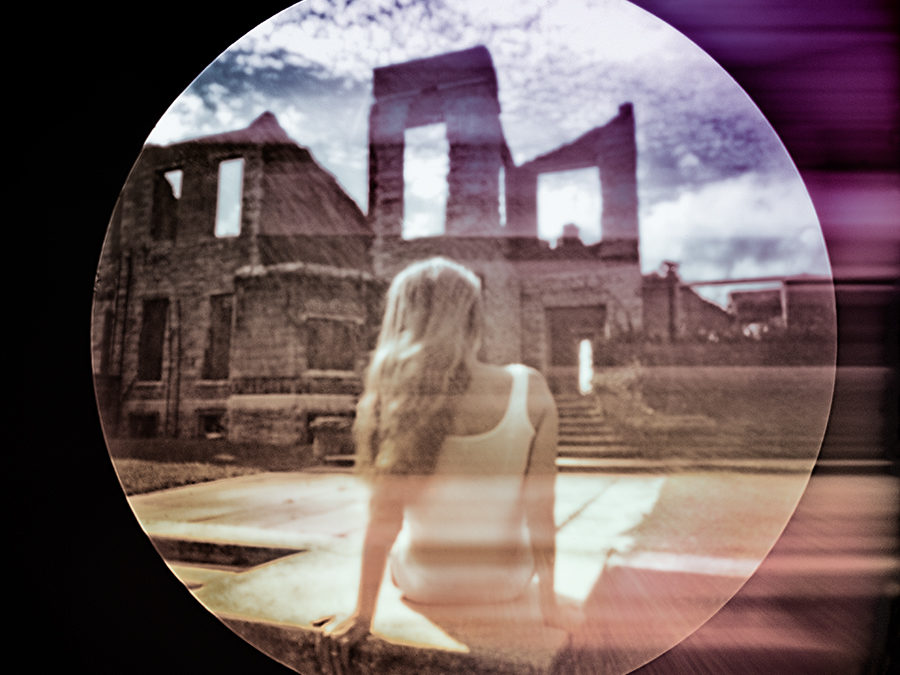
 Unknown author. Kodak box camera, circa 1890
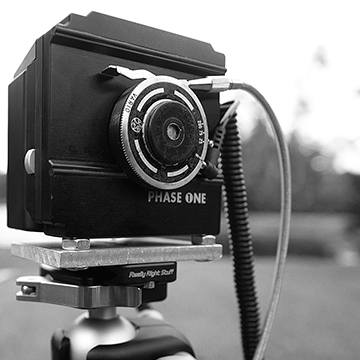 Image # 2: Custom fabricated medium format digital camera
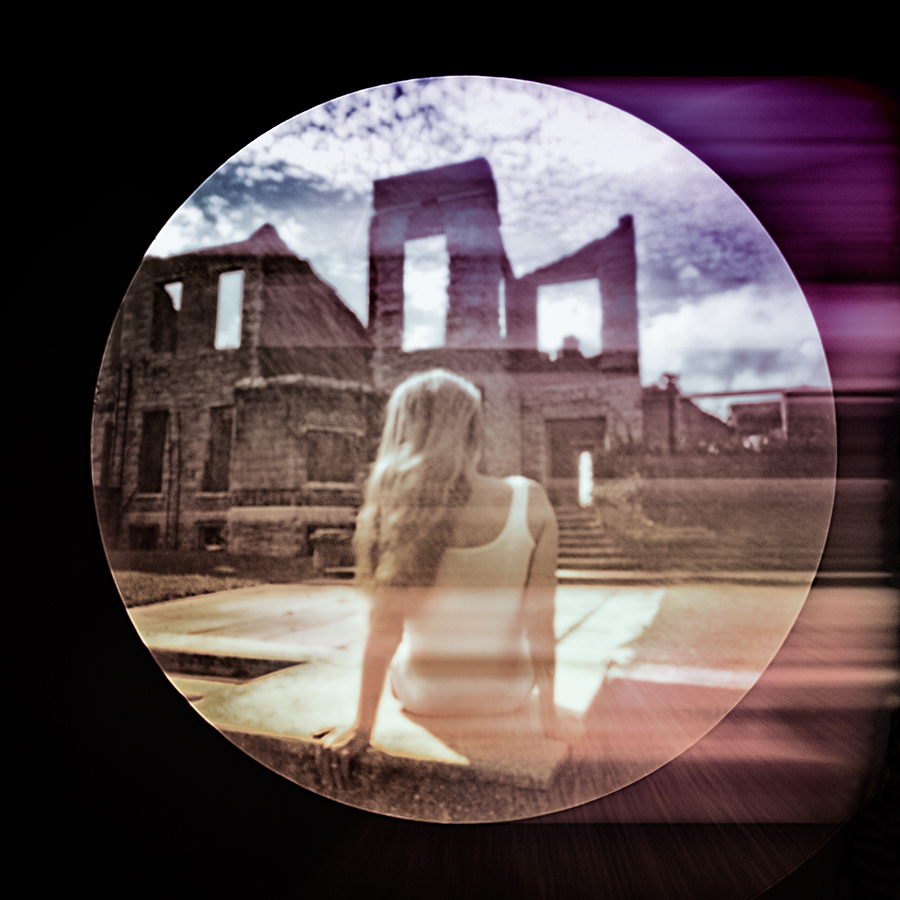
 Cathy Dutertre, Deity, “Behind the Veil” series, 2014
 Cathy Dutertre. Loss, “Quest” series, 2013
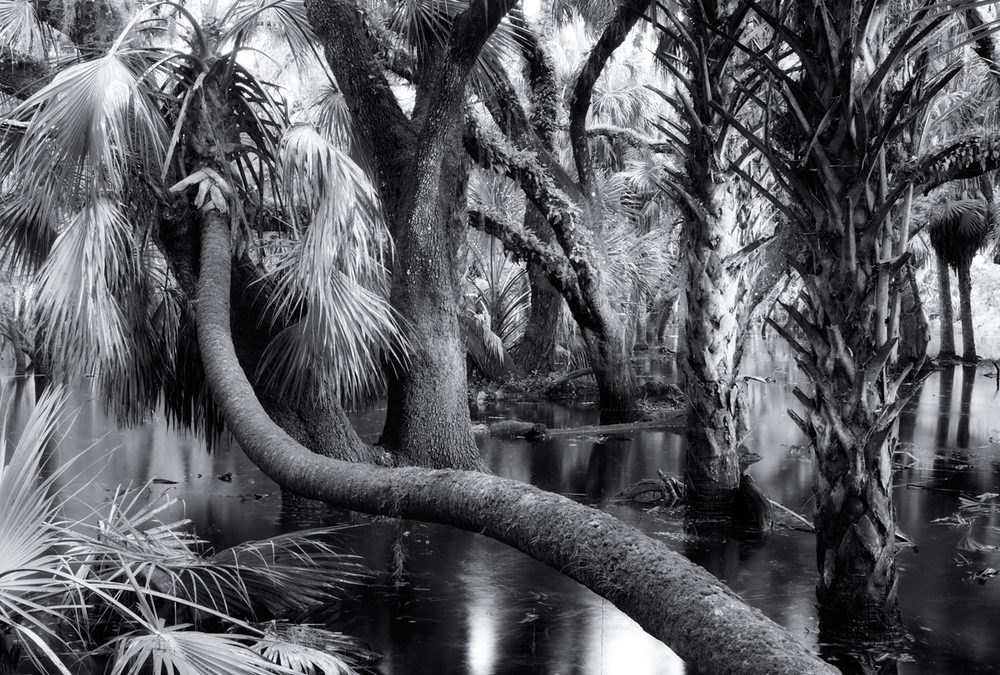
 “Myakka Park Drive 1, Sarasota” by Scott Bolendz
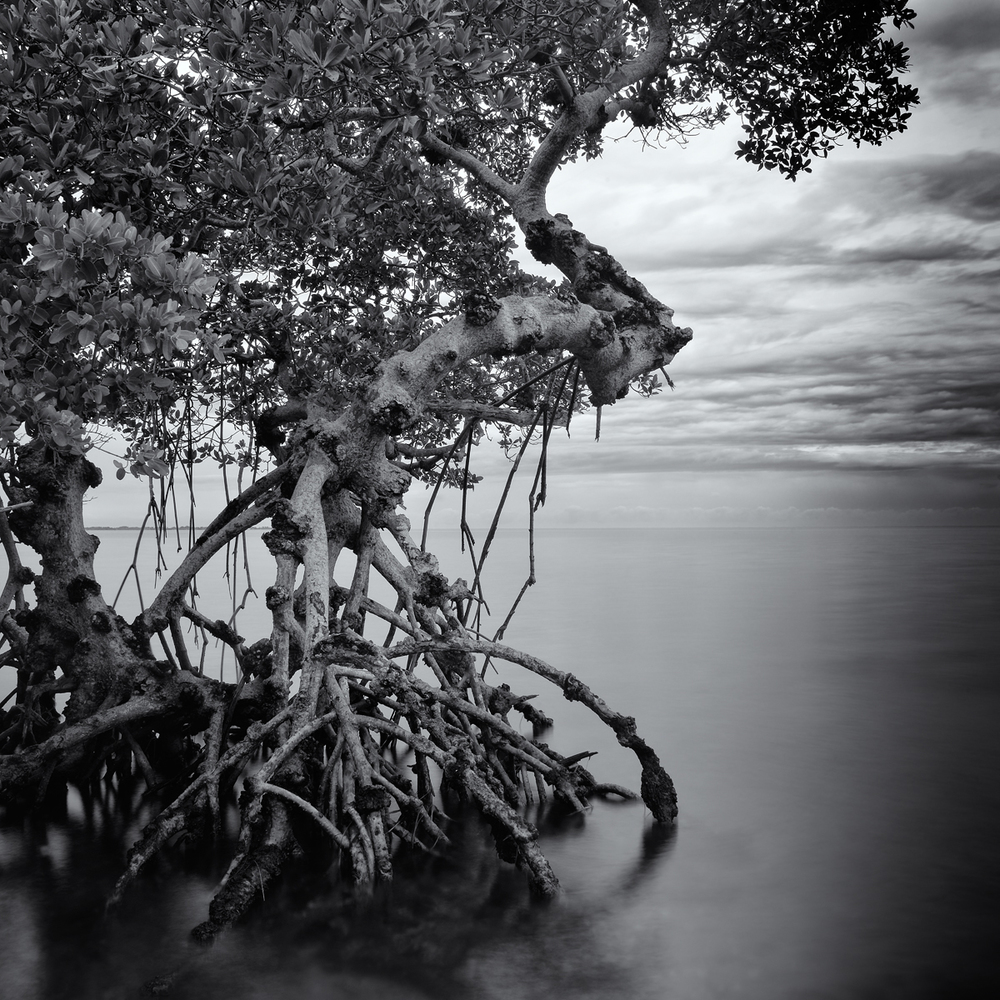 “Remnant Mangrove, Tampa Bay” By Scott Bolendz
 “Remnant Mangrove, Terra Ceia Bay” By Scott Bolendz
 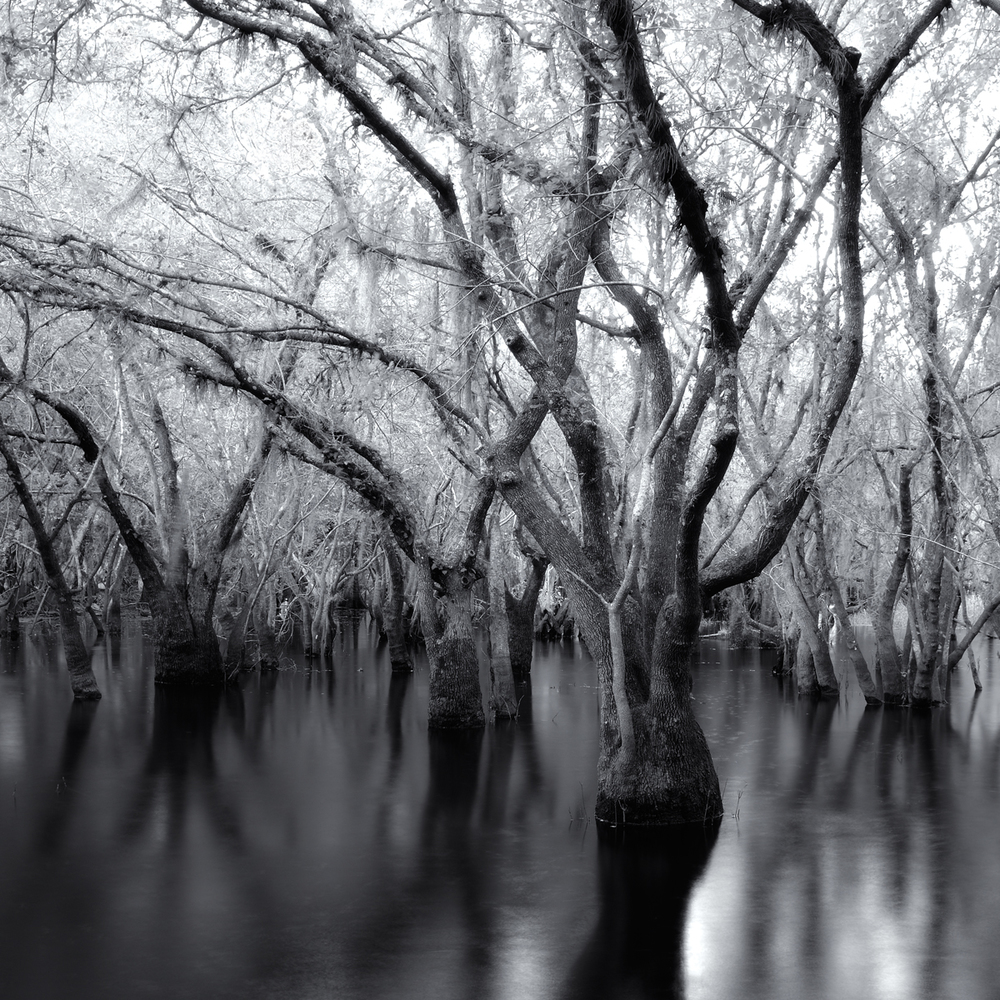 “Myakka Park Drive 2, Sarasota” By Scott Bolendz
Recent Comments