The Daguerreotype & The Calotype: Photography’s Parallel Histories
The Daguerreotype and the Calotype were the first widely usable photographic processes to be introduced to the world. Each method arriving to the same conclusion though different means of execution, and producing technically different outcomes, both processes would take photography into the mainstream practice that we know today. These methods would both inspire wide use of the camera, as well as present problems for later photographic techniques to solve, taking photography from its early beginnings in the end of the 19th century to the modernity we now enjoy. The Daguerreotype and Calotype have similar histories in similar timelines, but reached their fruitions through a parallel yet contrasted path by inventors of different persuasions. The very makeup of the two methods would go on to create some of the aesthetic building blocks of present photography, as well as influence an era to continue the active invention of ever newer and more practical photographic methods, all while changing the very face of art. What inspired these inventions began with drawing aids, using basic physics man has been aware of for centuries.
Almost as long as there had been artists in the world, devices such as the Camera Obscura and the Camera Lucida took advantage of the natural phenomenon in physics of focused light to render scenes from reality. Constructions similar to the Camera Obscura were described as far back as the 5th century B.C. by Chinese Philosopher Mo-Ti, where a small hole was used to direct the straight rays of light against a wall in a darkened room, creating an image reversed of that found on the outside (Historic Camera). Later, by the 15th century, Leonardo Da Vinci would describe clearly a similar device, now coined by its name as Camera Obscura, that followed the same principals but in a smaller instrument consisting of a wooden box. By the 16th century, a lens is added to the configuration to have greater control of the light entering the device. This Camera Obscura was used essentially as a drawing aid to help artists render their creations closer to the reality they saw via tracing the reflections of light into a two dimensional image (National Media Museum). In 1807 a device possessing a similar principal was patented to assist drawing by Sir William Hyde Wollaston, known as the Camera Lucida, which consisted of a prism at the end of an arm which when viewed from the upper face transposed an image from ahead over the drawing media with which to trace(Garcia and Levin). Both devices helped artists create truer renderings on canvas and paper, putting their artistic vision within closer grasp.
Basic Camera Obscura Figure (Snelling)
Though these instruments had more humble beginnings as artists aids for the start of a masterpiece, the question recurred: what if the image being show was able to be captured, allowing nature itself to draw the beauty before your eyes? To be able to fix the image so that one may be able to return to that moment again and again. To create what we know today as photography, or painting with light.
Wollaston’s prism optics, 1807 (Garcia and Levin)
There were many people interested the theoretical invention of what would later become know as photography, and several quite viable attempts had been made prior, but the Daguerreotype and the Calotype were the first to succeed in what we know today as standard photographic process. These two seemingly similar yet wholly different processes came about at roughly the same time in history by two entirely different individuals attempting to succeed in the same outcome; to create a method by which light focused into image could be permanently affixed to a media in a lasting and easily viewable manner. The inventors of these processes wished light to paint what nature saw.
A daguerreotype portrait of Louis Jacques Daguerre by John Jabez Edwin Mayall , a photographic artist who established a studio in London in 1847 and later set up a photographic studio in Brighton, Sussex. This daguerreotype dates from 1846. (Sussex PhotoHistory)
Both inventors announced their findings within several short years of each other, giving the masses a choice in execution from the very beginning. In Paris, France 1838 the invention of the Daguerreotype by Louis-Jacques-Mandé Daguerre was revealed to the world as the first ever successfully refined process of practicable means with which to create an exact replica of an image reflected into a camera. That same year in England, William Henry Fox Talbot announces a way to record images without a camera by way of his photogenic drawings, and goes on to refine the technique into camera use; ultimately patenting a refined version of this in 1841 that he would name the Calotype (Library of Congress).
Joseph Nicephore Niépce (1765-1833) (Hemphill)
The Daguerreotype’s invention began when artist and painter, Daguerre, already interested in fixing images with the Camera Obscura, began working with Joseph Nicephore Niepce in 1829 (Sussex PhotoHistory). Niepce too was searching for a similar outcome, but coming to it from the perspective of an unrealized appreciation for lithography talent. By the time Daguerre entered into partnership with Niepce, Niepce had already created what is known as the first photograph in an experiment that produced a heliograph (or sun painting) via an eight-hour exposure, which was eventually denied by the Royal Society. Not to be discouraged, this partnership would prove successful in its task. Niepce died in 1833, he would not live to see this final result. However, his input remained integral to the Daguerreotype’s advent just five years later (Hemphill).
After the death of Niepce, Daguerre continued experimentation with copper plates coated in silver iodide. These experiments by 1835 lead to a light sensitive media that resulted in a direct positive image of the reflected light by bringing the latent exposed image to development after additional exposure to warmed mercury fumes, in turn these images were able to be made in under an hour as apposed to the eight hour process first attempted by Niepce. By 1837, Daguerre formulated a way to fix the image with common salt giving the exposed image permanence and preventing further exposure in the image when viewed in the light. Now, he had a way of both producing images from light in the relatively short time, and a way of preserving them successfully. An additional improvement was made when Daguerre followed a suggestion by Sir John Herschel to use hyposulphate of soda instead of just salt, thereby improving the permanence and overall process (Sussex PhotoHistory). The process now complete, replicable and ready for use, the Daguerreotype was announced to the world in 1839 Paris, France. The first practical means of producing a photograph was born, considered a ‘gift to the world’ and the method was offered freely without restrictions (Nelson). The method created strikingly detailed monotone images of the subject, but because it was a direct positive, they were not reproducible so only one unique copy of each image could be made.
Apparatus and equipment for making daguerreotypes, from an advertisement published in 1843. (Sussex PhotoHistory)
The process of making a Daguerreotype is complicated and somewhat dangerous considering the chemicals involved, it took much time compared to the ease of use we experience photography today. One would start with a plate of copper that has been coated in silver, and begin polishing and buffing the surface to a mirror like finish making sure to keep the silver intact. This plate would then be sensitized through exposure to iodine and bromine fumes within an airtight container. These combine with the silver in a chemical reaction to form a light sensitive media that is able to record the lights and darks of a scene. This sensitized plate is then placed into the light tight holder with a removable slide on one face, and then finally into the camera. The camera itself was a simplistic design featuring a crafted wooden box with a fixed lens resembling a tube on one side and a plate holder on the other. Some versions of the camera were focused via moving an inner box back from an outer box which the lens was attached to.
“The real old school — we’re talking 1839 here — was all about wooden boxes and brass lens protrusions, as you can see above. The double box design of the Daguerreotype lets you achieve focus by moving the smaller inner box away from the front-mounted 15-inch lens. Exposure times can take up to half an hour, though, so you might wanna budget for a sturdy tripod as well. Speaking of budget, if you know the meaning of the word you’re not probably not the target audience here, as a May [2010] auction in Vienna is set to start at €200,000 ($280,000), with predictions placing the final sale price closer to €700,000 ($980,000).” (Savov)
At this point, the subject is placed into position using any manner of posing stands, head rests and clamps to keep the subject as still as possible. This is when the removable slide would be is slid out of the way as the photographer became ready to make the photograph. Finally the cap over the optics in the camera would be removed for a period of time so the image is allowed to expose to the prepared plate. By the time of common use of this method, some improvement had been made to the exposure times by John Frederick Goddard. Now, an exposure could take anywhere from ten seconds all the way up to or beyond ninety seconds, a gain over the original thirty minutes to an hour, but still too long to avoid posing stands.
Inside a Daguerreotype Studio (The DagLab) Anna Cora Mowatt. Photographer unknown. Date unknown. Sixth plate. The Arthur and Elizabeth Schlesinger Library on the History of Women in America (A/K62-12) (SL-44) (Harvard University)
After all is completed in camera, it was time to develop the image. The plate would be suspended over a dish of mercury inside a fuming box. The mercury was heated, allowed to permeate the silver on the plate surface, and a clear and detailed image appeared. Following this, the image would need to be fixed, or made permanent upon the plate, by bathing the plate in hyposulphate of soda [or modernly known as sodium thiosulphite]. The resulting images contained astonishing sharp detail with a seeming glow because of the metal base, but the image itself was delicate and very prone to degradation by surface marring. The image would have to be mounted behind glass and then set in a metal case in order to preserve it from the elements and wear from touch. Optionally, one could choose to have the finished image gilded or hand colored by an artist using pigment powder and gum arabic (Sussex PhotoHistory). Because of the heft of the metals used, the images were generally small; the final image being a direct positive, they were laterally reversed, and finally, featuring the metal backing, they had to be held a certain way to the light to see the entirety of the image. As they were also quite detailed because of the use of a fine surface and application of emulsion, along with their encasement, they were treated like heirlooms, often having small inscriptions or locks of hair placed into the case to create a unique memento for the keeper, similar to earlier miniature portraits.
Stepping back several years, during the time that Daguerre was preforming his final experiments, William Henry Fox Talbot in England had a similar idea.
Portrait of William-Henry Fox Talbot, Calotype Salt Print (The James Irvine Foundation )
In the 1830’s Talbot, frustrated with his attempts at drawing via a Camera Lucida, began experimentation with what he called photogenic drawing. Photogenic drawing was Talbot’s first attempt at creating a photograph through direct exposure of an object lain on a silver nitrate sensitized sheet of paper. His progressive experimentation revealed that layered silver nitrate and salt would produce the best images when exposed damp, however, typical exposures took over an hour making the process not suitable to most subject matter, in addition the image resulted in what could be considered a negative. He did not make a vigilant attempt at refining and publishing the process at this time.
However, upon hearing of the advent of the Daguerreotype in 1839, he felt moved to action to fully refine the process that he had begun work on. He was able to shorten his exposure times greatly and started using a similar form of camera for exposure onto his prepared paper negatives. Talbot also invented the salted paper print when experimenting with his photogenic drawings, and used these to incorporate the negative image created in camera with the salted paper contact print to produce a positive image. By 1840, he had done what he set out to do in the form of what would be called the Calotype [or ‘Talbotype’ as was casually used at the time] and salt print. Talbot announced the discovery in 1841, and subsequently received a patent for it in that same year thus restricting access to the process pending a fee. The Calotype was the first process of its kind that resulted in a negative paper image that could be reproduced into many positive images after its exposure, in contrast the Daguerreotype (Morris and Stubbs). The resulting positive print produced an image lacking in the detail of the Daguerreotype, but one that expressed a moodiness in its character, and allowed an ease of production for the consumer.
Here is a real waxed calotype negative and a salted paper print made from it. (The Photo Place Bus)
Creating a Calotype uses much of the same basic equipment as found in Daguerreotype making. A similar camera type, though there were many variations for both methods, similar ways to expose the image and similar way of preparing, although the Calotype offered a somewhat safer process.
An example of the types of cameras used for the Calotype (Vince)
The Calotype begins by first preparing the paper. One would first need to find suitable paper, Talbot preferred fine rag writing paper from Whatman Co., but any satisfactory paper of fine grain and without watermark could work. Preparing the paper is to iodize it by first brushing on a solution of silver nitrate in distilled water and allowing it to dry under gentle heat. Next, the barely damp paper would be immersed in a solution of potassium iodide for two or three minutes, then finally washing the paper to free it of excess chemicals, and then dried again. This first stage allowed a prepared medium that could keep for some time, so at this stage paper was usually iodized in batches until ready to make the image.
William Henry Fox Talbot, Two Men in the North Courtyard of Lacock Abbey, 1841-1844, calotype negative, waxed, 15.9 x 20.0 cm, corners rounded. (Kraus)
Directly before the photograph was made, a solution of gallo-nitrate, consisting of silver nitrate and gallic acid, was mixed. This solution was volatile, and had to be used as quickly as possible. In a darkened room the prepared paper was coated in this solution then partially dried using blotting paper. The paper was more light-sensitive when used partially damp, but could be used dry as well, though because of the nature of the solution one could not wait longer than a few hours before use. This finally coated paper was then loaded into the camera in almost total darkness. At this point, the photographer is ready to expose the paper and make the photograph. An exposure took anywhere from ten second up to almost an hour for average conditions. At this point a latent image is formed and the paper is ready for development. This would involve mixing a fresh portion of gallo-nitrate solution, then washing this over the freshly exposed paper, once again in a darkened room. Here, the photographer would choose when to halt development to taste, usually in under a minute. When he felt that the image was ready, the development would be fixed by using either potassium bromide or hypo, which is similar to modern fixing agents. A final washing and drying completed the negative. The resulting negative would have a deeper brown or black monotone, small details could be corrected here with use of a pencil as the media was still basically paper. The negative could be waxed on the back at this stage, as it would help with transparency, but this step was optional. At last, the Calotype is made. This resulting negative is the Calotype proper. From here, there is a different process for producing a positive print.
William Henry Fox Talbot, Two Men in the North Courtyard of Lacock Abbey, 1841-1844, salt print from a calotype negative,15.9 x 20.0 cm on 18.4 x 21.0 cm paper. (Kraus)
The salt print, also invented by Talbot, was the process of choice for making positive images out of the Calotype negatives, often even on the same kind of paper as used for the negative. This paper would first be soaked in what was essentially a solution of table salt, then after drying, it was brushed on one side with silver nitrate. This allowed silver chloride to embed within the paper’s fibers making the side light sensitive. Now the finished negative would be placed over the salted and sensitized paper and then placed in bright light, perhaps outside in the sun. It would take about fifteen minutes for an image to appear in the salted paper, leaving a final step of fixing the image in similar fashion to fixing the negative (University of Glasgow). The final image would have a brownish huge that sometimes tended toward reds and purples dependent on the fixing agent used. Where salt was more heavily used, the color tended toward reds and purples, or if hypo was used the image would be more brown. Other methods were utilized to tone the image creatively such as ironing, use of sulfur or gold toning (Early Photography). The final result, though quite detailed to being with, was a paper positive with a decidedly contrasty and diffused quality possessing texture and unique tactile flaws because of the papers used.
The world was now met with two totally new and unique ways of producing imagery. People now had a choice of methods accessible and obtainable by the public, both methods offering the photograph at the end of the creation process. However, there were stark differences between the outcomes and actual making suitable to different subject matter.
Aesthetically, the differences between these two processes were vast. While both created a monotone image, the visual similarities stopped there. The Daguerreotype created pictures with the finest minute details recorded, clean even highs and lows across the tonality, a glow from within the image due to the metal. These elements combined made for a medium that was well suited to subjects requiring absolute depiction and definition. The image was a startling resemblance of reality; the image detail itself was held within the very molecules of the chemicals being the metal base had no grain. The produced image was one of a kind and could not be recreated, this made each rare and coveted, as an original painting would have been, implying the value of the finished piece.
Conversely, the Calotype and salt print had a much different appearance. This image tended to have high contrast between lights and darks as a result of the chemicals being absorbed into the paper fibers. Additionally, because of the paper fibers, the image would present with a grain that would diffuse the details. Because it was a paper to paper positive negative process with chemical applied directly by hand, further detail would be lost between the transfer to positive, adding further smear to the image. It had a distinct atmospheric effect that lent itself well to moodiness in the image. The somewhat uncontrollable result of toning combined with further choice of coloration based on fixing agents used, meant that the final image would have a more painterly artistic quality lending itself to addition interpretation (Rayazansky).
A Daguerreotype next to a Calotype and salt print. Both portraits, notice the difference in feel and mood despite similarities. (Found on Pinterest) A Daguerreotype next to a Calotype and salt print. Both portraits, notice the difference in feel and mood despite similarities.(From Wikimedia Commons)
The Daguerreotype method, being freely available, was hugely successful and within years of its introduction, portrait studios began cropping up in all metropolitan areas; the only exception of which was a patent obtained in England limiting its use slightly (This may have been in part as response to the Calotype’s immediate patent at its advent). People were not immediately warm to the idea, and as such newly learned photographers enticed political figures and celebrities into the studio (Library of Congress). It quickly took off and the manual for the process first published in France, became available across the world in various translations within months. Portraiture was now accessible to nearly all, not just the affluent as had been true with painted portraits; this also opened the doorway to mass commercial photography. The detail in these photos was so encompassing that the very name had become likened to the meaning of ‘truth’ and people viewed them as the very reality of the soul within the sitters. These small gilded images became almost commonplace as society at large flocked to have their likeness ‘taken’. The delicate little photos were cherished, cupped in the hand and admired closely because of the Daguerreotypes uniqueness and mirror-like qualities. The process was used for other subject matter, but its real commercial shine was in the portrait (Nelson). Some other uses of Daguerreotypy were for scientific measures, because of the clarity. Equally, it found a home in some of the first astrophotography (Catcher).
Here is an example of a pretty famous daguerreotype. This is the first known photographic image of the moon. It was taken by John Whipple in 1851. (Rayazansky)
As the Daguerreotype was storming the commercial portrait front, so too the Calotype and salt print was gaining interest in its method and use. Unfortunately, the Calotype would see limited popularity because of the additional cost associated with its patent, and the scandalous lawsuits surrounding that fact; it still managed to garner enough of a competitive corner to gain wider use. The media involved in the process was lighter to carry and much less expensive to maintain. Because it was less dangerous, somewhat easier to process and the media was more durable, it was uniquely suited to travel, architecture and landscape photography. The pictorial qualities of the images combined with the deviations in toning, were well suited to artistic takes on photography; also suiting amateurs for the same reasons. As the process was able to reproduce prints from a negative many times, it had found a home within the sciences as well (Snyder).
Dean Orphanage, Calotype ~View looking over Dean Village in the valley of the Water of Leith (Edin Photo)
The stage for these new mediums was set at the start of the industrial revolution in the 1830’s, with social and scientific reform underway. The world was quickly becoming faster paced and more expecting of instant gratification and mass production (Snyder) (O’Rourke). Scientific inquiry stimulated the minds of man to wish to see more acuity than was available in the illustration. The modern world was ready and eager for the advent of photography, and the accurate representation of reality as inspired by Renaissance times. Art was becoming more pictorial as whims began to move away from the traditional in being driven by the new middle-class. From newspapers to book illustration, family remembrances and desire for faster graphic art; the niches were ready and waiting for photography (All-Art.org). Having both the Daguerreotype and Calotype available for a wide array of photographic possibilities, photographic imaging was in a position to proliferate in the minds of men.
Daguerreotypy being easily available and becoming endeared by the public, tradesmen left their stations to become amateur daguerreotypists, despite the lack of artistic or design skill they were still able to turn a profit in the portrait making business, making it available to anyone. In America, photographic portraiture was quickly becoming the norm, with new studios becoming common place on the East Coat. The Calotype and salt print, though never to gain the popularity of the Daguerreotype, but being easily producible by the average person interested in the medium meant that for the first time tourist photos and proto-snapshots were also being created. The world was now flooded with images, however many mediocre images, lacking in any artistic value, than with any other medium. This drew the disapproval of some of the world’s most respected art critics, spawning all manner of famous critiques citing that photography was inferior to any of the true arts, and that it would eventually lead to the cheapening of art (Rosenblum). Further that because of the mechanical nature of photo making, photography would never be considered equal to drawing and painting (Library of Congress). Fanning the flames from the critics, photography brought with it the expected progression of photographic pornography. Depicting the naked body in such a way was almost voyeuristic in its depiction of a real person. Photography would struggle to gain a foothold in the arts for many years to come, with debate resounded throughout Europe and the Americas. However, it certainly touched the waters of the arts and created a perceived threat to certain individuals involved in them.
Perhaps not yet quite fine art by the time these methods were overcome by new photographic processes, the popularity and normality of photography had made its stand against time, these basic first methods opened the floodgates for creation and invention in the medium, and created world where photography would continue to shape and influence art. These processes planted the seeds of inspiration in the minds of inventors and artists alike. Near the end of these two method’s rein, and bridging into theses processes’ next generations, photographers such as Mathew Brady and Felix Nadar would pioneer visual techniques, compositional tools and advanced lighting. These advances gave photography more creative and technical value, further positioning it into the world of visual media and art; even gaining its own value as art, in time. The Daguerreotype and Calotype would fade away into history to be commonly replaced by the wet collodion glass negative and the albumen print within less than twenty years of their inventions (The British Library Board). Nonetheless, in their wake photographic production and reproduction had become a standard means of communicating and recording information. The unobtainable realistic beauty of the images swayed the minds of artists (Rosenblum). The mark of the unique qualities remained relevant even today. The Daguerreotype inspired future photographers to seek perfection and quality, while the Calotype created common ground in the necessity to have a positive negative system for unlimited reproductions, alongside inspiring artistic aesthetic in photographic medium (MMoA). This forward motion in photographic media would allow new philosophies that would examine the value and implications of photography progressing alongside a changing modern world and the changing mind of man. The black and white image, by default of technological limitations, granted a new format in which to see and create in the hypothetical monotone world. Without these first early and quickly passé methods of photographic reproduction, none of the world we now have would be possible. These early methods are responsible for all that is photography today.
Having recently embarked into a deep metaphysical concept, one that is engaged in a personal and cathartic journey of self-discovery, I needed a camera system that would support such an endeavor. Following some experiments with a regular 35mm DSLR, as well as some exotic medium format digital systems, it quickly became apparent that a perfect camera system would not fulfill the ephemeral nature of the images desired to illustrate such a complex project.
The key components sought for these photographs involved a round image format, as a temporal disconnect akin to the first Kodak box camera of the late 1800’s, and the soft focus dreamlike quality of the pinhole mechanism.
Image # 2: Custom fabricated medium format digital camera
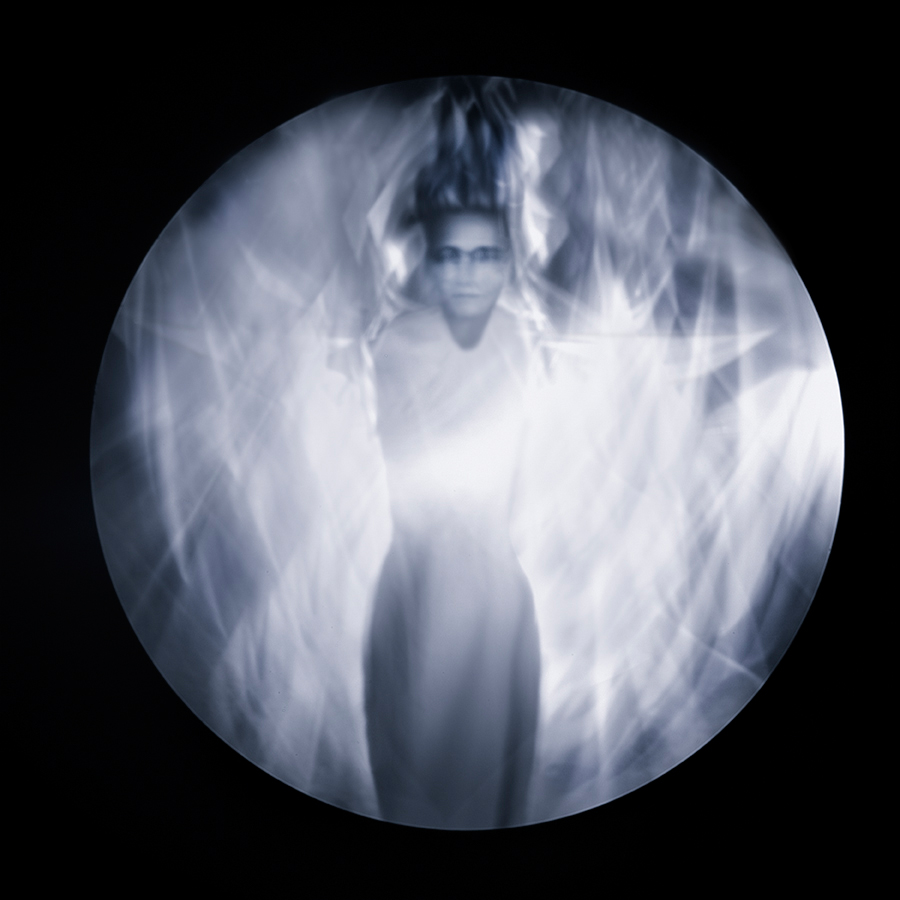
With these precepts established, a custom built camera was undertaken, consisting of a flawed medium format digital array (Phase One P25 with dead pixels and a non functioning back display), a brass pinhole mounted on a 1960’s view camera shutter (that only opens and closes without the regular shutter speeds) affixed to the drilled protective plate supplied with the digital back. This system produces round images due to the close proximity of the wide-open shutter to the array, a soft rendition of the scene from the pinhole and even more interestingly some unpredictable aberrations due to the capture process that involves a dual firing of the shutter, the first to “wake up” the digital back that does not communicate with this mechanical only system, and in rapid succession a second capture for the actual image recording.
The following image clearly shows the results from the twin exposures, the unpredictable aberrations that add a chance element to the photographs, as a subtle reference to alternate planes of reality.
Another aspect of this custom camera resides in its propensity to suffer from extreme flare, a flaw that can then utilized for expressive purposes with the addition of artificial battery powered lighting on location (continuous or flash) projected directly into the pinhole opening.
Cathy Dutertre, Deity, “Behind the Veil” series, 2014
In addition, the absence of a viewfinder and the lack of a functioning back display means that the operator has no way of knowing if the subject, in this case myself as a self-portraiture approach, is actually in the frame and compositionally correct within the environment. This additional chance element allows for a slow and methodical process, one that required much experimentation in order to pre-visualize the camera’s field of view. Finally, the color palettes generated by the pinhole can be surprising depending on the quality and intensity of the light at the time of capture, resulting in images that either work well within the concept’s narrative or not at it is often the case.
Cathy Dutertre. Loss, “Quest” series, 2013
As in all concepts, the tools utilized to generate images that support the project must be derived from the “What” and “Why” aspects, the intellectual approach needed to achieve a cohesive series of photographs that contain the visual elements supportive of the artist’s intent. In this case, this “round” pinhole camera has proven to be most effective with these communicative efforts, yet complex to operate, unpredictable for the most part, a magnet for dust that needs cleaning several times a day, but always wonderfully surprising, as photography should be, and was in the analog realm.
The Use of Natural Low-Light and Neutral Density Filters in Concept-Based Landscape Photography
I want to thank UPA Gallery – and Pierre Dutertre in particular – for inviting me to write this guest blog. I’m grateful for the opportunity to introduce my work to the readers of this unique educational blog and appreciate UPA’s commitment to giving exposure to emerging fine art photographers.
Stormy Weather
Monster hurricanes… saturating heat … biblical rains … what’s not to love about summer in Florida? At least when it comes to photography. When the skies turn dark and stormy and people seek shelter indoors, I grab my camera gear and go to work outside.
In this blog post I’ll review how I use low-light conditions – especially rainy low-light conditions – and ND filters in my concept-based landscape photography, specifically for lighting aesthetics and water-blur effects. We’ll take a detailed look at two images from my Florida series, called “Remnants,” to see examples of how I approach low-light conditions with and without ND filters.
First, it’s important to understand what an ND filter is. Basically, it’s a lens filter made of dark glass (like sunglasses) that reduces the amount of light reaching a camera’s sensor. This allows for much slower shutter speeds in order to create motion-blur effects, among other things. There are different kinds of ND filters – slot-in, screw-on and variable – each with different density ratings that give various f-stop reductions. There are pros and cons to using each type that’s beyond the scope of this blog post, but a quick Google search using the terms “ND Filter” will pull up many useful articles for further reading.
Natural Low-Light Effects
My Florida portfolio is called “Remnants” on www.scottbolendz.com . It documents small moments of modest natural beauty – what I call the “diminished sublime” – in remnant green spaces along Florida’s heavily developed Gulf Coast. The images have a delicate, compressed, dream-like quality due to the contingent, often fleeting, nature of the depicted scene. This project is influenced, in part, by Clyde Butcher’s Florida series and Michael Kenna’s long-exposure work.
I like shooting in rainy low-light conditions because the camera can transform a relatively mundane landscape into something otherworldly. Such low-light is often sufficient by itself for longer exposure times, which can be especially useful if groundwater is present (as is often the case in Florida). One of the challenges of shooting the lush Florida landscape is the visual complexity of the vegetation. Water reflections often add distracting elements to an image (at least to my eye). Longer exposure times, however, can soften or even obliterate water reflections and give a smooth, silky, almost dream-like surface plane that can add depth and simplify a composition. ND filters allow for even longer exposure times when necessary.
“Myakka Park Drive 1, Sarasota” by Scott Bolendz
My photograph “Myakka Park Drive, Sarasota” was shot immediately after a thunderstorm. I set my Nikon D600 on a tripod (a definite must for long-exposure work!) and tried to get a long exposure time without using an ND filter. I was using a Nikkor 24 mm/2.8 prime lens. I set my camera/lens to manual focus (infinity), aperture priority f/16 and ISO 100 which gave me a shutter speed of 5 seconds. This was long enough because raindrops were still falling from the wet foliage onto the groundwater surface, creating small disturbances that would help in achieving a nice water-blur effect. This, in turn, would create a clean background plane to highlight the layers of lush, complex foliage. And – voila!
ND-Filtered Lighting Effects
“Remnant Mangrove, Tampa Bay” By Scott Bolendz
My photograph, “Remnant Mangrove, Tampa Bay”, was shot at mid-day using a 64x ND filter during a brief interlude between coastal storms at Emerson Point in Bradenton, Florida. The clouds and water were both moving slowly, but the light was too bright for longer exposures without the benefit of an ND filter. Even at f/22 and ISO 100 the shutter speed was 1/20 second (too fast for motion-blur).
I only carry 2 high-quality screw-on ND filters: a 64x (6-stop reduction) and a 1000x (10-stop reduction). These 2 filters offer a decent range of f-stop reductions for most lighting situations I encounter.
The workflow for this image is more involved because it’s necessary to compose and meter the scene prior to attaching the ND filter (the viewfinder is too dark when the ND filter is attached):
1. Set the camera on a tripod.
2. Use manual focus (set to infinity) and frame the scene – I used my 24 mm prime lens.
3. I metered the scene using aperture priority f/22 and ISO 100 for the longest exposure possible prior to adding an ND filter.
4. Next, check the shutter speed. It was 1/20 for this particular camera setting.
5. Enter the 1/20 shutter speed value into a long exposure calculator (free apps are available on iTunes!) to see what new shutter speed would be required for a similar exposure if a 64x or 1000x ND filter were attached. The results: 3 seconds (64x) and 51 seconds (1000x). Based on current conditions, I chose the 64x.
6. Next, put the camera setting on full manual and replicate all the previous settings from aperture priority (f/22, ISO 100, etc…) and select a new shutter speed of 3 seconds (to account for the 64x ND filter).
7. Carefully attach the 64 x ND filter to the prime lens.
8. Use a wireless shutter release or the camera’s timer to take the picture.
I often have to increase or decrease the calculated shutter speed based on what the first captured image actually looks like on the camera’s LCD screen. The image may be under or over-exposed (I only shoot RAW files so I can tweak the exposure in post-production). If you decide to re-compose the image, remove the ND filter and start the process all over again.
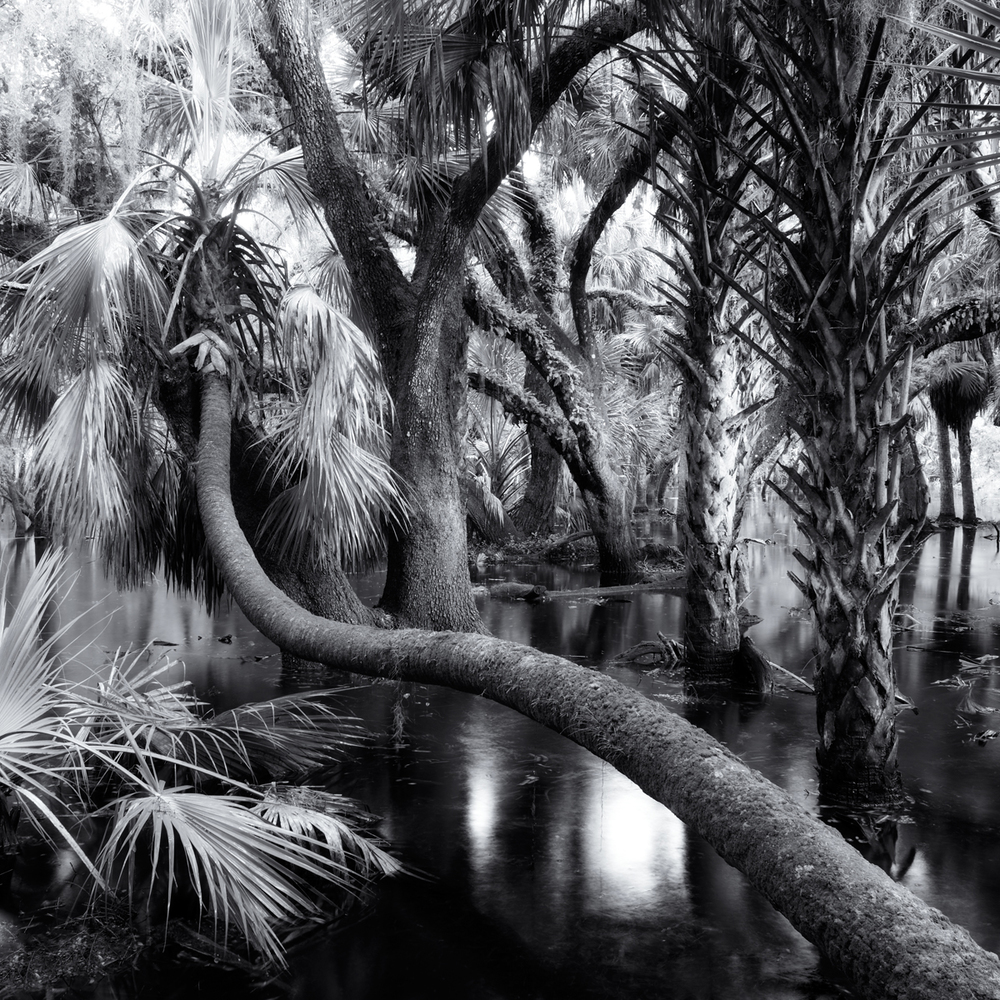
Here are a few more examples of my Florida series shot in rainy low-light conditions with ND filters. Again, notice how the blurred water surface provides a clean plane that nicely highlights a visually complicated subject.
“Remnant Mangrove, Terra Ceia Bay” By Scott Bolendz “Myakka Park Drive 2, Sarasota” By Scott Bolendz
Some final thoughts
First, since I mainly shoot with a prime lens for my Florida series, the workflow process described in this blog post applies to prime lenses. Use of an ND-filter on a zoom lens is a somewhat different – and more difficult – workflow which I will review in a future UPA Blog post. Second, when shooting long exposures for either water or cloud-blurring effects, it’s important to be aware of even slight movements of your subject. This is less of an issue if the subject is a mountain or city buildings. But with vegetation and wind movement – like coastal mangroves, for example – you may need to be very patient until the subject is absolutely still. And if you’re shooting in rainy low-light conditions, patience is a virtue!
Scott Bolendz is an emerging fine art photographer. His landscape work has won several awards at The Florida Museum of Photographic Arts in Tampa. To see more of his images you can visit his website www.scottbolendz.com or follow him on Facebook at “Scott Bolendz Photography.”
Is it a form of art? A lack of imagination? Or just plain theft?
According to the Cambridge dictionary, the word appropriation is described as: “When you take something for your own use, usually without permission”
““When you take something for your own use, usually without permission”
So with this definition in mind, it is natural to think of this topic as a ‘hot button” for many, but particularly for professional photographers, in the commercial as well as the fine art realms. As an active member of the American Society of Media Photographers for many years, I can attest to the fact that this singular topic is akin to opening the pen of domestic animals to a pack of wolves, with the resulting carnage and even occasional self-cannibalism in the process.
First, we must look at the established parameters for all creative materials. Are they copyrighted? Has the copyright term expired? Are they part of the public domain? These factors would initially establish the potential legal use of these materials, the conditions for the usage and the ultimate outcome of the subsequent work created from the materials. These questions are more of a legal approach to the topic, but nevertheless an important starting point. It is crucial to remember that the courts do not make judgments on the artistic merits of any works of art, but rather look at their specific status within the current copyright laws. Having said that, there is a current flurry of activity proposing changes to the copyright laws (not in favor of the creators), as well as a number of class action lawsuits against Google and Getty Images. So far, the courts have often ruled against the appropriator, much to the chagrin of the art elite who proclaims appropriation to be integral posit to post modernist art, freedom and all kinds of elitist dribble. Sadly, the copyright laws are being eroded and more often than not the courts are now swaying in favor of the appropriation culprits.
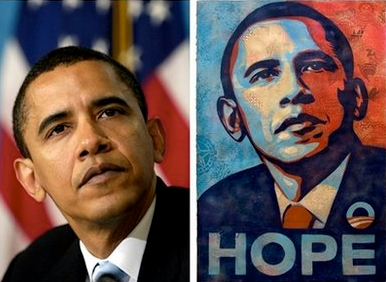
Photograph by Mannie Garcia (AP) / Artwork by Shepard Fairey
Secondly, the vast proliferation of images in a globally connected world and social medias in all forms will invariably lead to the proliferation of appropriation, often under the incorrect assumption that if it is on the internet it is free to use and fair game. Google is the biggest culprit, gathering millions of images for the purpose of gathering data on the viewer and/or user of said images. Interestingly, Shepard Fairey found the image of Obama on Google. Should you care to check the terms and conditions for most social media platforms, you may be surprised at the dangers of putting your images on these media! Technology has changed the entire premise of copyright laws, eroding these in the process, yet the world moves forward and so we must evolve as fighting Google, Getty Images or the social media platforms is simply futile. The genie, or monster, is out of the bottle.
““Is the person or artist using these as a precursor and inspiration for their own output?”
Last, and perhaps more importantly in my personal opinion, is the intent of the person who appropriates the materials. Is the person or artist using these as a precursor and inspiration for their own output? Are they replicating or duplicating the materials for personal use or commercial gain from the public or private enterprises? Are they using them to produce a new generation of art, one that takes its roots from the originals but departs in a newer creative form? Are the materials used for academic purposes and following the established rules of that usage? So, at the root of this topic are the ethics within the intent of the person or persons who appropriate the art (in its many forms). Appropriation is not new, gaining momentum with the Cubist collages of Picasso and Braque, the readymade urinal presented by Marcel Duchamp in 1915, the 1950’s works of Jasper Johns and Robert Rauschenberg, Pop art and the emergence of post modernism with notable users of appropriation such as Jeff Koons and Sherry Levine. The polemics of what constitutes art cannot be presented in such a limited blog format, suffice to say that appropriation art is a complex topic that can be debated by the art elite in between ritzy gallery openings, museum gatherings and the columns of well read publications that do not address farming or livestock in any fashion.
Photograph by Art Rogers, 1980 / Sculpture by Jeff Koons, 1998 Photograph by Walker Evans, 1936 / Re-photographed by Sherry Levine, 1981
Ultimately, and in response to the title of this blog, appropriation can be a form of art, a lack of imagination, or just simply theft. As any good lawyer would say: It depends. In this case I would affirm that it depends on the intentions and ethics of the appropriator, or some ubiquitous discussions on what constitutes art and its ownership.
The use of movement and slow shutter speeds for concept-based intents and visual experiential outcomes.
Photo Credit: Edgerton Harold
The uniqueness of the medium of photography resides in its ability to capture the passage of time, either with a long exposure or just freezing a moment in time. High-speed photography allows us to observe the fast actions of the world, the hidden spatial movements of humans, animals, as well as the physical properties of actions and laws of physics.
Photo Credit: Richard Copeland Miller
The reverse of high -speed photography, the capture of movement has also immense potentials for expressive outcomes, the study of the passage of time as a unique characteristic of the medium. Extrusive time, an academic term, refers to slow shutter speeds, long exposures and movements within the subject or scene, as well as with the camera as we will explore shortly. Although many artists have explored extrusive time, either due to the limitations of their historical process, one with low sensitivity such as the Daguerreotype or wet collodion, or even slow optics, others have used these inherent limitations to record the passage of time for an emotional and ephemeral outcome. One of my greatest influences resides with Richard Copeland Miller who photographed the country of Romania in his book entitled “Passage Europe” in a most somber and immensely emotional manner, using both extrusive time and camera shake to imbue the viewer with an extraordinary sense of sadness and nostalgia for a country left behind in the 20th Century. Sadly, he passed away at an early age, yet his work resonates the deepest within my soul.
Photo Credit: Richard Copeland Miller “Ephemeral” by Cathy Dutertre
Cathy Dutertre has made extensive use of extrusive time with several of her current projects, “Behind the Veil” and “Behind the Mask”. Using a tethered stationary camera, she will produce a performance (another academic term that designates a sub-genre of self-portraiture) together with various props in order to arrive at highly expressive images. The exposures are often in the 30 second to several minutes’ ranges, the tethering allows her to adjust her movements in order to arrive at a precise artistic outcome.
Photo by Cathy Dutertre, 2014 Photo by Cathy Dutertre, 2014
Another aspect of illustrating movement resides in the camera’s movement during capture, the act of altering and deconstructing the scene using a variety of techniques including ND filters, variable movements of the camera and rear sync flash.
Photo by Cathy Dutertre, 2014 “Chinoiserie” by Cathy Dutertre
Using movement, either from the subject or the recording device can be extremely emotional as the viewer re-interprets the image from a mental and emotional rather than physical points of view, whereas the use of extrusive time allows the artist to remodel the world at large, exposing the viewers to the astounding ability of the medium to record the passage of time.
The Technique of Variable Planes of Focus for Reflective Artistic Outcomes
Photo by Pierre Dutertre
View cameras, with their ability to independently move the front and back standards to generate sharp images within complex environments where the detail of a product or structure has to be fully rendered, have been around for well over a century. Architectural photographers have used the swings, tilts and shift functions of their view cameras to generate accurate, fully focused and standard renditions of interiors and exteriors, ensuring perfect vertical lines and recording the fine details of a particular space or building. Commercial artists have indeed been fortunate to control precise planes of focus to accurately represent products without distortion and with immense or a very shallow depth of field. This was predominant in food photography, where only a small portion of the image would be in focus, thereby creating a visceral and imaginative reaction with the viewer.
However, this ability to precisely control 3-dimensional planes of focus (also known perhaps incorrectly as selective focus) can also be utilized by the creative artist who desires to highlight a particular point of interest in a scene, directing the viewer to an area of interest as intended for a concept-based reflective intent. This technique relies on the ability to move the lens 3-dimensionnally, with the equivalent of the swings and tilts available in a view camera format. There are several alternatives that replicate the front movements of a view camera, from the easily attainable to the exotic. The beginning point resides in a lens baby set-up available for 35mm DSLR cameras.
Lensbaby, Tilted
The operator can simply twist the lens in multiple directions to generate a fairly precise 3-diemnsional plane of focus.
The results can be very creative in isolating certain parts of the scene in order to create a mood or an ephemeral and mysterious image that denies a full view to the viewer, allowing for directed and controlled points of interest and therefore an artistic communication, resulting in a reinterpretation of the scene by the viewer.
Photo by Cathy Dutertre, 2012 Mounted Canon PC Type Lens, Tilted
Perspective correction (PC) or tilt-shift lenses for 35mm and medium format cameras have been primarily used by architectural photographers in order to control perspectives and distortion, but these exotic prime lenses can also be used to imbue a distinctive style and content to an image.
The Canon TS-E 24mm f/3.5L II allows for shifts and tilts, but can also be rotated to create a similar result of the lens baby, yet preserving a superior optical rendition.
“White Knight” by Cathy Dutertre
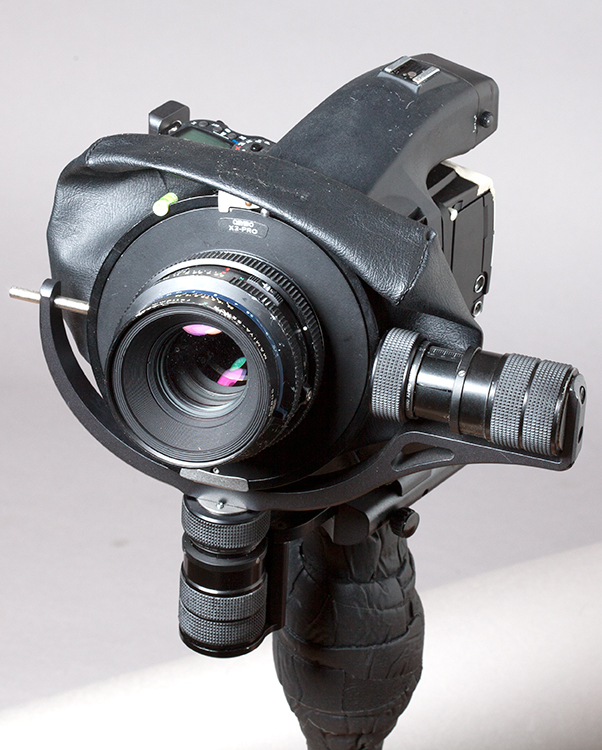
At the high end of the spectrum, one can use the X2 PRO system created for medium format and 35mm digital cameras, replicating the precise movements found in a view camera that otherwise may not be the best suited tool.
X2Pro, Fully Extended
Although created for studio use the X2 PRO is still manageable on location as in my personal use, despite the bulk and weight of the complete assembly. Mounted with a refurbished Mamiya body, a flawed Phase One P25 digital array, an ancient Mamiya RZ lens and a monopod, this rig has been a mainstay of many of my personal projects, allowing me to precisely control the 3-dimensional planes of selective focus to convey a mood and expressive / reflective artistic outcome. From a banal scene, I am able to extract the essence of a particular subject in order to imbue the image with a communicative message, the real subject matter that transcends the recording abilities of the medium.
“Dawn” by Pierre Dutertre “Weeping” by Pierre Dutertre
In effect, the technique of variable planes of focus imitates to some extent our human vision, monocular eyes that have a central point of sharpness, blurred peripheries and adjustable parallel focusing. The ability to push beyond these organic parameters with 3-dimensional planes of focus allows for a creative outcome, making images that are precisely controlled to add a quasi surrealist feel and mood, deconstructing unnecessary elements that do not support the concept, and creating engagement with the viewer as they examine a reconstructed reality as a personal communicative effort on the part of the artist.
Ah, night photography. Camping out under the open sky, recording trails as the stars creep across the heavens, exposing the glorious Milky Way as only a camera can see it…
Nope, that’s not happening in the city!
A Persistent Love
One of my favorite kinds of photography to both create and view is nighttime exposures of urban light. I have always felt such an affinity for the nighttime. By nature, I’ve always been a bit nocturnal, at my best after sun down. For this reason, nighttime urban photography exists within a deep affection that I may never let go of. Prowling around when the sun has hung up his hat for the night, the light and shadow begins to play in an artificial dance under the street lamps. Photographs made of the night hold such mystery and magic for me. Shadows become distorted, colors become surreal, static scenes whisper a different story than the one they assert in daytime.
Below are two examples of daytime versions using some of my favorite nighttime photographs as guides.
4PM versus 4AM, Day & Night Opposites Day & Night Opposites, Featuring the photo “Lure”, by Linz Welch
Looking at these comparisons, the daytime counterparts don’t hold the ambience and clandestine personality I seek. The stark atmosphere and deep darks of the evening versions call for my investigation. The photos in daylight just seem more still and obvious in their existence to my eyes.
My Trusty Steed
During the night, one of the most important pieces of equipment for me is a solid, yet packable tripod. A good tripod is integral to my style of photograph creation at night, as most of my nighttime exposures are from 15 seconds through 4 minutes. I tried many models of tripod before finally discovering my beloved 3 Legged Thing. This is a really gorgeous and understated tripod. It remains versatile, while being just enough unlike other tripods to feel like it is more than only a utilitarian item. On that note, I’ll stop making verbal love to my tripod here, and save the review for later.
3 Legged Thing: Eddie
The two most important aspects of this tripod choice are that it is carbon fiber and only about 16.5″ folded. Carbon fiber is important because it resists transmitting vibrations up through the camera while remaining much lighter than other materials. The solid foundation stops speeding traffic from causing shake to my longer exposures. Carbon fiber is also ceases vibration faster than metal, so wind and camera shutter slap is more easily damped. The small size and weight means that it can fit inside my backpack, allowing me to carry only one bag which makes those long treks through the sub-urban jungle more bearable.
Another piece of equipment you will find in my bag is actually the one you won’t find. I almost never use flash in my night exposures, preferring to work with the conditions as I find them.
In The Best Light of the Light
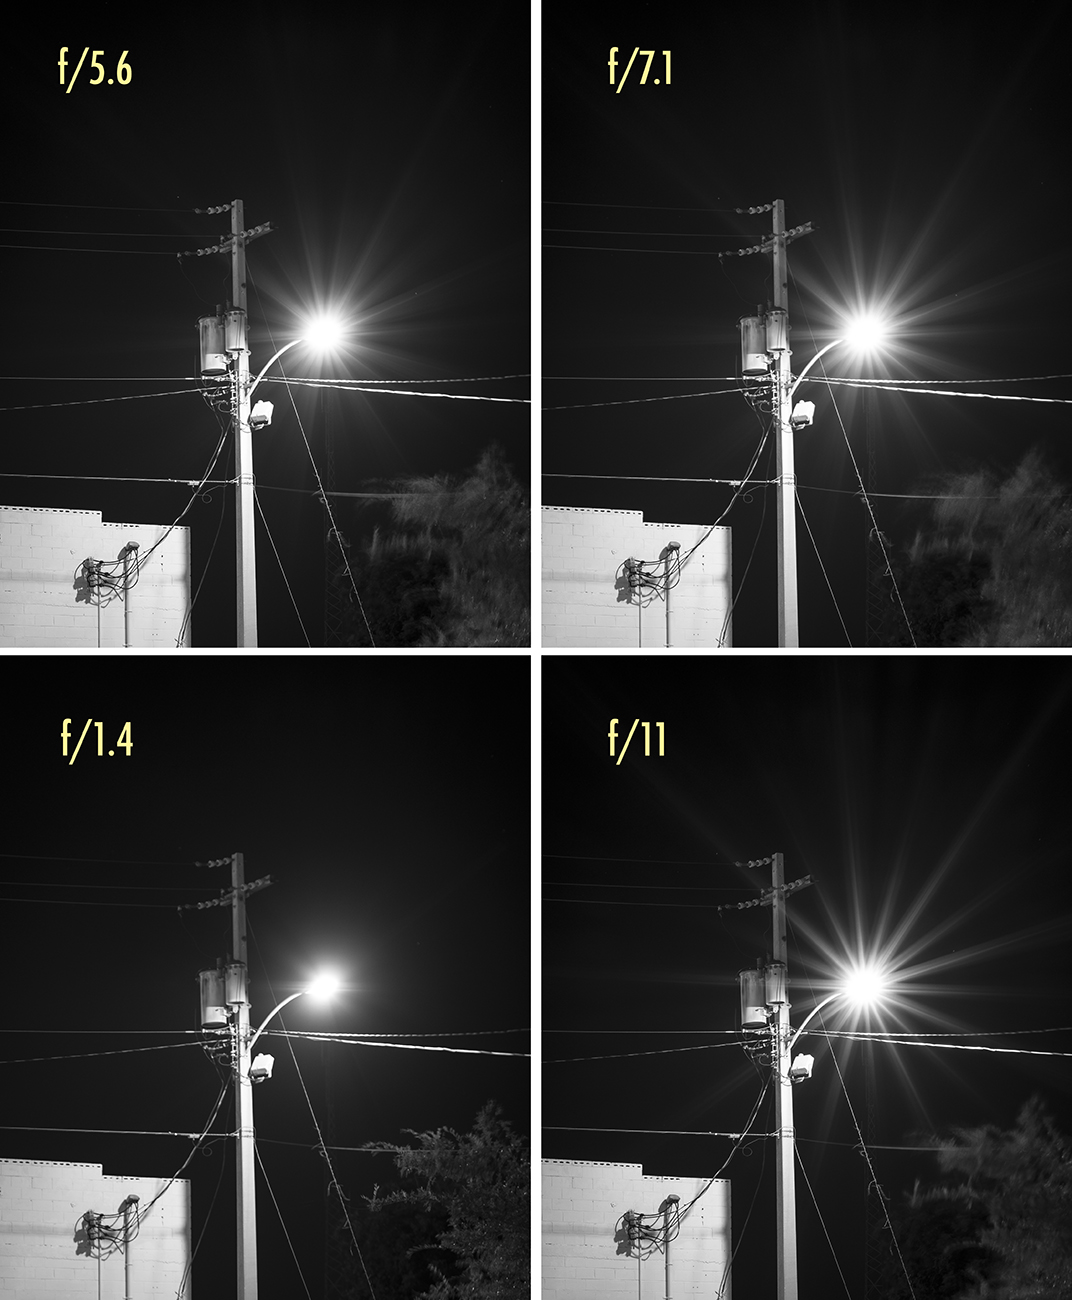
When creating photographs that include light sources, one of the most essential aspects to me is rendering the visual character of the light as I see it in my minds eye. For this reason I choose to almost always stay within the aperture ranges f/5.6-7.1 despite loss of depth of field and complete sharpness throughout. While this exact setting can vary dependent on the lens’s construction, this is what is true of the lenses I am currently using. However, what remains always true is: the smaller the aperture (higher number, ex f/11) the sharper the light appears when it enters the lens; and the larger the aperture (smaller numbers, ex f/1.4) the more hazy the light, as it has a larger opening through which to enter.
A Comparison of Different Flares
As shown in this picture, the top two examples at f/5.6 and f/7.1 are the kind of light source flare that I am simply in love with. It just barely begins to form a star while remaining slightly ethereal and equivocal. In the example for f/1.4, the light source has no personality; it just sits there and adds nothing of itself beyond the light in the scene. In the f/11 example, the star effect feels too abrasive; too sharp and defined, it begins to call all attention to itself as its shape geometrically contradicts all other forms in the photo.
Nighttime Shadow Trees, Featuring the photo “Stand”, by Linz Welch
A Few Tidbits To Remember
Having my ideal aesthetic and foundation in mind, there are a few more pieces of advice that are essential to a night of photographic urban safari. Below is a list of things to consider when setting out with a camera after sundown.
Do use a tripod and remote, or the camera’s self-timer.
Touching the camera while activating the shutter button can cause unwanted blur.
Do be aware of surroundings and never be in the way.
Sometimes photographing empty areas at night can be a bit of a risk, be aware of who is around you and evaluate potential risks. The sad truth is there are people out there that might take the opportunity to run away with your gear! On the other side of the equation, be aware that when deploying your tripod, you don’t want to hinder vehicle or walking traffic around you, or cause people to trip on your tripod. It’s best to find an unobtrusive area you can hang out in, thus allowing you to concentrate on capture.
Do look at the way the light changes the subject.
You don’t have to have use street lamps necessarily, but interesting lighting conditions are optimal studies for the conditions that are only available at night.
Don’t expose for the subject, but rather the quality of light.
The object here is to do the most justice to the light itself, with the exposure of the subject being complementary to the light.
Don’t be afraid of the mundane, sometimes the simplicity of the light is all that’s needed.
At times, simplicity wins; all of the interesting angles and perspectives can’t compete with good old fashion geometry. Don’t be afraid to try the obvious approach.
Don’t be temped into high ISO settings.
The lowest ISO and long shutter speeds will maintain subtle gradients and dark tonalities. As noise or grain in the media increases, details can become mushy and unique nighttime tonalities can be lost. Don’t be afraid to open the shutter for several minutes or more.
“The Path of Night”, by Linz Welch
Into the Night
I hope you’ve enjoyed reading my approach to stalking around in the dark. As you can see, not all photo adventures need to take place in waking at 6am, and some of the real jewels only become apparent in the evening. Our modern days are so busy, and full of running from here to there, that we often forget to enjoy this world of artificial light we have created for ourselves. Of course with it, all the stars of the heavens are missing in action as more sprawl brings more light pollution. Finding stars for photographs means venturing ever farther away from home for many. However, rediscovering the uniqueness of the world of man, as seen at night, means adventures can also be found in just a few steps outside.
Well, what’re you waiting for? Get out there and lose some sleep to the glory of night photography!
Optical blur, or in other words the lack of sharpness and detail in a photograph, is an integral part of the limitations of the medium that can be used to effectively change the scene captured and reconstruct, reinterpret, the world around us in a communicative output. As Hiroshi Sugimoto, a contemporary photographer who has successfully used optical blur via defocusing a view camera to illustrate a massive project and book on architectural icons worldwide, declares: “It is about seeing the thing itself rather than the thing”. http://www.sugimotohiroshi.com/architecture.html.
As our eyes are assaulted by a flurry of confusing details within any scene or environment, the deliberate act of removing such details precisely and controllably with the technique of blur allows the artist to communicate his or her personal communicative view of the essence of the world to the viewers, in an expressive and experiential reinterpretation of the mundane or iconic.
Early Figure of Camera Obscura
Optical blur can be achieved with a variety of methods, from pinhole applications to flawed optics and manually defocusing lenses, but originally started with the camera obscura, a pinhole system that is at the core of photography and originally used in the Baroque period by many Lowlands painters to accurately draw complex and sometimes contained perspectives, such as the interiors of Johannes Vermeer. From the inception of the Daguerreotype onwards, great advancements in the resolution and quality of optics resulted is sharp images with immense depth of field, the desired result with photographs up to our present time when digital camera manufacturers tout the ubiquitous amount of clarity and detail regarded by the public as quintessential to a “good” image. The Pictorialist movement of the late 19th and early 20th centuries sought to reverse that trend in order to place photography as its own art form, closely following the established medium of painting as its stylistic and subject matter influences. In that desire, one doomed to last only a few decades before modernism dismissed the failed aspirations of the pictorialists, flawed optics and pinholes were commonly used together with the gum bichromate and platinum processes to render ephemeral images lacking detail and with limited or non existent sharpness. Such an example can be seen in the iconic image by George Davison, “The Onion Field”, 1889, one created with a pinhole camera.
Pinhole photography can be very affordable, with laser drilled brass pinholes of varying diameters available for 35mm DSLR’s and medium format digital cameras, yet these lack the hand of the artist insofar as creating your own pinholes can be far more unpredictable and therefore more appropriate for the “chance” element of the medium in terms of the methodology used to support a sound stylistic conceptual application. An example of this personal application can be seen in a collaborative project with Cathy Dutertre in her ongoing search for spiritual and scientific questionings, “Quest”, created with a pinhole mounted directly on a medium format digital array. http://www.pierredutertre.com/2013-collaborative-project/, http://cathylyn.com/new-work/.
“Flight”, by Cathy Dutertre Ground #42, 1997 by Uta Barth
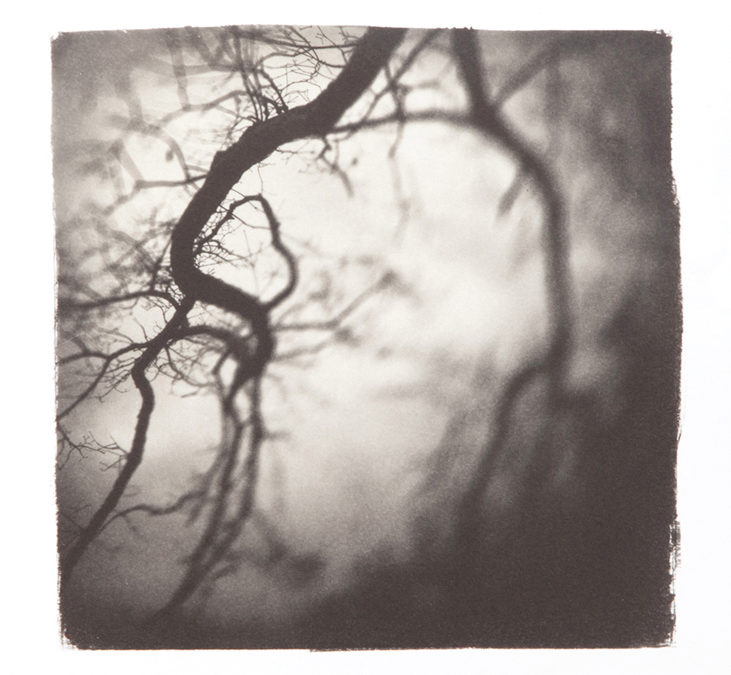
The method of defocusing a good optic for a conceptual approach resulting in experiential imagery can at first glance appear easy and gimmicky, yet I must simply say that it is a most difficult technique that requires a precise intent rather than the search for singular “cool” images. Hiroshi Sugimoto, as discussed earlier, has applied this methodology in a consistent manner to illustrate his personal approach to illustrating architectural icons in a minimalist style and intent. Uta Barth, a contemporary post-modernist conceptual artist has applied a different technique by focusing her camera on an object close to her camera and effectively defocusing a banal scene further away, often within the confines of her immediate spatial presence, thereby offering a reconstruction of mundane environments for experiential outcomes. I have applied similar conceptual principles within my ongoing “Seascapes” series, one firmly inspired by pictorialist principles as well as post-modernist approaches of deconstructing the inane representative qualities of the medium, using a flawed 40mm Hasselblad lens on a mechanical body mounted with a medium format digital array that is taped on the body with duct tape due to incompatibility. http://www.pierredutertre.com/sea-scapes/
“Seascape Study #7”, by Pierre Dutertre
This leads me to consider the radical approach of using flawed optics, or vintage optics from collectible cameras, mounted on modern digital platforms with a variety of MacGyver methods, such as glue or duct tape. David Arnold, a fully engaged artist, educator and mentor first introduced me to the possibilities of using flawed optics for expressive purposes, often cannibalizing vintage camera lenses and mounting these on a variety of digital cameras with tape in order to introduce a “chance” element to the resulting imagery. This approach clearly follows the great philosopher Vilem Flusser http://monoskop.org/images/c/c4/Flusser_Vilem_Towards_a_Philosophy_of_Photography.pdf who wrote that the photographer must be in full control of his “apparatus”, the camera, in order to rewrite the parameters of the mechanical aspects of the technology in order to uplift its limitations that are created by the manufacturer and society as a whole, to reinterpret the artist’s viewpoint as a communicative outcome for the viewers who will then reconstruct their own interpretation according to their personal cultural background. http://davidarnoldphotography.com/
In conclusion, I must point out that the technique of blur cannot simply be the result of accidental experiments, nor can it be the ubiquitous search for “cool” images, but rather the intellectually and stylistically driven approach to creative expressionism, the mandated outcome of any artist who seeks to communicate a personal view of their personal interpretation of the world at large to their viewers.
If you are interested in knowing more about the complex technique of optical or lens-less blur, I will be conducting exclusive and practical workshops later this year under the guise of the UPA Gallery.
The recent resurgence of alternative processes within the fine art photography realm, such as cyanotypes, Van Dyke browns, platinum/palladium prints, gum bichromates, daguerreotypes and wet collodions, have brought upon a new and exciting direction to our medium. Not only these alternative processes allow the digital photographer to easily switch back from the digital world into the analog realm with digital negatives produced on a simple inkjet, seamlessly and with the application of the hand into their visual outcomes, using UV contact printing for some of these processes, but also using many simple chemical kits and online information that are now available to those wishing to venture into these processes. Some of these processes, such as the wet collodion or tintypes remain in the dangerous aspect of these alternative methods, yet the artistic outcomes and value with collectors remains high in terms of perceived value. Several suppliers of such methods can be found at the photographic formulary website: http://stores.photoformulary.com, my favorite: https://www.bostick-sullivan.com/ or http://www.freestylephoto.biz/
With these newer possibilities it is now up to the photographic artist to decide on the methodology for presentation purposes, according to their conceptual approach as it applies to their viewers and ultimate outcomes. We are indeed fortunate to be able to delve into these alternative processes, from analog or digital precepts, and therefore must be open to these possibilities for a fine art outcome. A great overall resource of information can be found at: http://www.alternativephotography.com/wp/processes
Pierre Dutertre, Platinum/Palladium print from a digital negative, 14”x14” on Arches Platine media, 2013 Click image for available print Pierre Dutertre, Van Dyke brown print from a digital negative, 12”x12” on Arches media, 2012 Click image for available print Pierre Dutertre, Platinum/Palladium print from a digital negative, 14”x14” on Arches Platine media, 2013 Click image for available print Cathy Dutertre, Cyanotype print form a digital negative, 14”x14” on Cansonmedia, 2014
Are you interested in obtaining a one of a kind similar to those represented above? Please contact UPA Gallery at inquiry@upagallery.com or access our contact page.
The United Photographic Artists Gallery, L.L.C. would like to give you a warm welcome to our new site! Please have a look around and get aquainted with our artists. Contact us if you have any questions or requests.


 Basic Camera Obscura Figure (Snelling)
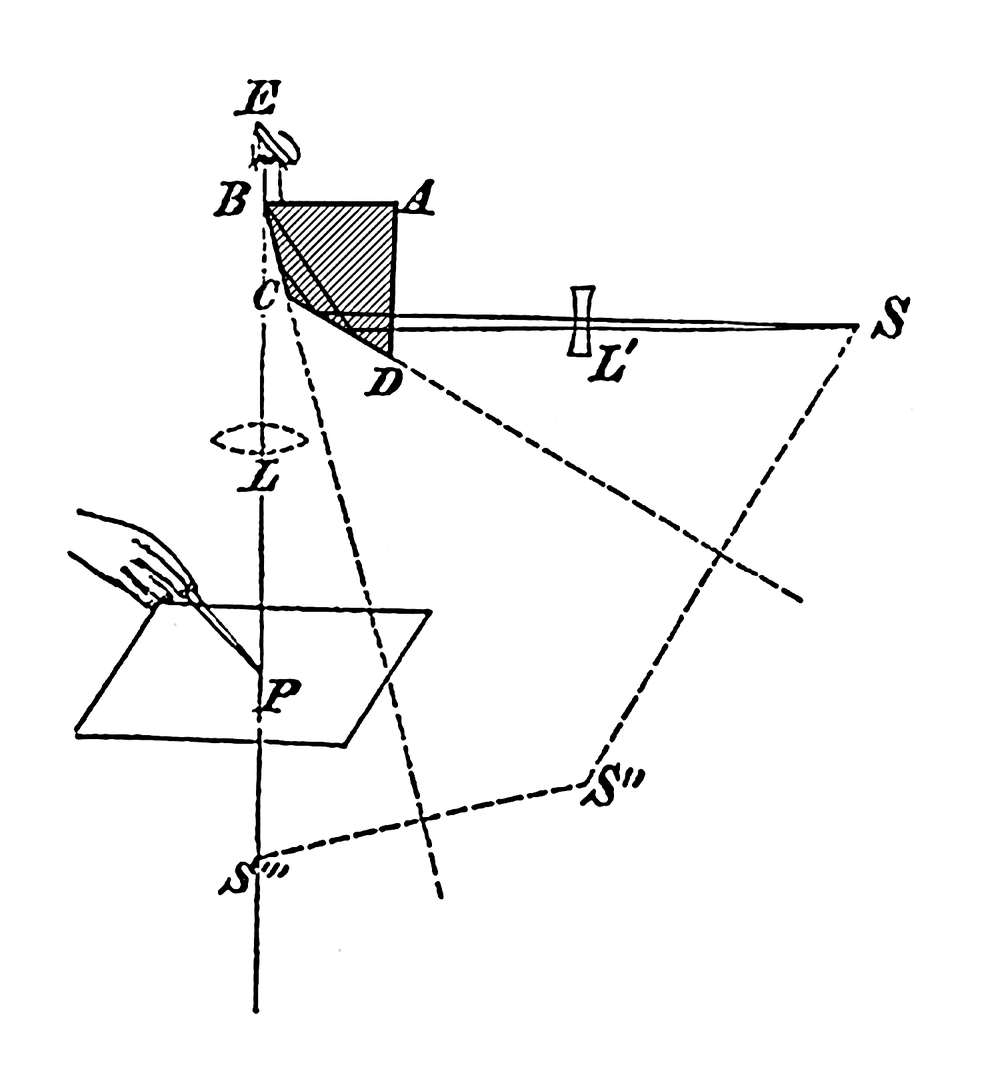 Wollaston’s prism optics, 1807 (Garcia and Levin)
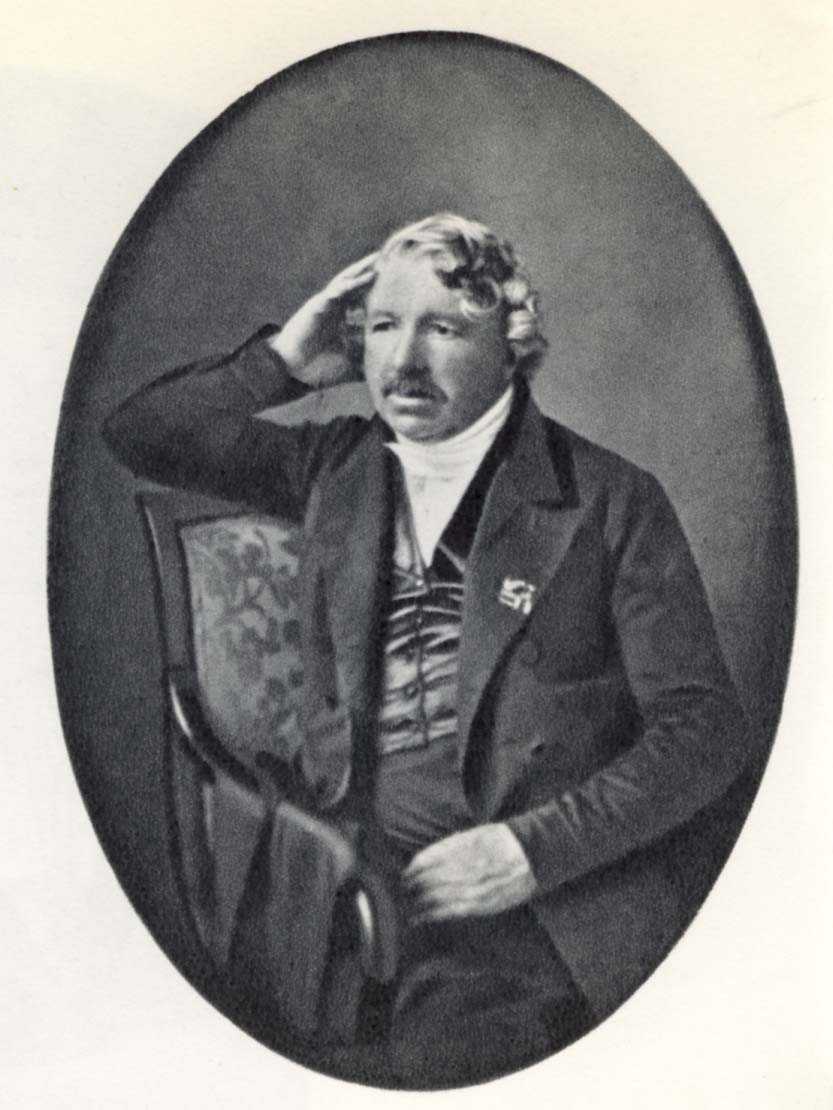 A daguerreotype portrait of Louis Jacques Daguerre by John Jabez Edwin Mayall , a photographic artist who established a studio in London in 1847 and later set up a photographic studio in Brighton, Sussex. This daguerreotype dates from 1846. (Sussex PhotoHistory)
 Joseph Nicephore Niépce (1765-1833) (Hemphill)
 Apparatus and equipment for making daguerreotypes, from an advertisement published in 1843. (Sussex PhotoHistory)
![“The real old school -- we're talking 1839 here -- was all about wooden boxes and brass lens protrusions, as you can see above. The double box design of the Daguerreotype lets you achieve focus by moving the smaller inner box away from the front-mounted 15-inch lens. Exposure times can take up to half an hour, though, so you might wanna budget for a sturdy tripod as well. Speaking of budget, if you know the meaning of the word you're not probably not the target audience here, as a May [2010] auction in Vienna is set to start at €200,000 ($280,000), with predictions placing the final sale price closer to €700,000 ($980,000).” (Savov)](http://static1.squarespace.com/static/52c88269e4b02010862a7bc9/52c8860ae4b0df7dc79d02f2/53d0de68e4b086627a600bab/1406197354152//img.jpg) “The real old school — we’re talking 1839 here — was all about wooden boxes and brass lens protrusions, as you can see above. The double box design of the Daguerreotype lets you achieve focus by moving the smaller inner box away from the front-mounted 15-inch lens. Exposure times can take up to half an hour, though, so you might wanna budget for a sturdy tripod as well. Speaking of budget, if you know the meaning of the word you’re not probably not the target audience here, as a May [2010] auction in Vienna is set to start at €200,000 ($280,000), with predictions placing the final sale price closer to €700,000 ($980,000).” (Savov)
“The real old school — we’re talking 1839 here — was all about wooden boxes and brass lens protrusions, as you can see above. The double box design of the Daguerreotype lets you achieve focus by moving the smaller inner box away from the front-mounted 15-inch lens. Exposure times can take up to half an hour, though, so you might wanna budget for a sturdy tripod as well. Speaking of budget, if you know the meaning of the word you’re not probably not the target audience here, as a May [2010] auction in Vienna is set to start at €200,000 ($280,000), with predictions placing the final sale price closer to €700,000 ($980,000).” (Savov) Inside a Daguerreotype Studio (The DagLab)
  Anna Cora Mowatt. Photographer unknown. Date unknown. Sixth plate. The Arthur and Elizabeth Schlesinger Library on the History of Women in America (A/K62-12) (SL-44) (Harvard University)
 Portrait of William-Henry Fox Talbot, Calotype Salt Print (The James Irvine Foundation )
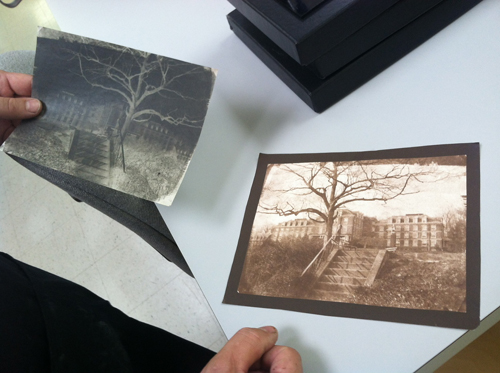 Here is a real waxed calotype negative and a salted paper print made from it. (The Photo Place Bus)
 An example of the types of cameras used for the Calotype (Vince)
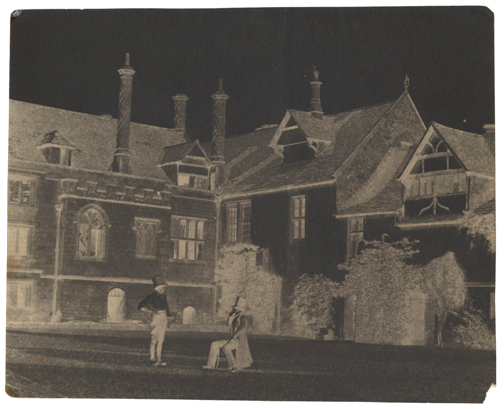 William Henry Fox Talbot, Two Men in the North Courtyard of Lacock Abbey, 1841-1844, calotype negative, waxed, 15.9 x 20.0 cm, corners rounded. (Kraus)
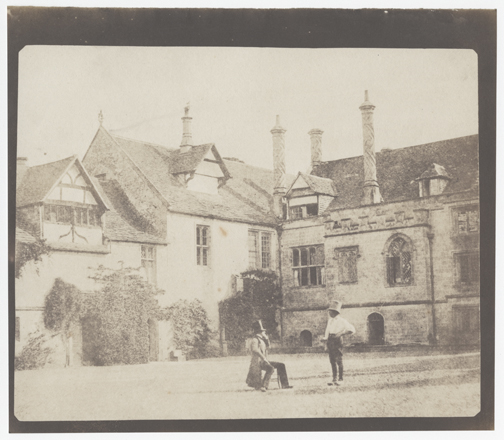 William Henry Fox Talbot, Two Men in the North Courtyard of Lacock Abbey, 1841-1844, salt print from a calotype negative,15.9 x 20.0 cm on 18.4 x 21.0 cm paper. (Kraus)
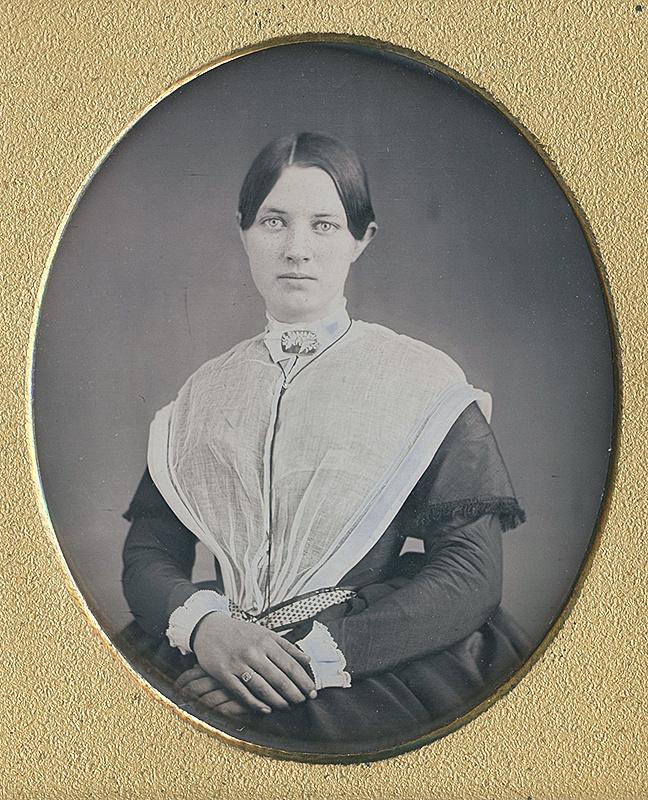 A Daguerreotype next to a Calotype and salt print. Both portraits, notice the difference in feel and mood despite similarities. (Found on Pinterest)
 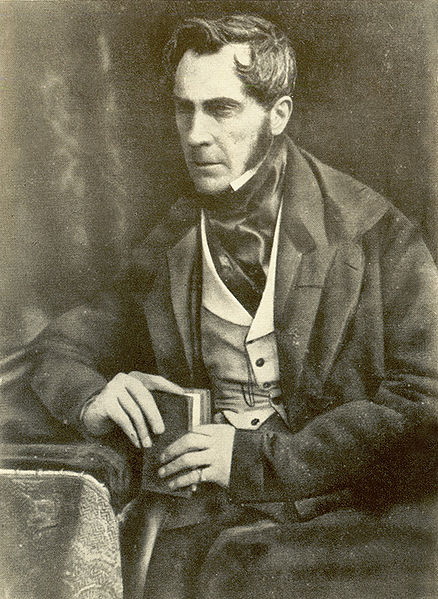 A Daguerreotype next to a Calotype and salt print. Both portraits, notice the difference in feel and mood despite similarities.(From Wikimedia Commons)
 Here is an example of a pretty famous daguerreotype. This is the first known photographic image of the moon. It was taken by John Whipple in 1851. (Rayazansky)
 Dean Orphanage, Calotype ~View looking over Dean Village in the valley of the Water of Leith (Edin Photo)
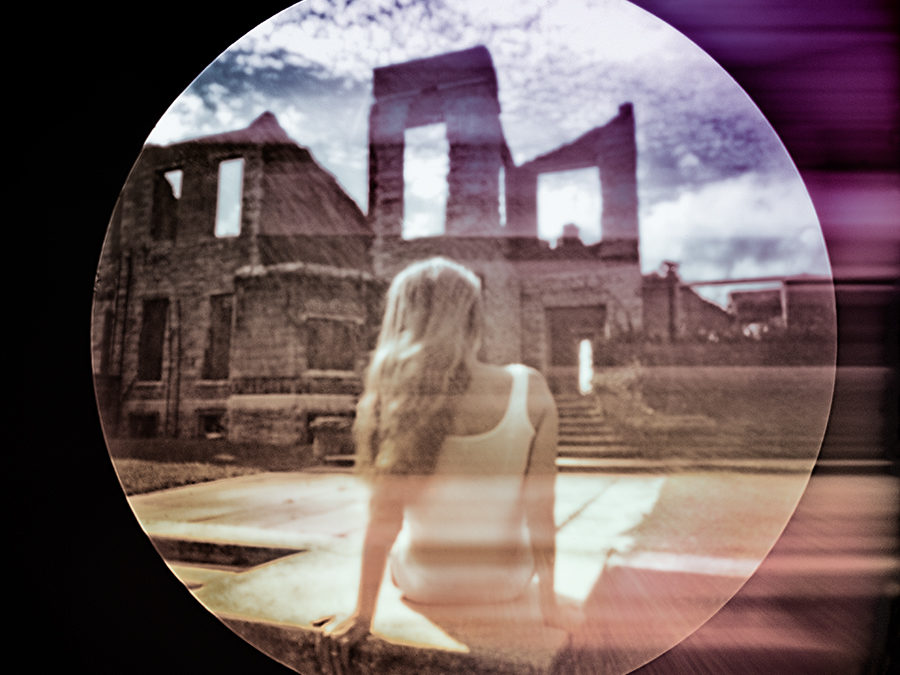
 Unknown author. Kodak box camera, circa 1890
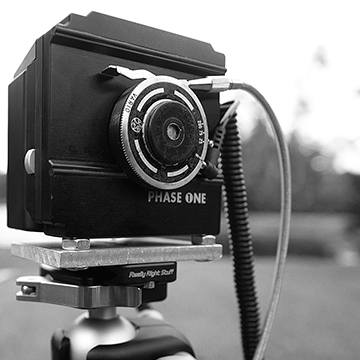 Image # 2: Custom fabricated medium format digital camera
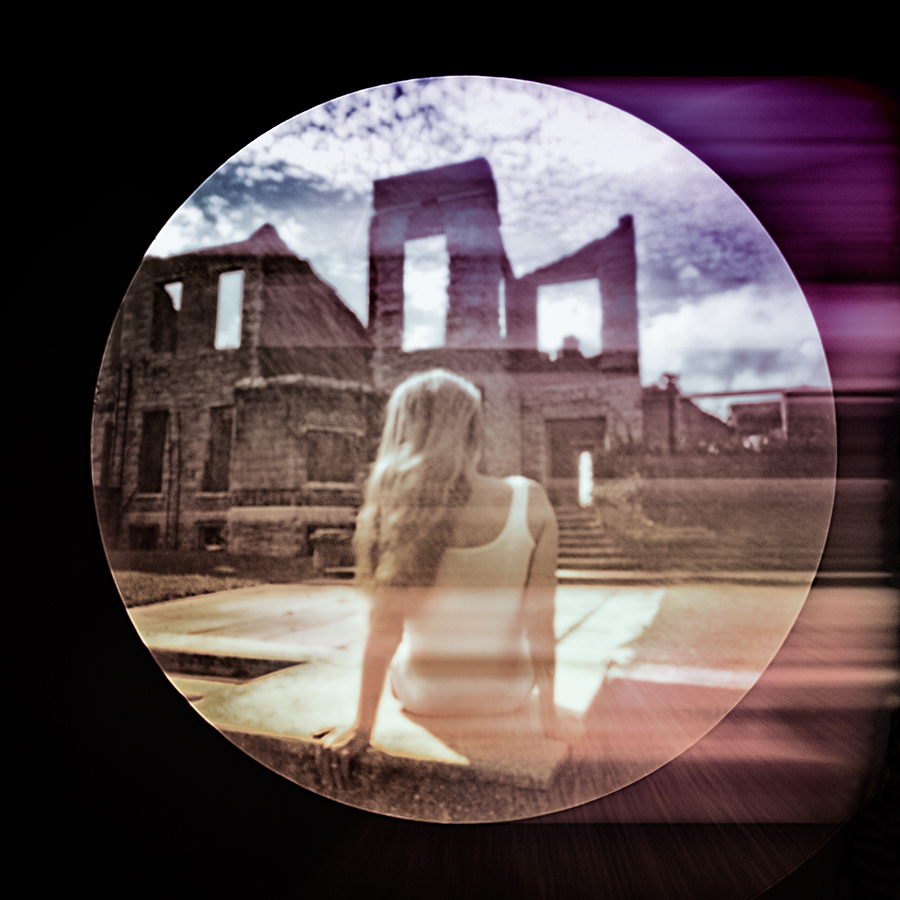
 Cathy Dutertre, Deity, “Behind the Veil” series, 2014
 Cathy Dutertre. Loss, “Quest” series, 2013
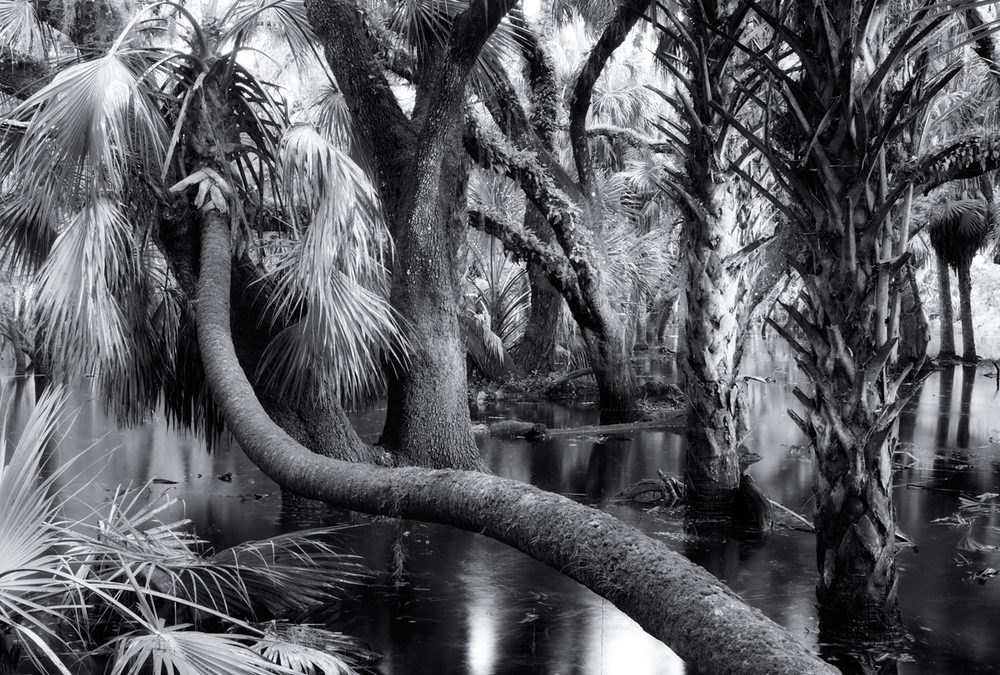
 “Myakka Park Drive 1, Sarasota” by Scott Bolendz
 “Remnant Mangrove, Tampa Bay” By Scott Bolendz
 “Remnant Mangrove, Terra Ceia Bay” By Scott Bolendz
 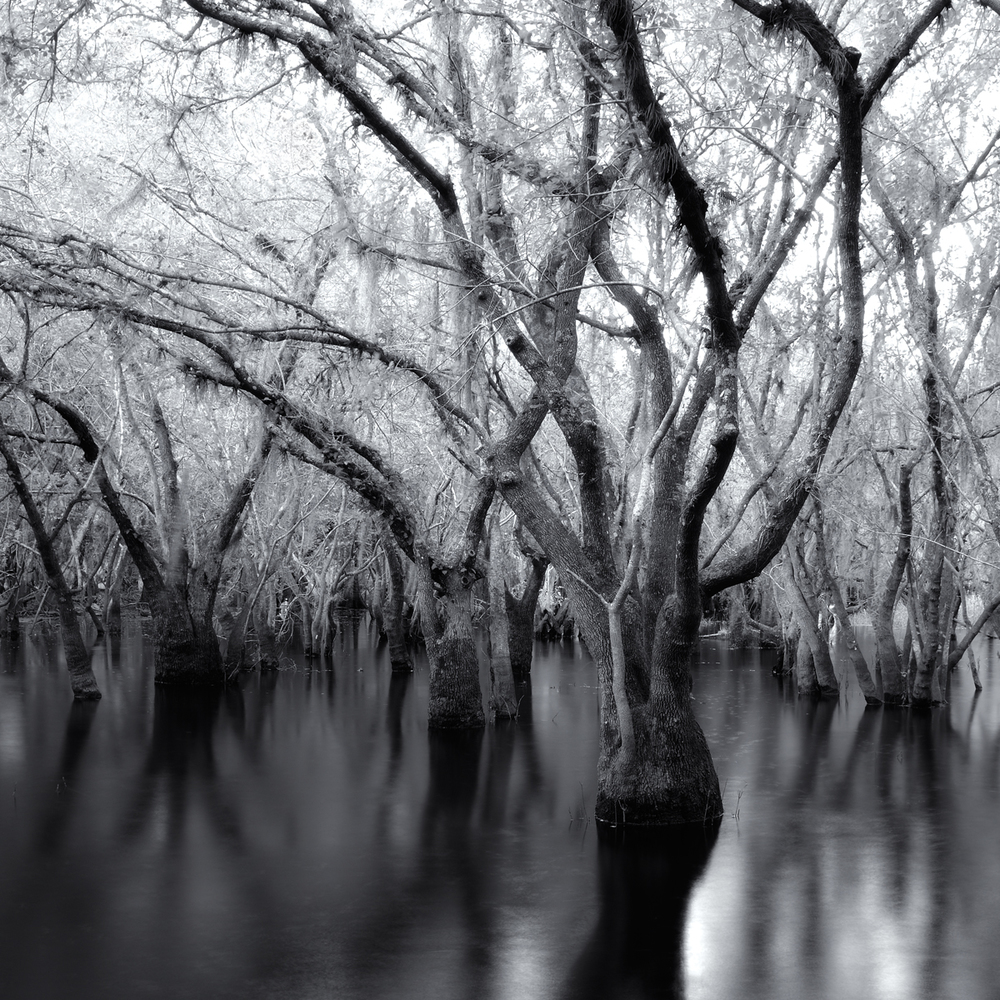 “Myakka Park Drive 2, Sarasota” By Scott Bolendz
 Photograph by Mannie Garcia (AP) / Artwork by Shepard Fairey
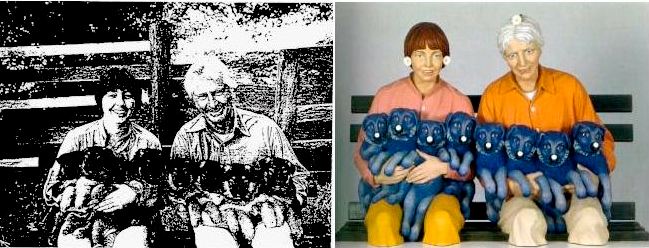 Photograph by Art Rogers, 1980 / Sculpture by Jeff Koons, 1998
 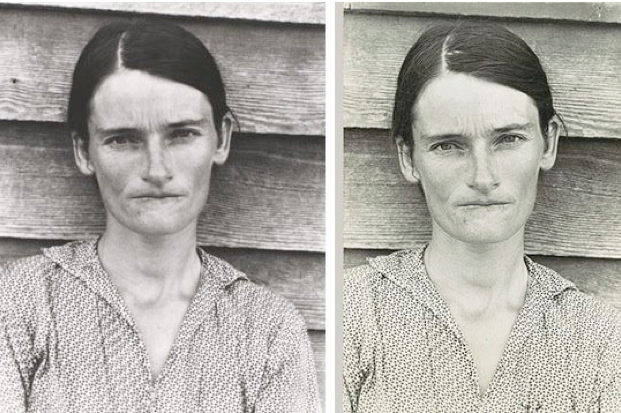 Photograph by Walker Evans, 1936 / Re-photographed by Sherry Levine, 1981
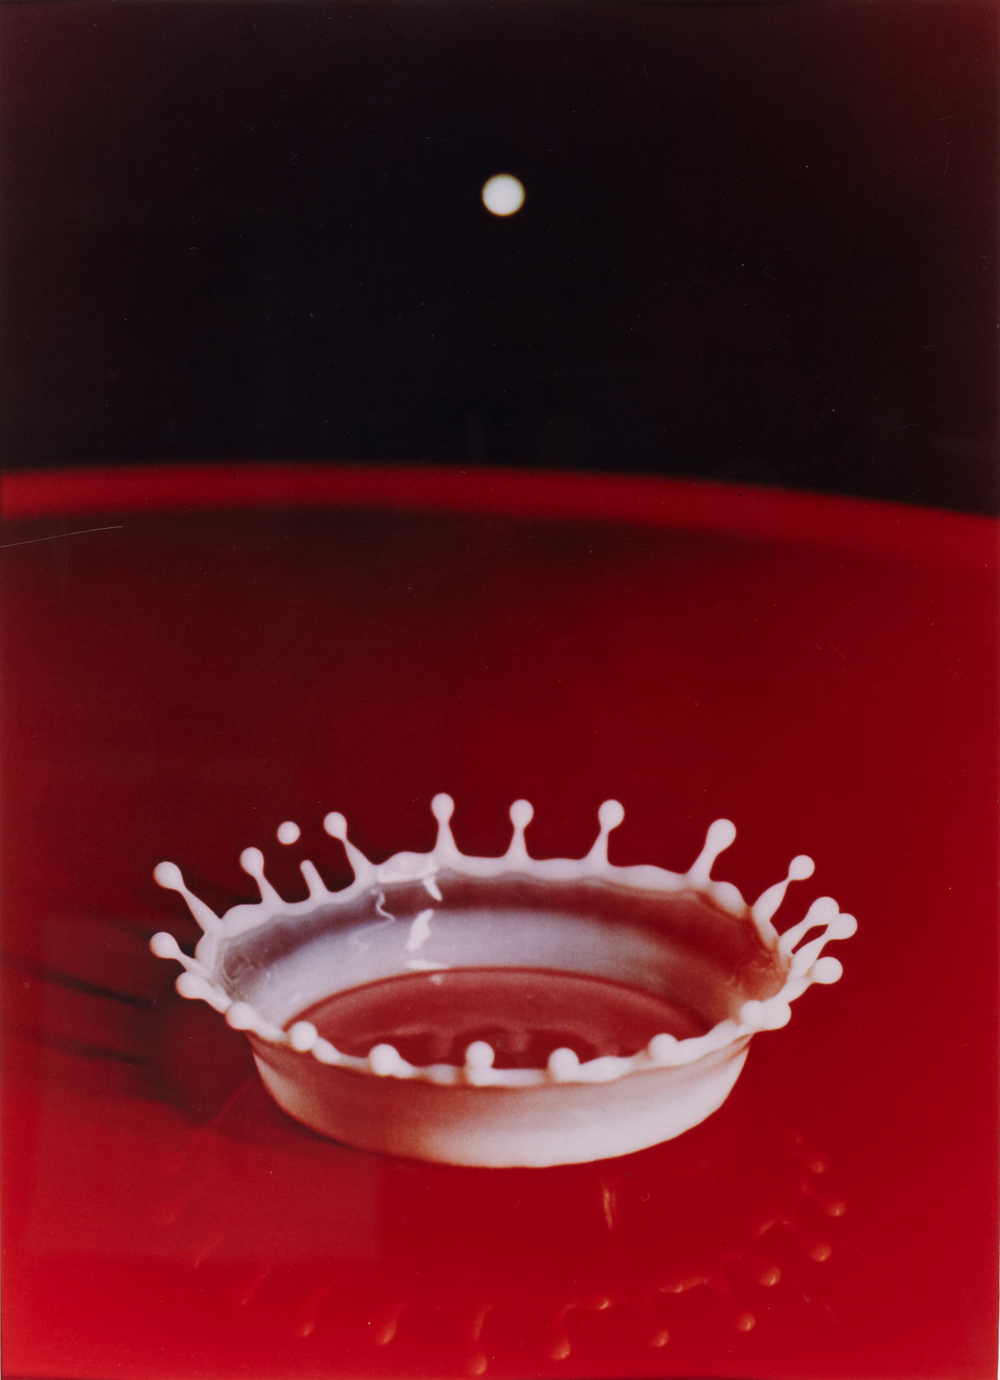 Photo Credit: Edgerton Harold
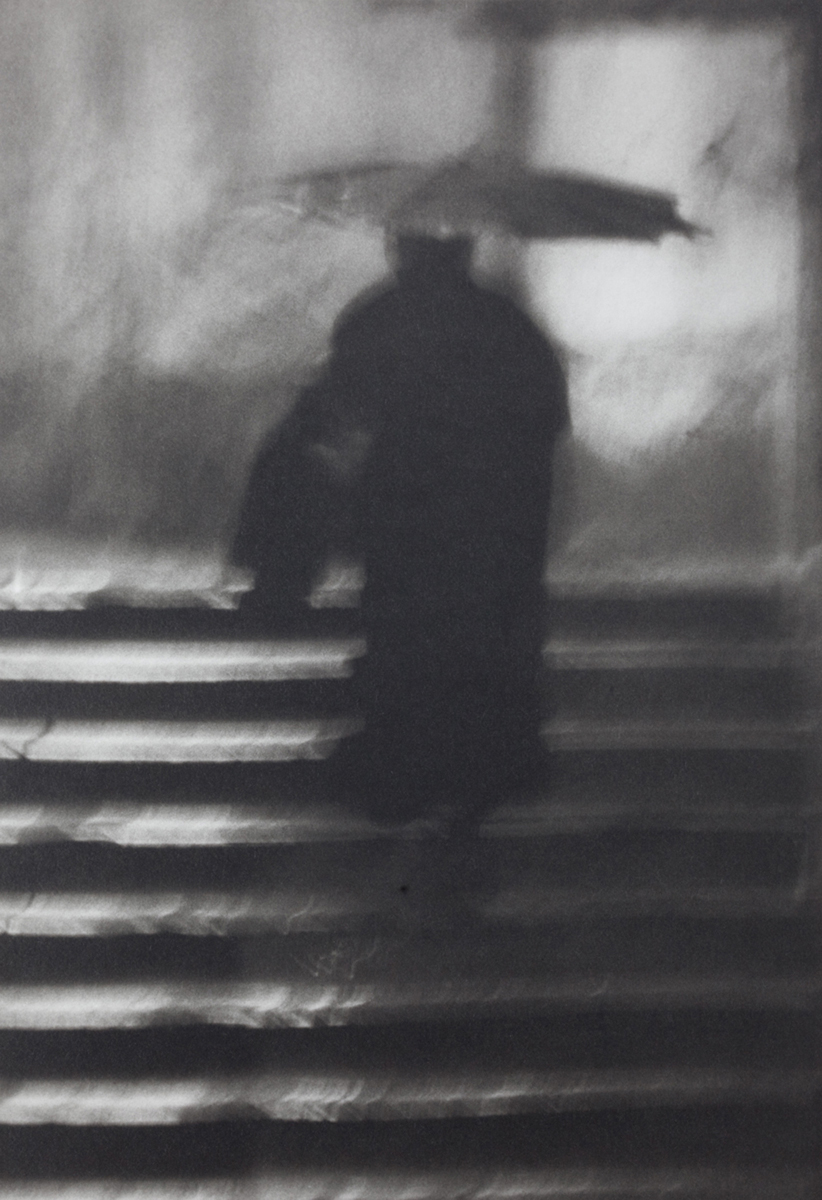 Photo Credit: Richard Copeland Miller
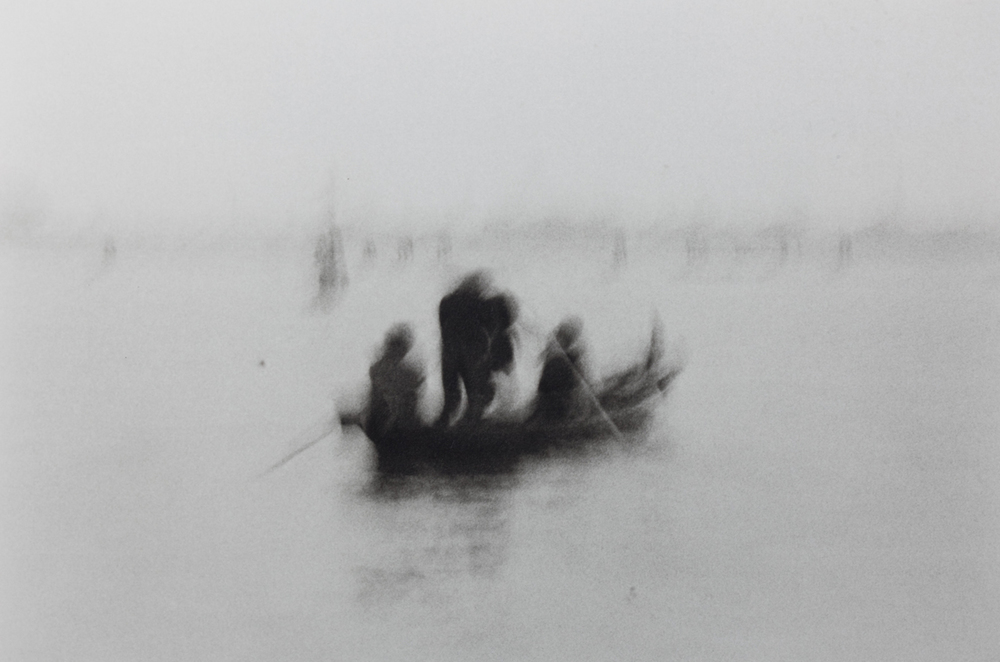 Photo Credit: Richard Copeland Miller
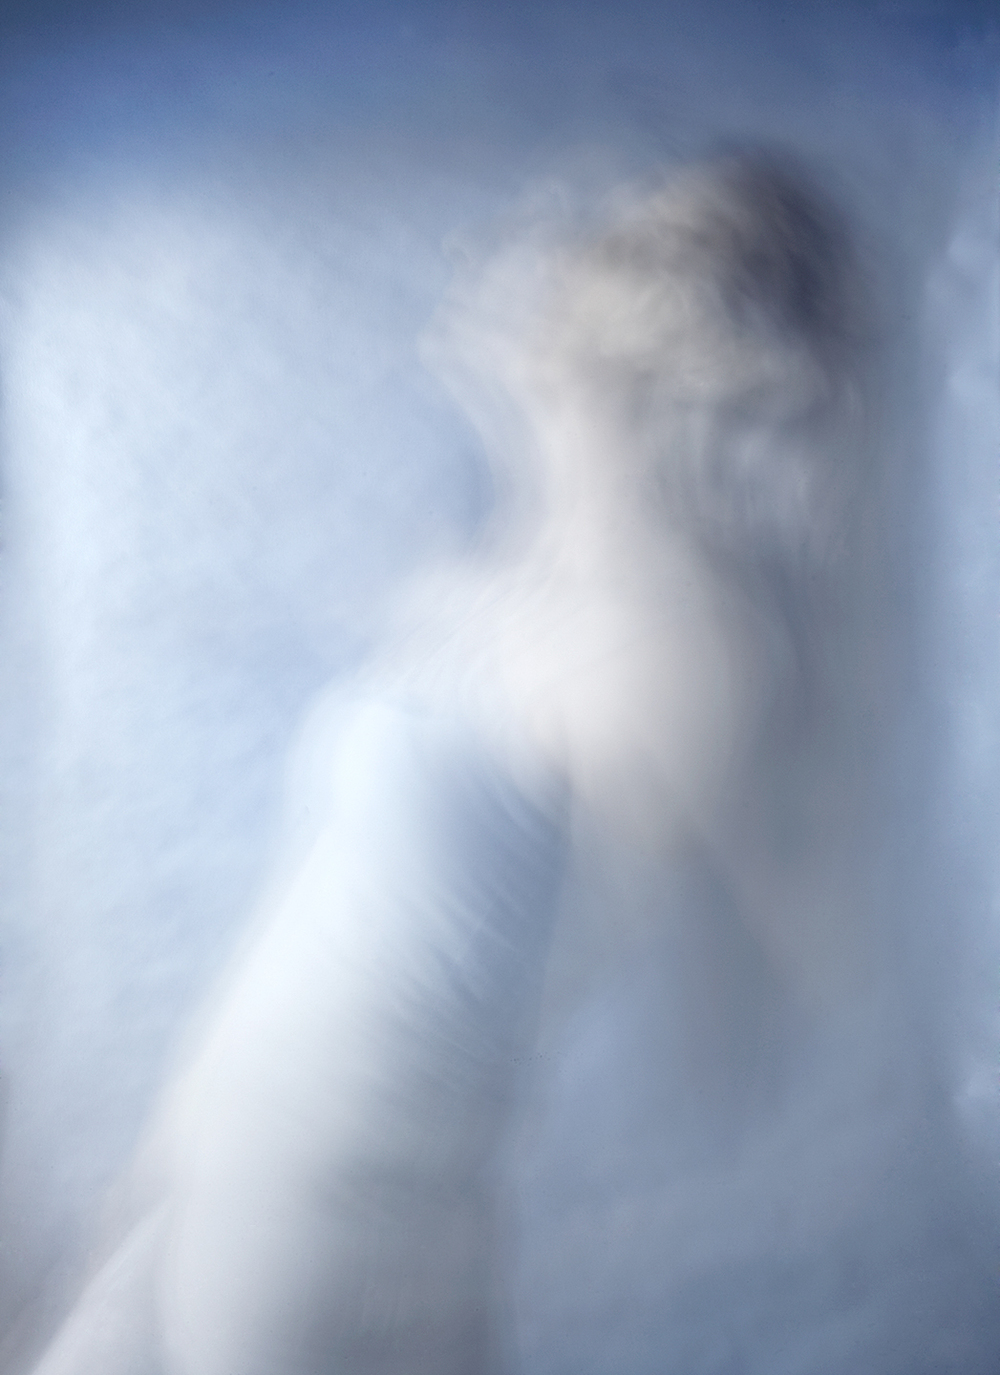
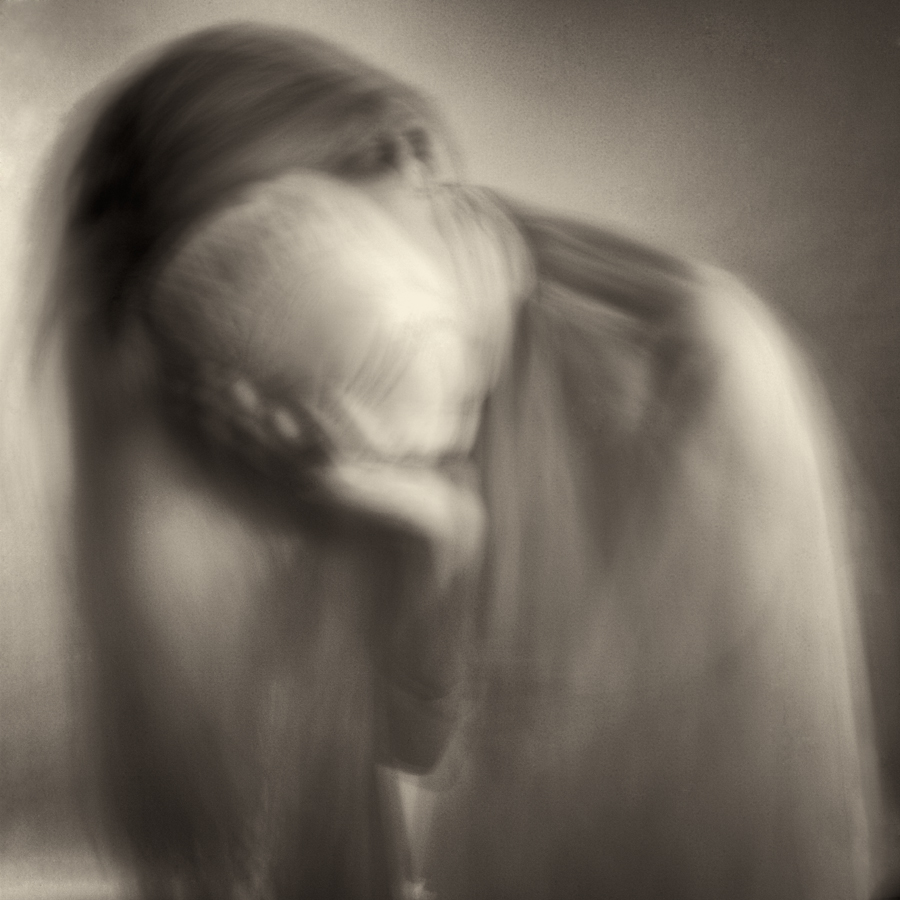 Photo by Cathy Dutertre, 2014
 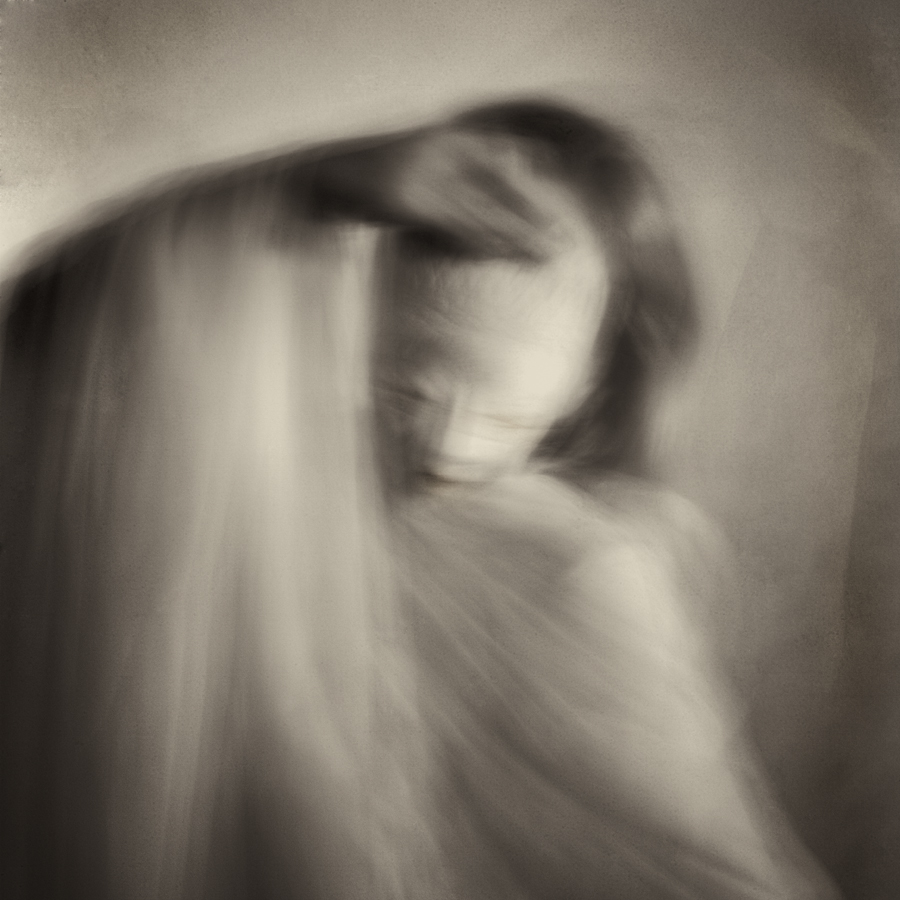 Photo by Cathy Dutertre, 2014
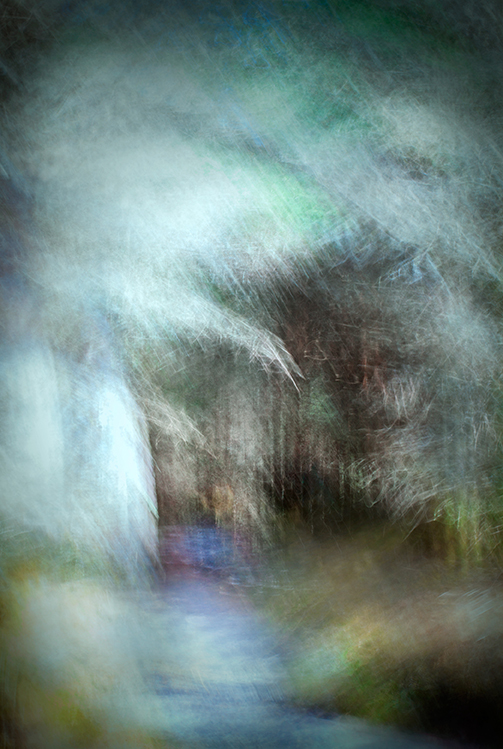 Photo by Cathy Dutertre, 2014
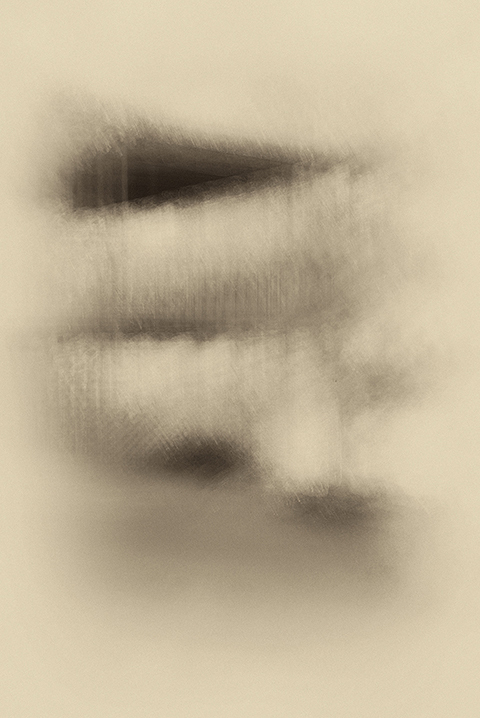
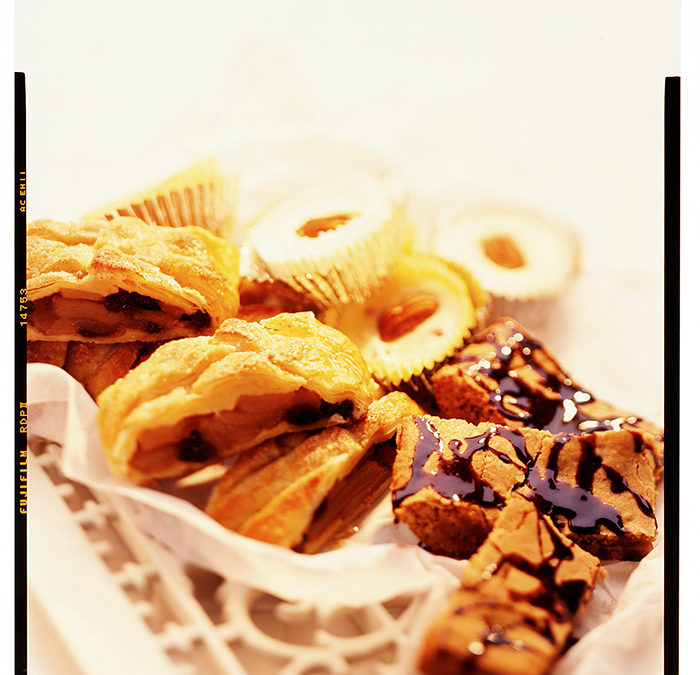
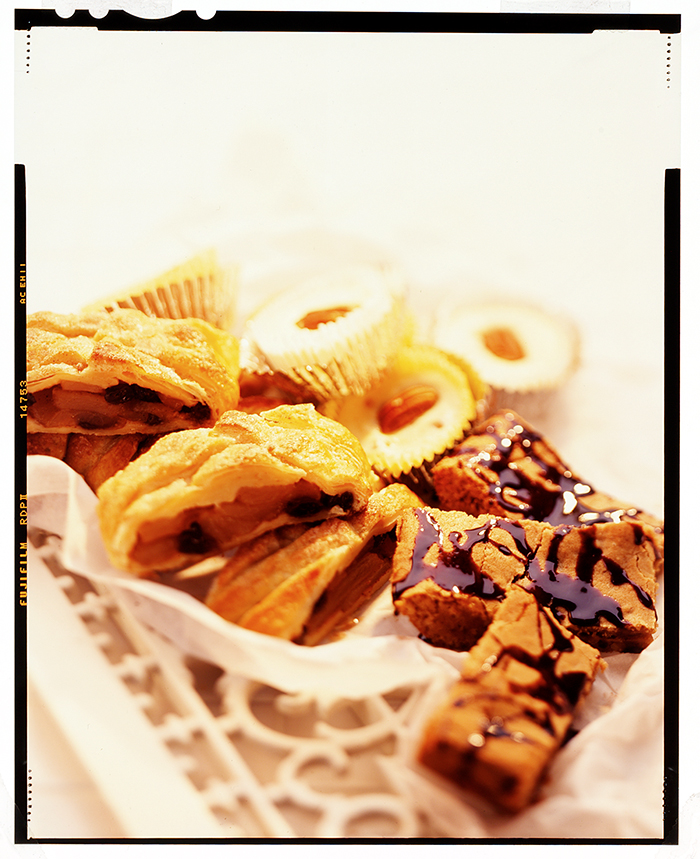 Photo by Pierre Dutertre
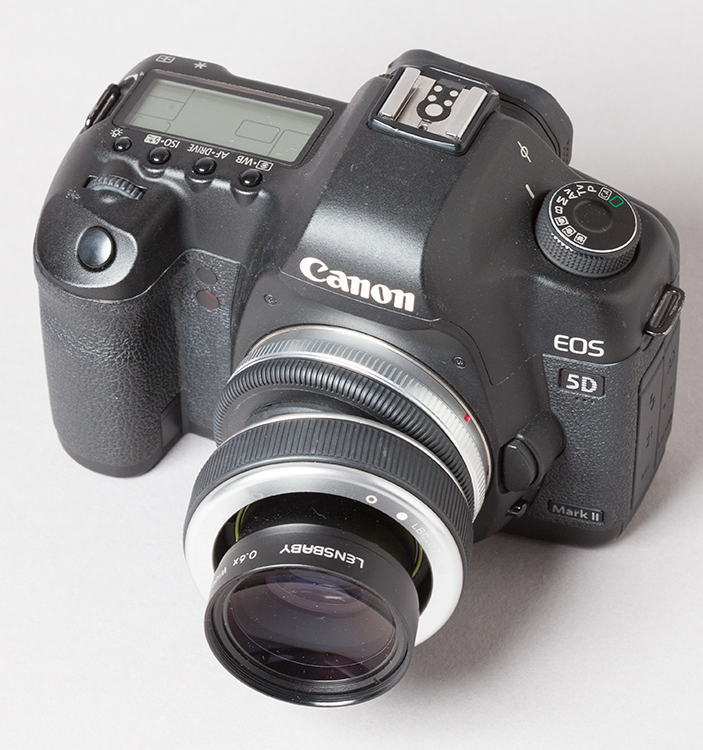
 Photo by Cathy Dutertre, 2012


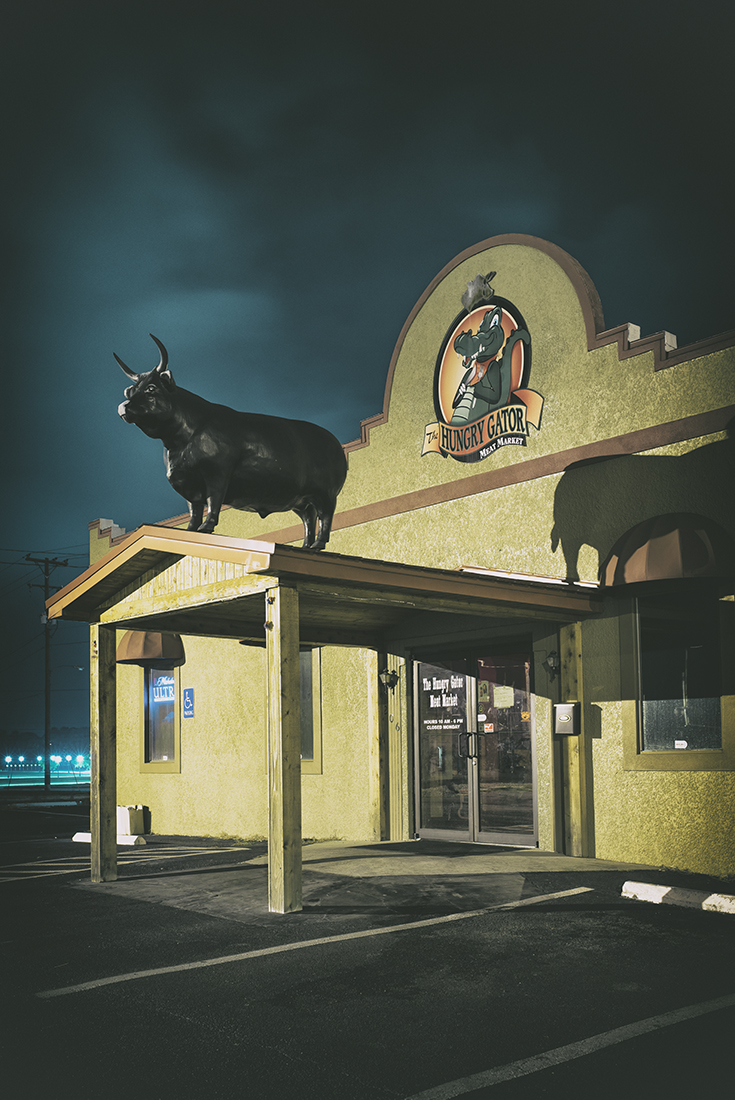 Hungry Gator & Bull
 4PM versus 4AM, Day & Night Opposites
 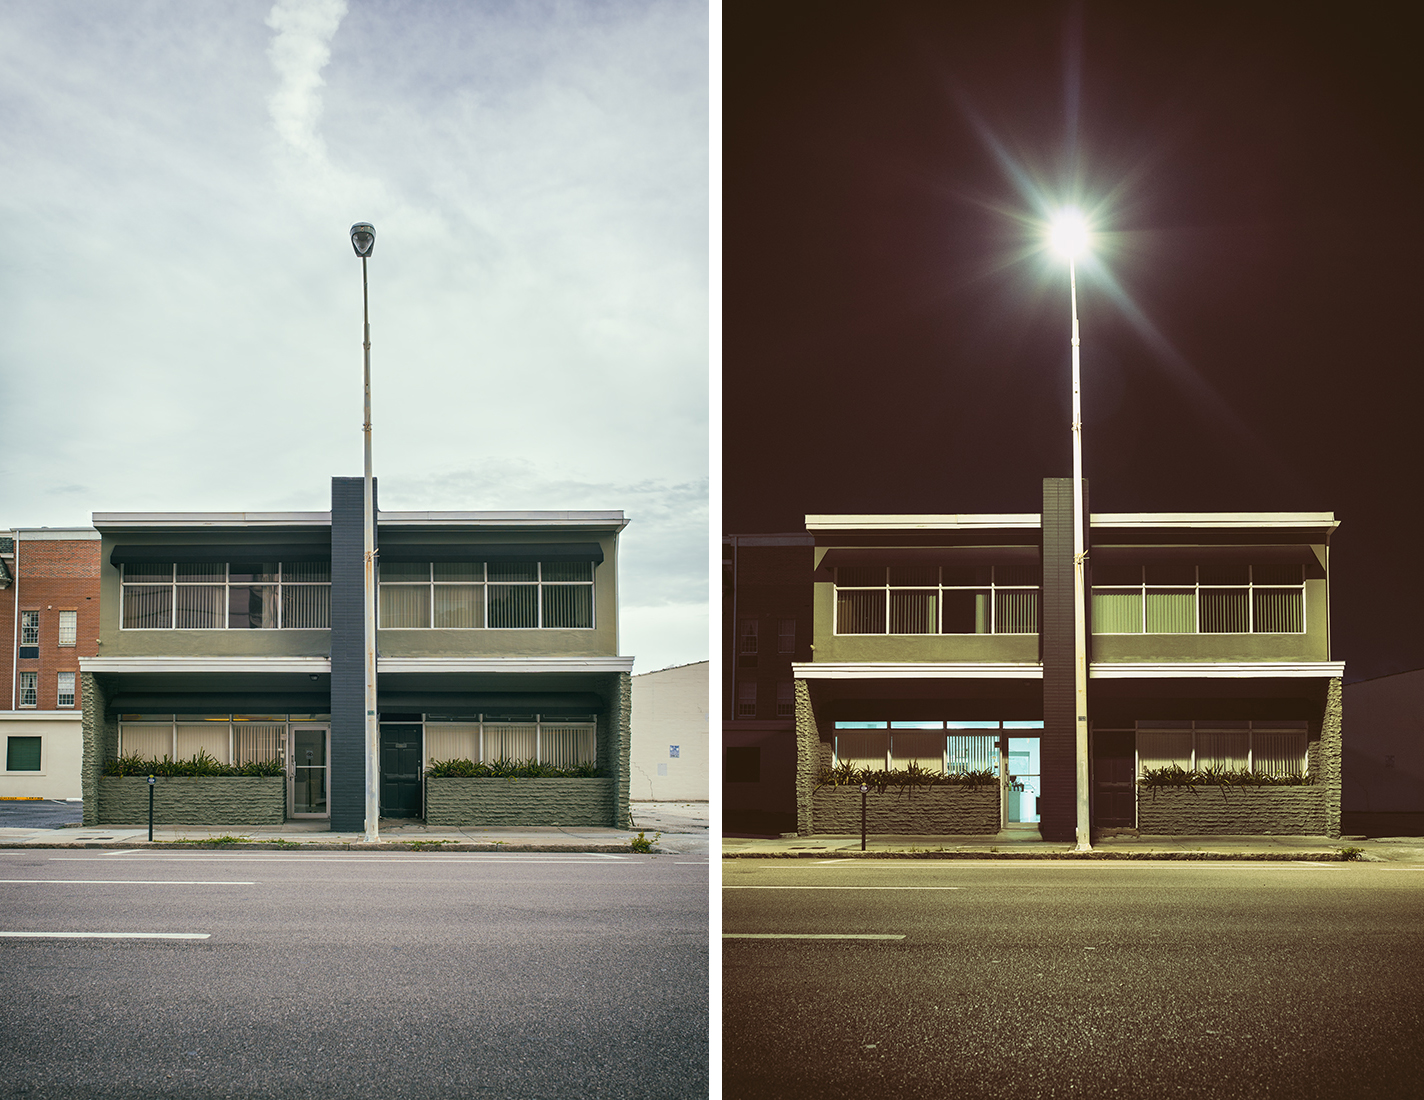 Day & Night Opposites, Featuring the photo “Lure”, by Linz Welch
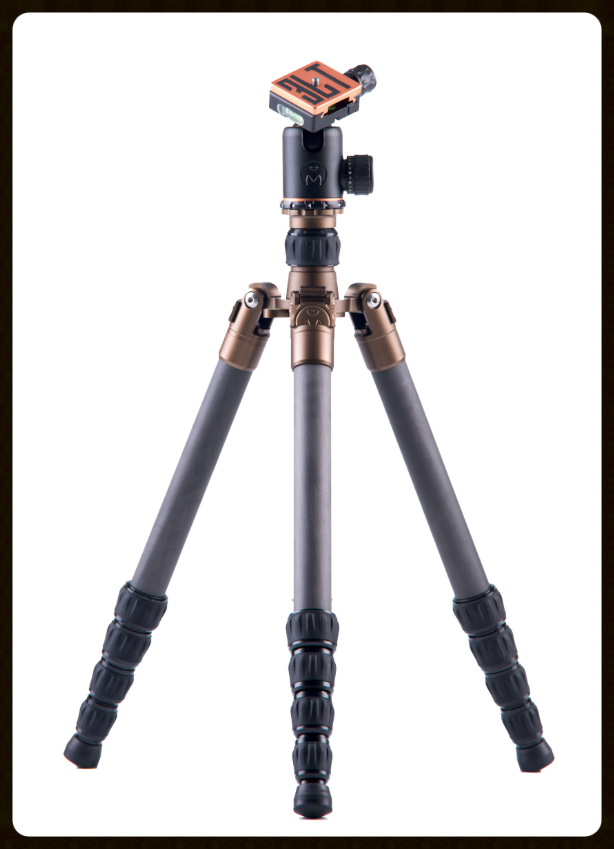
 A Comparison of Different Flares
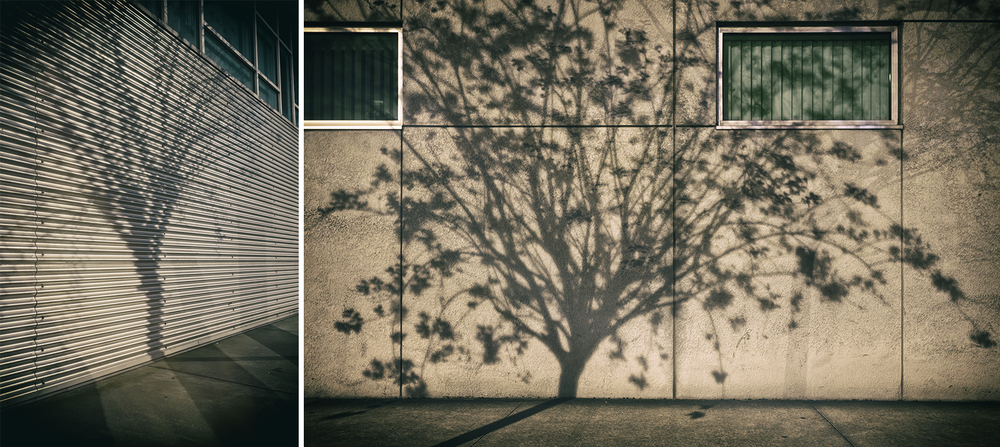 Nighttime Shadow Trees, Featuring the photo “Stand”, by Linz Welch
 “The Path of Night”, by Linz Welch
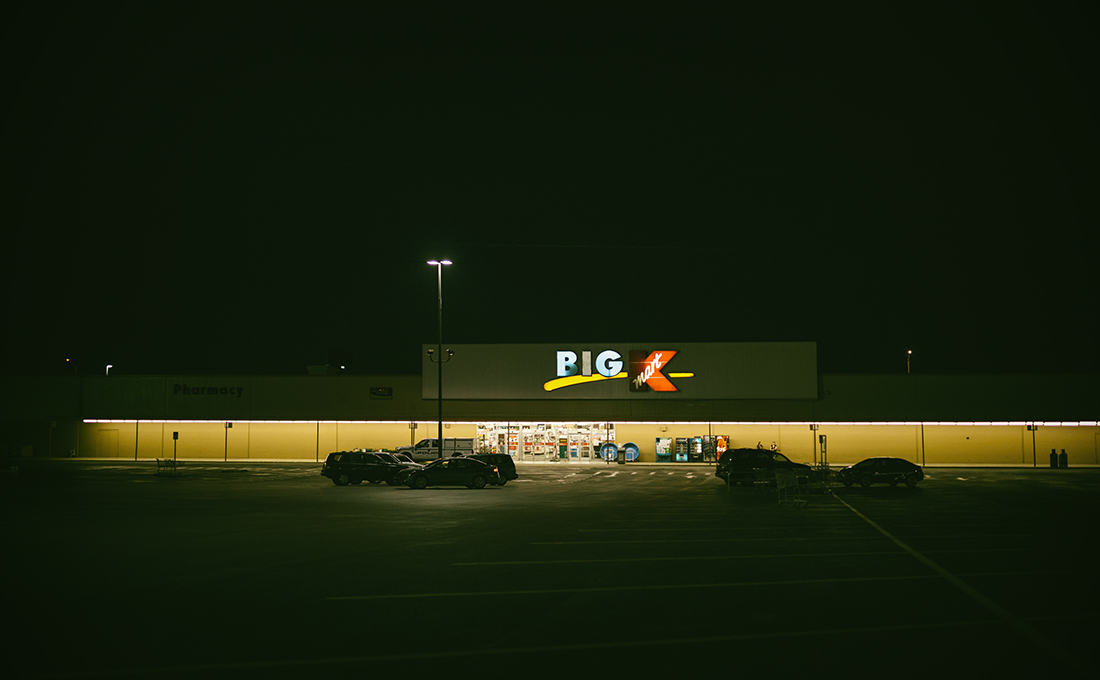 “Pig < “, by Linz Welch
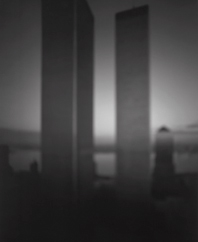
 World Trade Center, 1997 by Hiroshi Sugimoto
 Early Figure of Camera Obscura
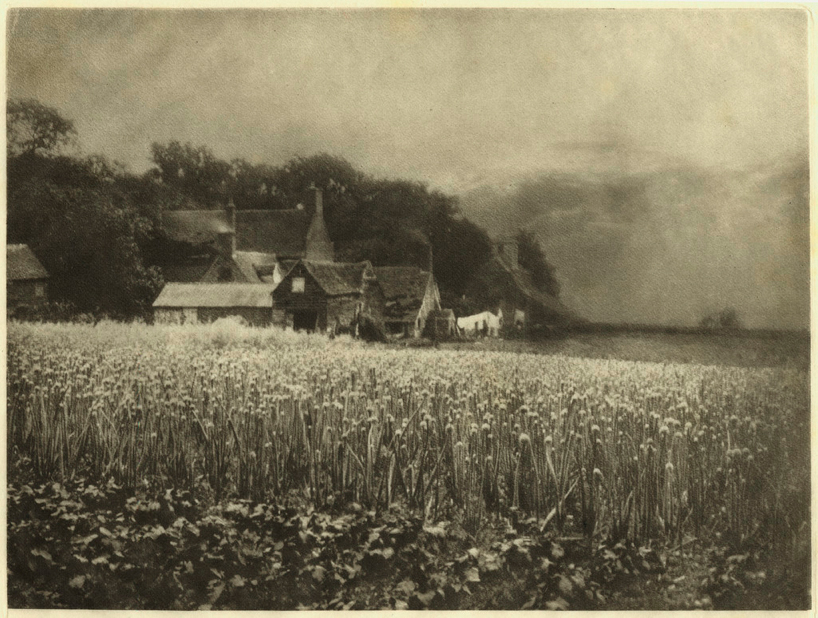 “The Onion Field” 1889, by George Davison
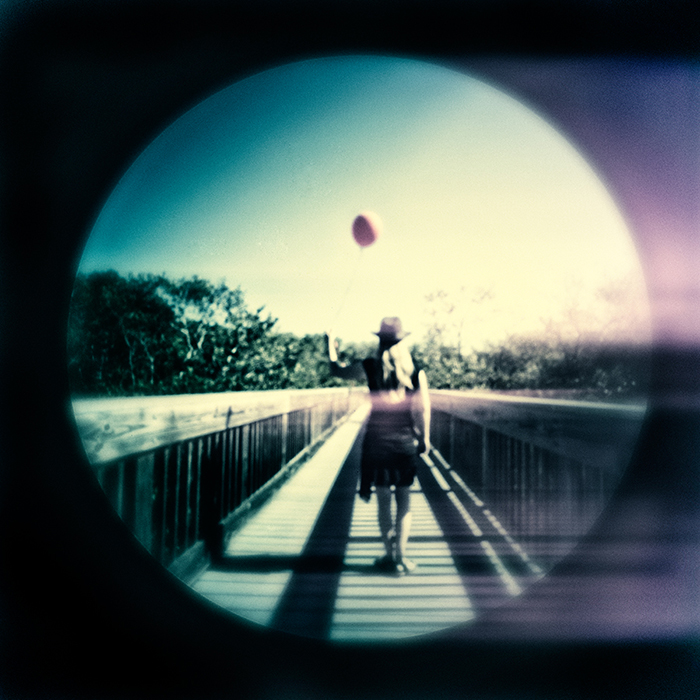
 Ground #42, 1997 by Uta Barth
 Pierre Dutertre, Platinum/Palladium print from a digital negative, 14”x14” on Arches Platine media, 2013 Click image for available print
 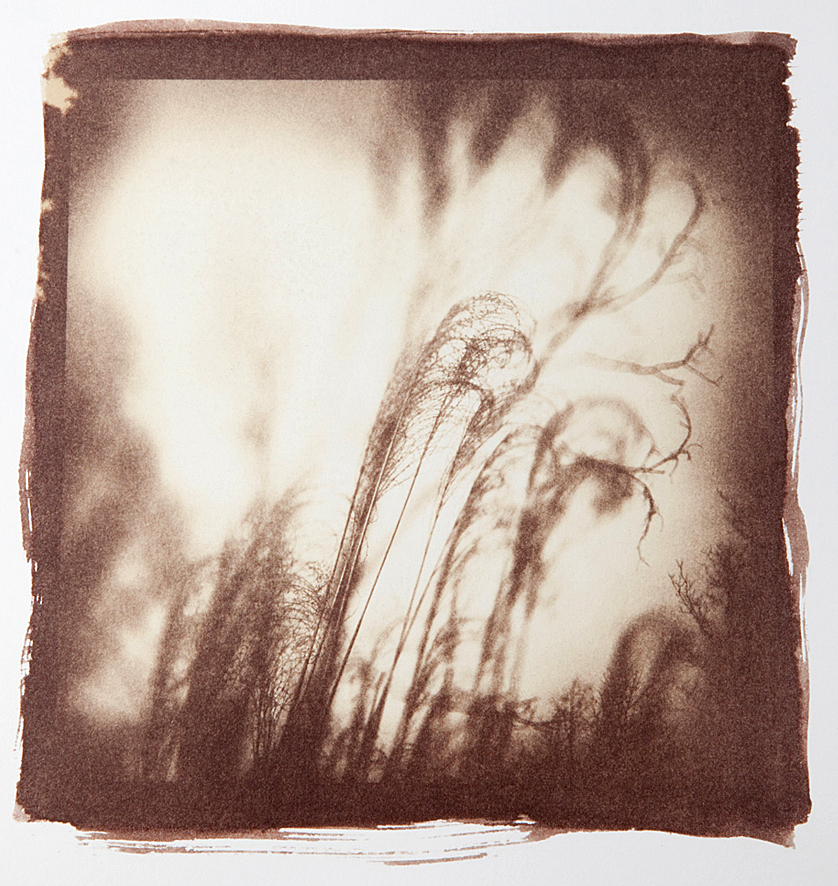 Pierre Dutertre, Van Dyke brown print from a digital negative, 12”x12” on Arches media, 2012 Click image for available print
  Pierre Dutertre, Platinum/Palladium print from a digital negative, 14”x14” on Arches Platine media, 2013 Click image for available print
 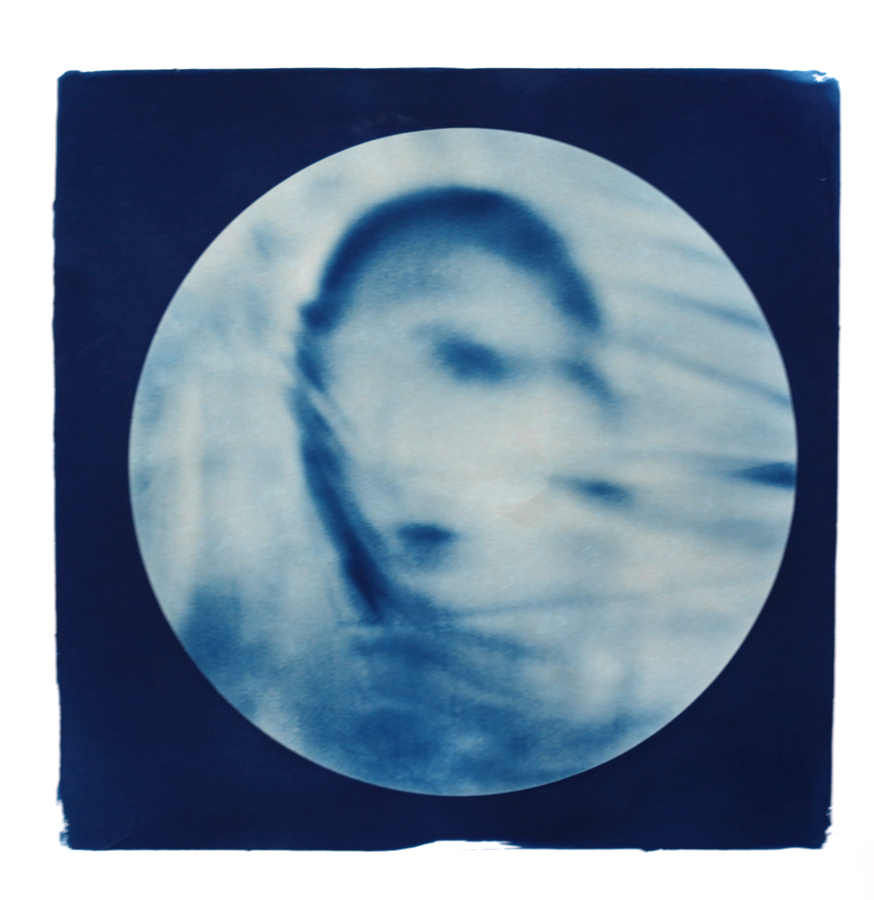 Cathy Dutertre, Cyanotype print form a digital negative, 14”x14” on Cansonmedia, 2014
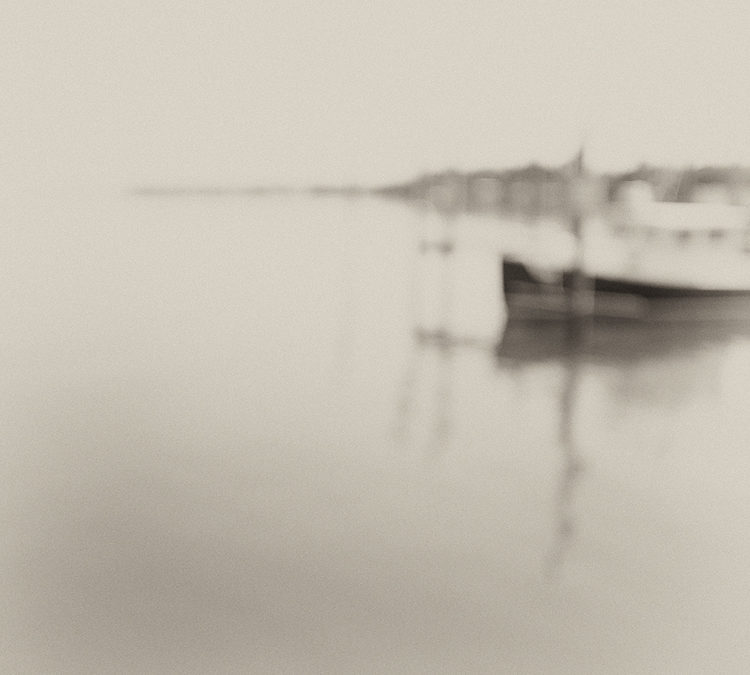
Recent Comments